About
Paper Craft Home
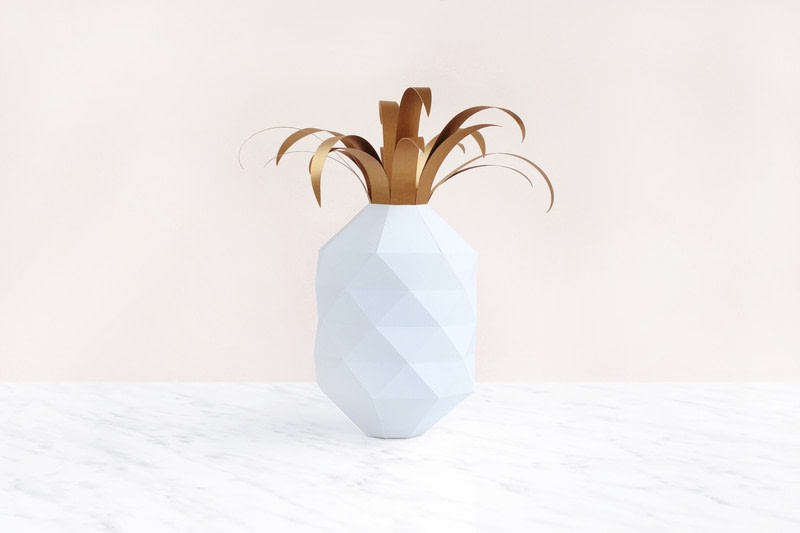
Inspired by their historical rarity, pineapples have long been a favoured subject for designers and architects, symbolizing warmth, welcome and luxury. As long as you take the time to get the combination of mountain and valley folds right, this exotic paper-engineered sculpture will add a tropical touch of art-deco glamour to your home.
Colour change
Try making your pineapple in gold paper for a brass pineapple look and all-out glamour, or in yellow with green leaves for a fun, tropical feel.
Tags
© 2024 Sarah Louise Matthews / Roost Books · Reproduced with permission. · ‘Paper Craft Home’ by Sarah Louise Matthews ISBN: 9781782216209 RRP Price: £10.99 Publisher: Search Press Available from www.searchpress.com
-
 Alex Z. added Paper Pineapple to Интересное
12 May 16:17
Alex Z. added Paper Pineapple to Интересное
12 May 16:17
-
 Kirsten C. favorited Paper Pineapple
03 Apr 22:50
Kirsten C. favorited Paper Pineapple
03 Apr 22:50
-
Jessica R. favorited Paper Pineapple
13 Jan 18:52
-
 ElizabethJuddTaylor favorited Paper Pineapple
14 Oct 00:42
ElizabethJuddTaylor favorited Paper Pineapple
14 Oct 00:42
-
 Crafterella featured Paper Pineapple
09 Oct 23:00
Crafterella featured Paper Pineapple
09 Oct 23:00
-
 Meredith A. favorited Paper Pineapple
08 Oct 23:47
Meredith A. favorited Paper Pineapple
08 Oct 23:47
-
 Carla B. favorited Paper Pineapple
08 Oct 15:48
Carla B. favorited Paper Pineapple
08 Oct 15:48
-
 Search Press published her project Paper Pineapple
01 Oct 09:00
Search Press published her project Paper Pineapple
01 Oct 09:00
-
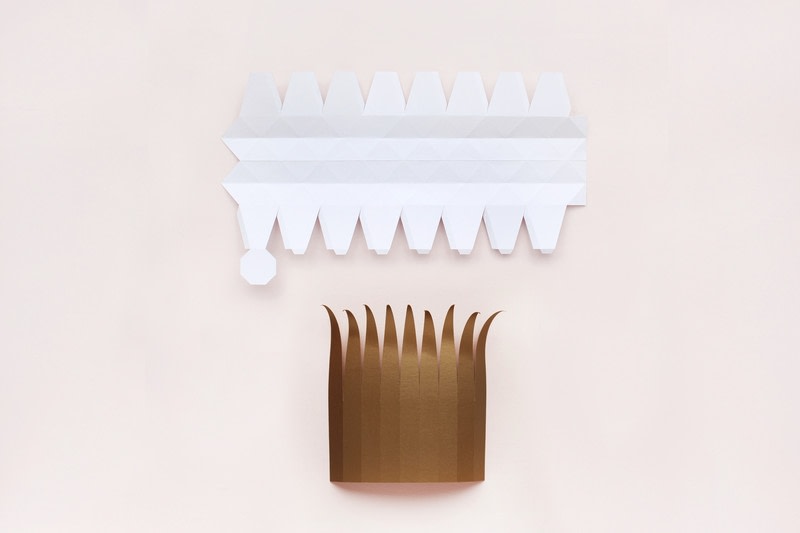
 Step 1
Using the corresponding templates (see page 134), cut out each piece as shown using a scalpel, cutting mat and metal ruler where necessary, or use scissors if you prefer.
-
 Step 2
Use an embossing tool and ruler to score the fold lines as labelled on the templates. Use a bone folder to fold the mountain folds first, followed by the valley folds.
-
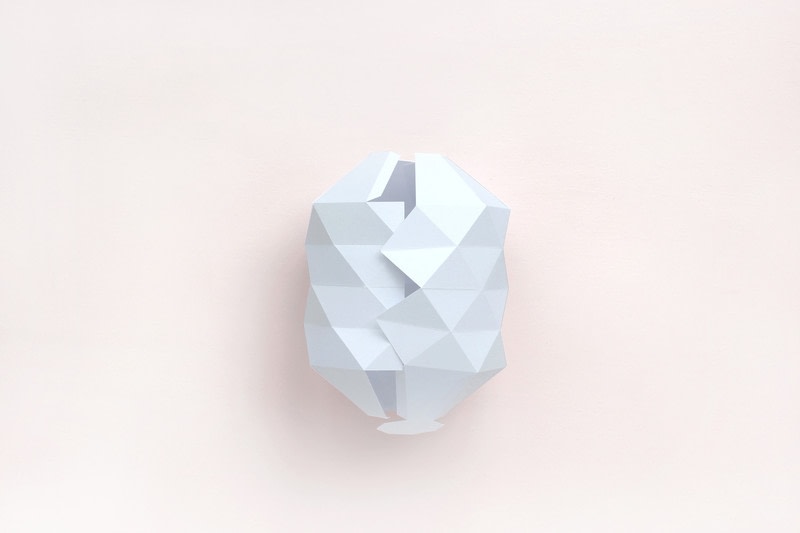
 Step 3
Place the creased piece in front of you, right-side up. Along the top is a row of trapezium shapes, each with a tab along its right edge. Work along the row, applying a thin layer of tacky glue to the front of each tab before attaching it to the back of the adjacent edge on the next trapezium. Repeat this along the bottom of the piece. You will now have a curved structure. Note that one edge of the piece is a zigzag and the other is straight. Position the zigzag edge on top of the straight edge, on the outside.
-
 Step 4
At the bottom of the piece is an octagon-shaped face. At this end, apply glue to the final trapezium tab and secure it to the back of the adjacent trapezium face, closing the shape. There will now be an octagon-shaped hole surrounded by seven tabs and an octagon-shaped face. Apply a thin layer of glue to each tab and press the octagon face down onto the tabs, aligning the edges while the glue dries.
-
 Step 5
Apply glue to the back of the zigzag edge and press onto the paper beneath, aligning the creases. Glue the final trapezium tab to the back of the adjacent side to complete the shape.
-
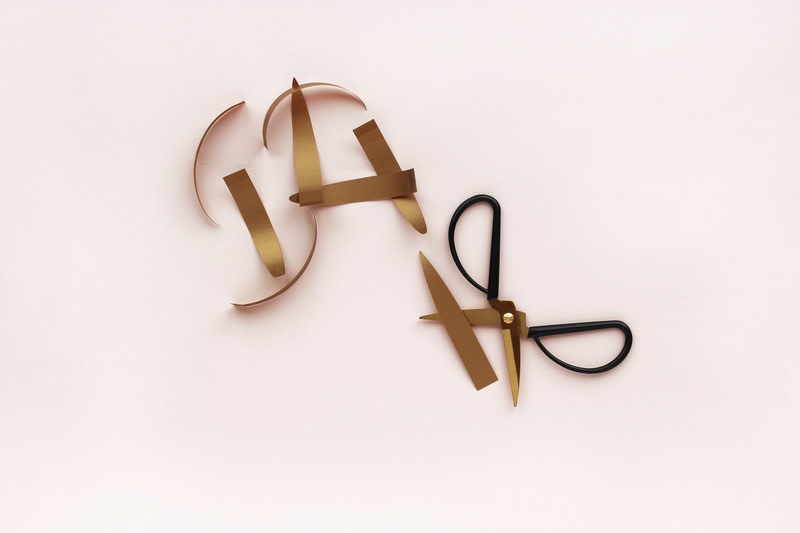
 Step 6
Use the blade of your scissors to gently curl each of the singular gold leaf-shaped pieces. Sort into groups of short leaves and longer leaves.
-
 Step 7
Stand the white piece up so that the open end is at the top, then take the short leaves. Apply a dot of glue to the rectangular end of the first leaf, then attach it to the inside of the white piece so that it curves outward, aligning the scored line on the leaf with the white top edge. Gently fold the leaf along the score line where it meets the white piece so that it stands upwards. Repeat this with all remaining small leaves.
-
 Step 8
For this step you will need the longer single leaves. Take the first leaf and apply a thin layer of glue to the bottom 1.5cm (½in) at the rectangular end. Place in the middle of the pineapple, fixing the leaf to the inside of one of the short leaves, curving outwards and aligning the leaves at the base. Repeat this with all the remaining larger leaves.
-
 Step 9
Take the strip of leaves and use the scissors to gently curl the tip of each leaf point upwards. Apply a thin layer of glue to the back of the end leaf, then curve the piece around and attach the glued leaf to the front of the opposite end leaf, aligning the edges.
-
 Step 10
Apply a thin layer of glue to the bottom 3cm (1in) of the leaf tube. Take the pineapple and spread the attached leaves slightly outward.
-
 Step 11
Place the leaf cylinder in the centre and push down to align the bases of the leaves. Push the single leaves back inwards, then hold while the glue begins to dry, attaching the leaf cylinder in place.