


About
a super quick fix
I've been scanning a bunch of pictures for Pearls of Honor, a book I am working on for my wonderful client, Dana Harbaugh. Several of the pictures are underexposed (too dark) in vital places, like faces. Here's a super quick fix that I learned from Photoshop Diva Katrin Eiseman. The technique was in a movie on the Video Workshop DVD that came with Adobe Creative Suite 3.
Skill level: Beginner, minimal knowledge of Photoshop
Photoshop version: 7 and above (demo is in CS 3)
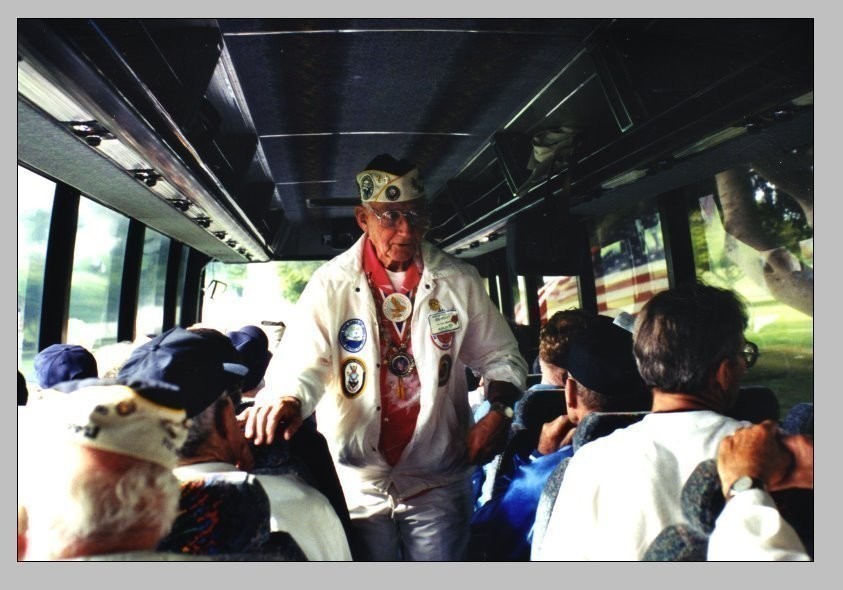
1st picture is before
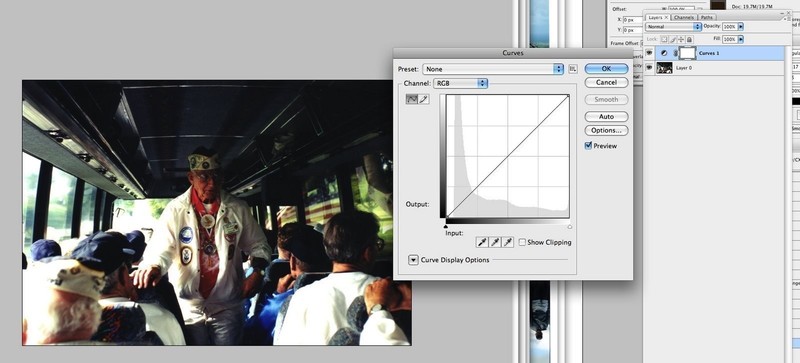
2nd picture is after
You Will Need
-
 Step 1
This picture of the Pearl Harbor Survivors on the bus is well composed but the Chaplin's face and the left side of the bus are all in shadow. Go to the layers palette and click the new adjustment layer button at the bottom. Select a curves adjustment layer. Make no adjustments and click ok.
-
 Step 2
Locate the blend modes at the top of the layers palette and set the curves layer to screen. The entire picture will brighten right up ... just right in some places and way too much in others. The screen blend mode lightens the pixels on the layer under it. This method is especially good at preserving details and not blowing out highlights.
-
 Step 3
Make sure black is your foreground color (bottom of the tool bar) and the layer mask is selected. You can see how the square around the thumbnail is darker and the curves layer is blue in the layers palette. Fill the mask with black by pressing option-delete (mac) or Alt-Backspace (PC).
-
 Step 4
Now using a big, soft brush, paint on the mask with white where you want the lightening effect. Masks in Photoshop work like stencils in the real world. If the mask is black, then the effect of the layer is hidden or "masked off". If the mask is white, the effect of the layer is visible. Unlike real world stencils, in Photoshop you can have varying degrees of opacity in a mask, so by painting the mask with gray it becomes partially transparent. Lower the opacity of the brush in the options bar (effectively making gray) where you want the lightening to be more subtle. Make sure you are on the mask thumbnail, not the layer thumbnail.
-
 Step 5
You'll see the mask thumbnail change to reflect what you've painted.
-
 Step 6
Go to the filter menu and choose Blur>Gaussian Blur. Use a high setting (30 pixels or more) to blue the mask (NOT THE LAYER) and soften the transitions between the masked and visible areas. If the effect is too strong, adjust the opacity of the curves adjustment layer down until you are pleased with the effect.


 1
Home Accessories »
Diy Jewelry Box
1
Home Accessories »
Diy Jewelry Box

