


About
Transforming a piece destined for the landfill
I love character. It gives pieces life. It can tell a story. It lets you know that a piece was used, and possibly loved. And while character can sometimes lead some people to think that these pieces aren't nice to look at, I believe that the beauty of a piece lies in the imperfections it has.
I think I like to be reminded of a simpler time, when people made do with what they had....even if it meant using something for a different purpose. We all like to go out and buy what we need and throw away what we don't. But I think people were more creative when they didn't have the money or desire to do that.
-
 Maya Kuzman added Painting A Trashed Child's Chair to Iris Simpkins' Living Room
21 Jan 18:59
Maya Kuzman added Painting A Trashed Child's Chair to Iris Simpkins' Living Room
21 Jan 18:59
-
Maya Kuzman favorited Painting A Trashed Child's Chair
21 Jan 18:56
-
 noche-estrellada added Painting A Trashed Child's Chair to Mori Girl Room
21 Sep 18:16
noche-estrellada added Painting A Trashed Child's Chair to Mori Girl Room
21 Sep 18:16
-
 Victoria M. added Painting A Trashed Child's Chair to Martha Stewart
09 Nov 14:48
Victoria M. added Painting A Trashed Child's Chair to Martha Stewart
09 Nov 14:48
-
 andersonandgrant published her project Painting A Trashed Child's Chair
06 Aug 12:26
andersonandgrant published her project Painting A Trashed Child's Chair
06 Aug 12:26
You Will Need
-
 Step 1
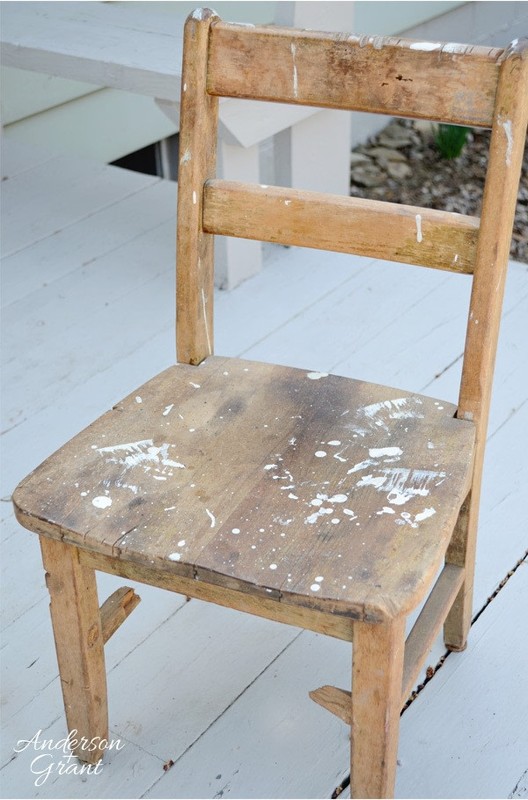
I purchased this child's chair that has a lot of "character". After it's intended purpose of being used by a child, the chair was obviously repurposed in a workshop. It was spattered with paint. Rungs were broken from the bottom. Parts of the chair had saw marks cut into it. The chair was in rough shape.
Many people probably looked at this little chair and thought it belonged in a pile of wood to burn, but I saw something with potential. I decided I wanted to paint the piece, but still maintain the character and fact that the chair was in rough shape
-
 Step 2
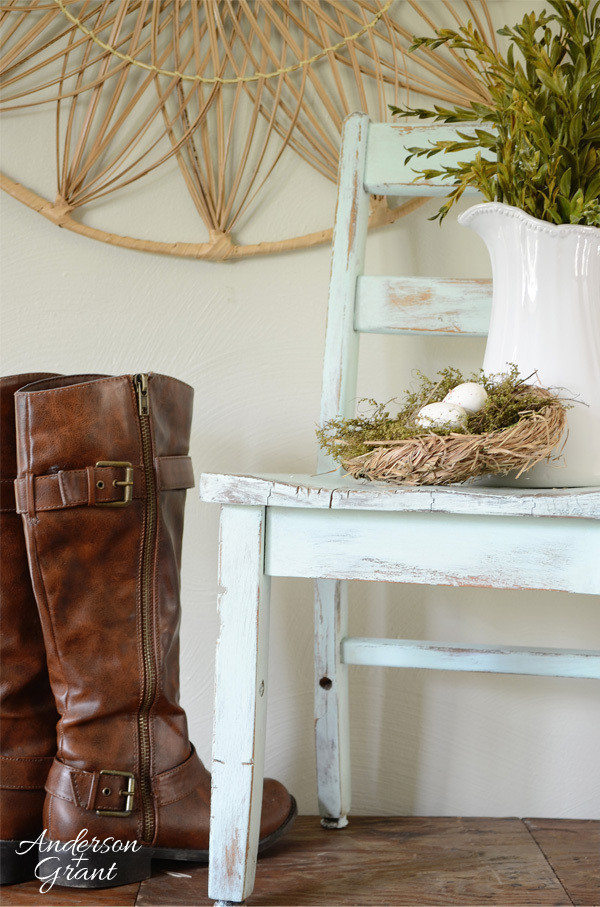
The first thing I did was sand away the paint spatters on the seat. The spatters came off quite easily and instantly cleaned up the chair.
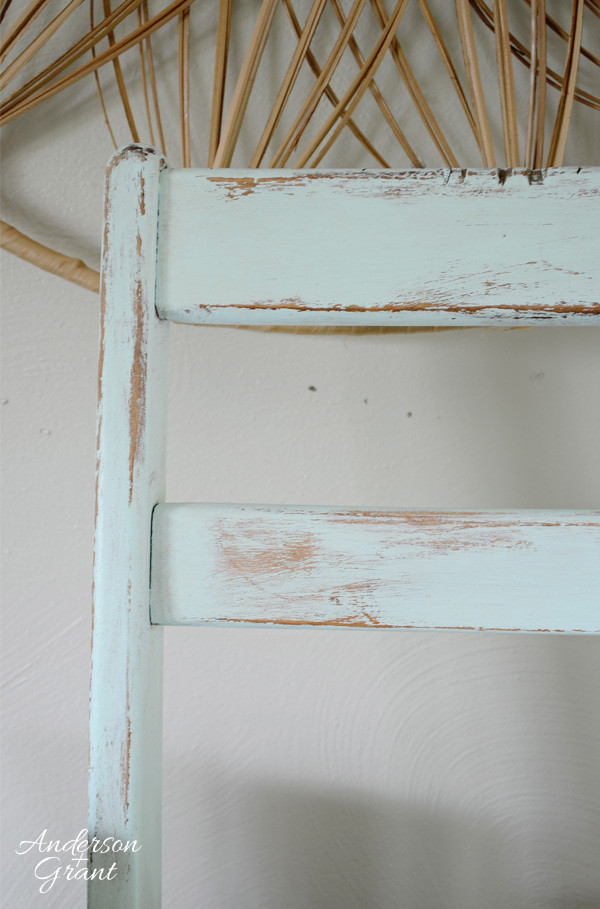
I rubbed clear wax in areas to help with distressing the paint. Then I randomly brushed on two coats of chalk paint in a light blue/green color. (The picture above is after just one coat). I was trying to paint this as primitively as possible. When the paint was dry (well, actually, after I used a hair dryer to speed up the process), I sanded the piece all over. I finished the chair with some antiquing wax to add a little more age.
-
 Step 3
I mentioned the two of the rungs were broken or missing on the bottom. I decided to just add a little more "character, and remove the broken one as well as one that wasn't broken on the side. I did leave the one in the back. The chair is still very sturdy even without the rungs. It can always just be used as a decorative piece, though, which is what I actually intended.
I really love how the paint chipped off in areas. This is partly from me using the clear wax and partly because some areas were not painted. Both techniques help to chip away paint easily, and combining the two really seemed to work well.