

About
Transform a frumpy, old denim jacket into a cute NO-SEW Bolero
After purchasing an over sized denim jacket from a thrift store, I re-vamped it into something I would actually wear. Quick and Easy. No-Sewing experience necessary!
-
 cindy.bledsoe.12 favorited No Sew Bolero
29 Jun 05:17
cindy.bledsoe.12 favorited No Sew Bolero
29 Jun 05:17
-
 cristinakilljoyway favorited No Sew Bolero
24 Jan 17:12
cristinakilljoyway favorited No Sew Bolero
24 Jan 17:12
-
 Step 1
Cut the sleeves
Put on the jacket and see how it fits on you. Also decide how long you want the sleeves.1. Using a piece of chark, draw a line 2 or 3 inches from where you would like the sleeves to rest. In my case, I placed the line at approximately my elbow.
2. take off the jacket and cut the sleeve.
3. roll the sleeve at least twice so that there is not dangling pieces. The roll will also hold better if you roll it more then once. Keep rolling until the sleeves are the length, fullness, and tightness that you desire.
4. Try on the jacket again to make sure that the sleeves are how you wish them to be.
5. If everything is perfect on that sleeve, take off the jacket and unroll the sleeve. Fold the jacket in half and cut the other sleeve so that they are both the same length, and then re-roll them.
*** Remember: you can always cut off more fabric from the garment, but you can't add more, so cut the sleeves in an area that's slightly longer then you think you want it and play around with it, rather then making the mistake of cutting too much off and hating the garment afterwards***
-
 Step 2
Cut the length
1. Try on the jacket once again and make a decision on how long you want your Bolero to sit. The best way to do this is to fold up the bottom and pin or hold it in some way while looking at yourself in the mirror.
2. Once you find the desired length, mark it out with chalk in a straight line and cut it. If you want to leave the edges frayed like mine, then simply cut it at the length you want I, but if you want to finish the hem, then I would suggest adding at least 1/2 an inch to the length you want.
my one suggestion regarding finishing the hem is that if you cannot sew a straight hem
(like I can't ) it will be extremely noticeable on the denim. (believe me, I tried!) *3. check the length of the jacket in the mirror and make any alterations.
-
 Step 3
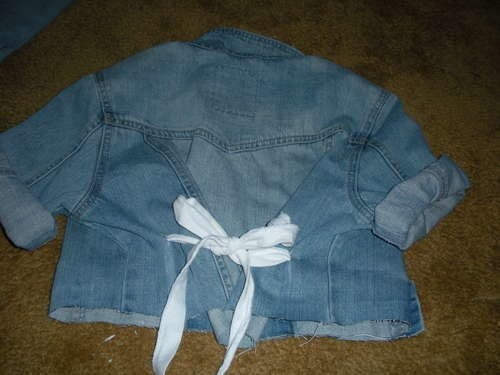
Make the back tighter
Depending on how loose or tight you want the jacket, this step can be omitted.1. Turn the jacket around and measure an inch or two in on either side as well as two to three inches from the bottom. Mark out this spot on both sides and cut out two small holes.
2. Take your extra fabric or ribbon, or whatever you plan to use to make the bow ( I use the hemp of a white cotton shirt) and feed it through both holes so that the long part of the string is on the inside and the two ends of the strings meet on the outside of the jacket.
3. Fold the wholes towards each other and tie the bow. Try to make the back look as neat as possible.
4. See how it fits. If you are comfortable with it then you are done! if not you can add "darts" to the back to clinch it in higher up!
-
 Step 4
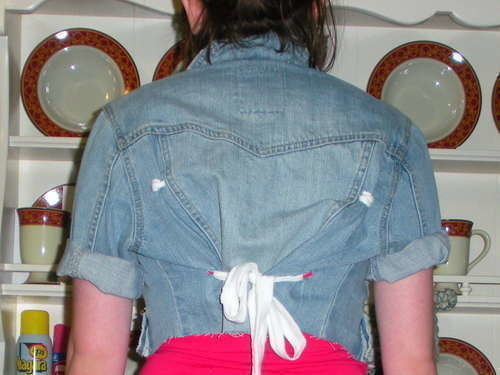
Adding extra darts.
After adding the bow to mine, I noticed that the back was still a little baggy and looked sloppier then I wanted it to., so I decided to add two "darts" on either side, higher up on the back.1. make chalk marks aligning them with the originals only higher up on either side. call this Left A and Right A
2. mark another chalk mark on either side about an inch in from the original chalk marks. Call them Left B and Right B
3. cut out holes on these marks.
4. Grab some more of the material used to make the bow in the previous step. Make sure you have two strands. Feed one of the strands through Left A and Left B and look them through a couple of times, clinching the fabric in. Tie a knot on the inside of the jacket. Do the same with the second strand in holes Right A and Right B.
** you can also tie these strands into bows on the outside of the jacket if you would prefer**
5. Try on the jacket and make alterations.
6. ENJOY YOUR NEW NO-SEW BOLERO JACKET!