About
Faux French Enamel Tags
Make these simple and easy tags. Give any piece that french enamel feel without bringing out the pyro in you! No fire necessary.
Tags
-
 Key West Witch added Make These Faux French Enamel Tags! to Jewelry
30 Jun 01:25
Key West Witch added Make These Faux French Enamel Tags! to Jewelry
30 Jun 01:25
-
 Alex Z. added Make These Faux French Enamel Tags! to Интересное
12 May 17:10
Alex Z. added Make These Faux French Enamel Tags! to Интересное
12 May 17:10
-
 Sarah Sylvia S. favorited Make These Faux French Enamel Tags!
18 Jul 06:29
Sarah Sylvia S. favorited Make These Faux French Enamel Tags!
18 Jul 06:29
-
 Sandy B. added Make These Faux French Enamel Tags! to jewelry Creations
26 Nov 14:15
Sandy B. added Make These Faux French Enamel Tags! to jewelry Creations
26 Nov 14:15
-
 Mona Rae favorited Make These Faux French Enamel Tags!
04 Jun 17:02
Mona Rae favorited Make These Faux French Enamel Tags!
04 Jun 17:02
-
 Ghosts are Green favorited Make These Faux French Enamel Tags!
26 Apr 01:00
Ghosts are Green favorited Make These Faux French Enamel Tags!
26 Apr 01:00
-
Alissa B. favorited Make These Faux French Enamel Tags!
13 Sep 02:57
-
Suzi T. favorited Make These Faux French Enamel Tags!
11 Sep 12:59
-
 Becky N. published her project Make These Faux French Enamel Tags!
10 Sep 21:23
Becky N. published her project Make These Faux French Enamel Tags!
10 Sep 21:23
-
 Step 1
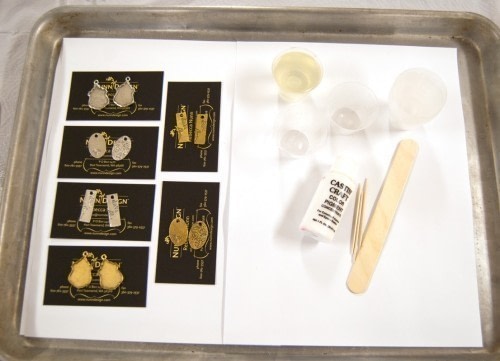
Preparing your work surface: Read the resin instructions for safety concerns regarding the Nunn Design Resin. When I work with resin, I always: Place a large plastic bag over my work surface and tape it down. I make sure I have ventilation in my work room. I wear gloves. I wear glasses (readers because I can’t see anymore. Plus it protects my eyes!). I have a pile of wet wipes handy.
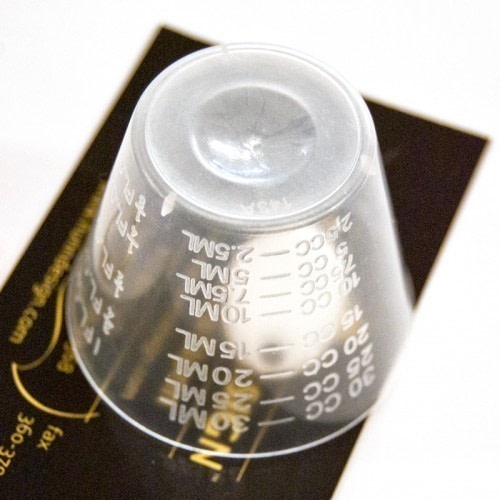
Mixing your resin: Place one cup (included in the Nunn Design Resin Kit) onto your table. For curing purposes, it is very important that the resin be an exact 1 to 1 ration of Part A and Part B. I suggest getting your eyes level with the resin so you can see the lines on the measuring cup. Pour Part A of your resin kit up to the ½ fluid ounce mark on your measuring cup. Pour Part B of your resin kit into the same cup until it is filled to the 1 fluid ounce mark. -
 Step 2
Set your timer for 2 minutes. Using the stir stick from your kit, slowly and carefully stir your resin scraping the sides as you stir. Stir for the full 2 minutes. After 2 minutes, scrape both sides of your stir stick on the edge of your resin filled cup. Set the mixture under a warm lamp for 5 minutes. This aids the air bubbles in the resin to rise to the surface and pop.
-
 Step 3
I tend to work in small area (typically my kitchen table), so I like to work on a surface that I can easily move around and not disturb. Place some business cards or some heavy card stock onto a cookie sheet, making it easy to transfer around the tags without getting any resin on your fingers. Lay your tags onto the business cards, keeping in mind that you will be covering them later with cups to prevent dust for getting on the surface of the uncured colorized resin. - See more at: http://www.nunndesign.com/make-these-great-faux-french-enamel-tags/#sthash.zt56K0Na.dpuf
-
 Step 4
After your resin has been under the lamp for 5 minutes, pour a small amount of the mixed resin into a measuring cup. Add in a couple drops of the Craftin’ Craft Opaque Pigment to give the resin color. If the resin isn’t as opaque as you would like, add in another drop of the Opaque Pigment. You can mix the full 1 fluid ounce measuring cup of resin if you want, but I transfer the resin into smaller cups because it is easier to stir and less messy to move around when less full.
-
 Step 5
Dip your stir stick into the colorized resin and drizzle a small amount onto your tag. I like to apply a small amount into the center of the tag and then use my toothpick to pull the resin to the edges. It is always better to under apply the colorized resin and add more if you want a higher dome. Since we will be applying a Transfer Sheet Word on top of the cured resin, I tried not to dome my tags too high.
-
 Step 6
If you have applied too much of the colorized resin, you can roll your toothpick in the resin and transfer it onto another flat tag
-
 Step 7
Cover your curing colorized resin to prevent dust from getting onto the surface. You can the additional cups included with the Resin Kit, Dixie Cups, glass bowls or a large Tupperware bowl for this purpose.
-
 Step 8
Let your colorized resin tags dry for at least 12 hours. I like to have additional bezels handy to fill as my colorized resin starts to get firm (I typically have a 60-90 minute window to work with the resin, but depending on the temperature and humidity of your location, the curing time will vary).
-
 Step 9
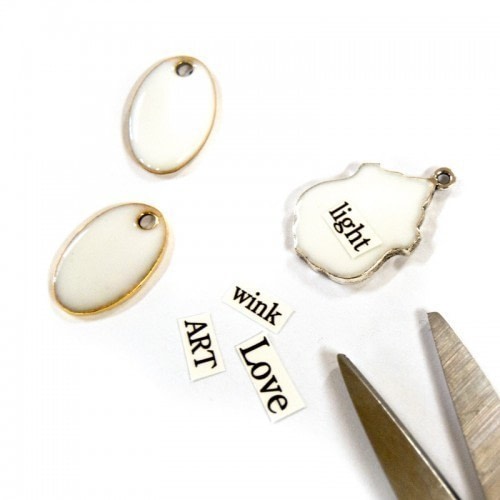
Applying the Transfer Sheet onto the colorized resin tag: Cut out the words that you would like to apply to the surface of your cured colorized resin tags.
-
 Step 10
Fill a small shallow dish with warm water approximately ¾ of the way full. The Nunn Design Transfer Sheets are printed on a film with a paper backing. When the transfer sheet is submerged into water, it separates the film front from the paper backing. Drop one of your transfer sheet words into the water and wait 30 seconds. I like to work with one of my transfer sheet words at a time, so I’m not in a rush as all of the backs release from the film fronts at the same time. The film is very fragile, so you will want to be gentle when handling it. When you remove the transfer sheet word from the water, you will be able to feel the film and paper backing sliding apart from one another and you hold them in your fingers. Leave the paper backing attached to the film front and dry your fingers with a paper towel.
-
 Step 11
Slide the film of the Transfer Sheet Word off the paper backing and onto colorized resin tag. Move it gently with your fingers until you have it in the position you want. Once the word is in position, press firmly with your Q-tip in the center of the image and gently, but firmly, burnish (another word for rub) the film down with your Q-tip. If your film won’t stick to your surface, remove the film and paint a thin coat of the Nunn Design Sealant and reapply. If the film rips, yikes, so sorry, you’ll need to start again. Although, I have seen some really cool pieces done with the words all ripped! Maybe it is a sign to let go of that perfectionism!
-
 Step 12
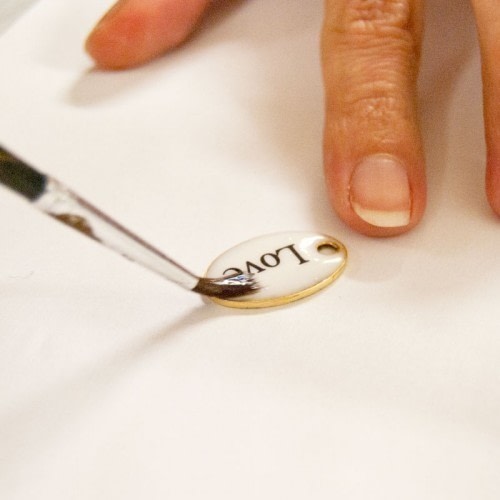
Using your paintbrush, apply a coat of Nunn Design Sealant over your colorized flat tag with your transfer sheet word. If you are finding that you have a lot of streaks and lines in your sealant, you might want to use a newer brush. Also, make sure that your paintbrush is bone dry prior to applying the Nunn Design Sealant. If there is moisture on your brush, it can cause bubbles.
-
 Step 13
String your creations on a chain and pat yourself on the back. I find this technique to be super fun and am slightly addicted to creating them!