


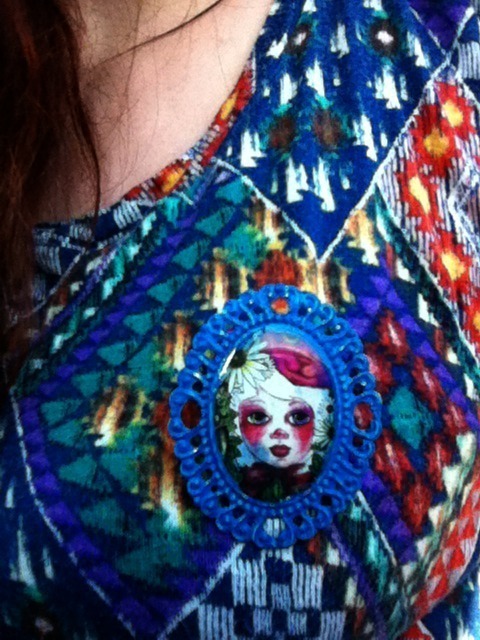
About
An easy and effective way that enables the use of virtually any image!
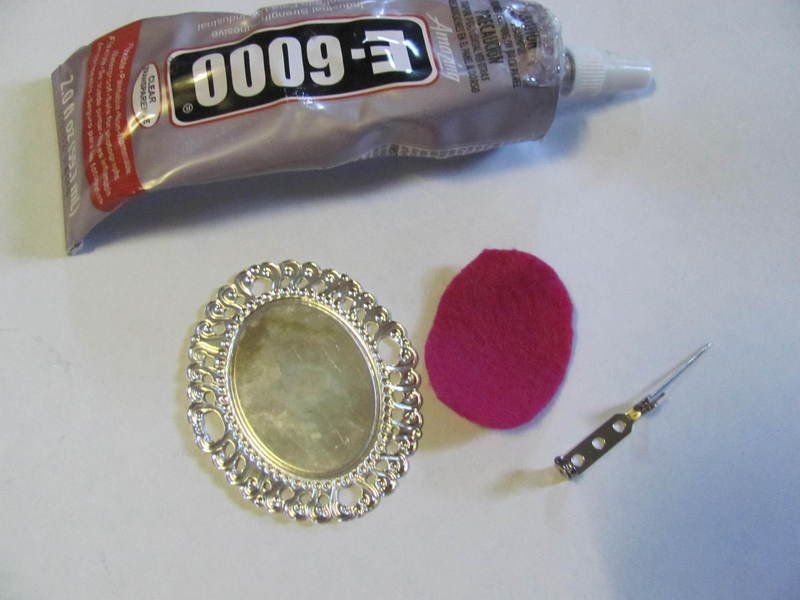
***Plastic Cameos and pinbacks can easily be found on Ebay or Etsy for a relatively cheap price.
***Easy Cast Clear Casting Epoxy was bought from Hobby Lobby
***Clear Acrylic Spray Paint was bought from Walmart
- - -
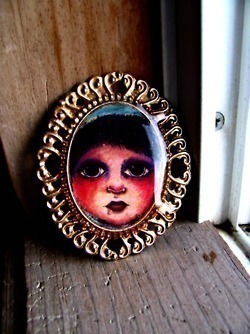
Other examples have been included.
Tags
-
 Marjorie D. favorited WORKING WITH RESIN: Make The Perfect Cameo Brooch
15 Jun 17:59
Marjorie D. favorited WORKING WITH RESIN: Make The Perfect Cameo Brooch
15 Jun 17:59
-
 Emma H. favorited WORKING WITH RESIN: Make The Perfect Cameo Brooch
05 Jul 15:09
Emma H. favorited WORKING WITH RESIN: Make The Perfect Cameo Brooch
05 Jul 15:09
-
 Sarah W. favorited WORKING WITH RESIN: Make The Perfect Cameo Brooch
21 Jan 00:38
Sarah W. favorited WORKING WITH RESIN: Make The Perfect Cameo Brooch
21 Jan 00:38
-
 Eleanor favorited WORKING WITH RESIN: Make The Perfect Cameo Brooch
19 Jan 18:22
Eleanor favorited WORKING WITH RESIN: Make The Perfect Cameo Brooch
19 Jan 18:22
-
 melinda.meh added Make The Perfect Cameo Brooch to jjd;laskjl;fkdj
10 Sep 09:57
melinda.meh added Make The Perfect Cameo Brooch to jjd;laskjl;fkdj
10 Sep 09:57
-
 Jessica A. favorited Make The Perfect Cameo Brooch
15 May 01:42
Jessica A. favorited Make The Perfect Cameo Brooch
15 May 01:42
-
 DocDoolittle favorited Make The Perfect Cameo Brooch
17 Feb 21:18
DocDoolittle favorited Make The Perfect Cameo Brooch
17 Feb 21:18
-
 MandyCip_93 favorited Make The Perfect Cameo Brooch
22 Dec 19:08
MandyCip_93 favorited Make The Perfect Cameo Brooch
22 Dec 19:08
-
 Libby W. favorited Make The Perfect Cameo Brooch
20 Dec 11:25
Libby W. favorited Make The Perfect Cameo Brooch
20 Dec 11:25
-
 Barbara M. favorited Make The Perfect Cameo Brooch
14 Nov 04:16
Barbara M. favorited Make The Perfect Cameo Brooch
14 Nov 04:16
-
 Step 1
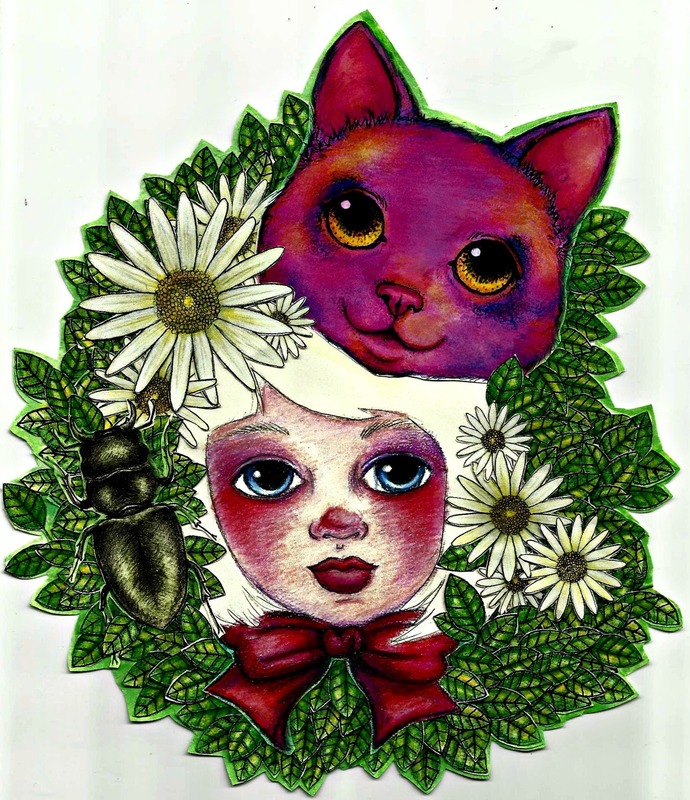
The first step is to find AN IMAGE, size it down, and PRINT it.
In the Printer Settings>Page Setup you can scale down your image easily for printing.
I used one of my artworks and scaled it down to 9 in my page settings.
-
Step 2
Print your image. Cut it out with your SCISSORS, but do not size down further just yet.
-
 Step 3
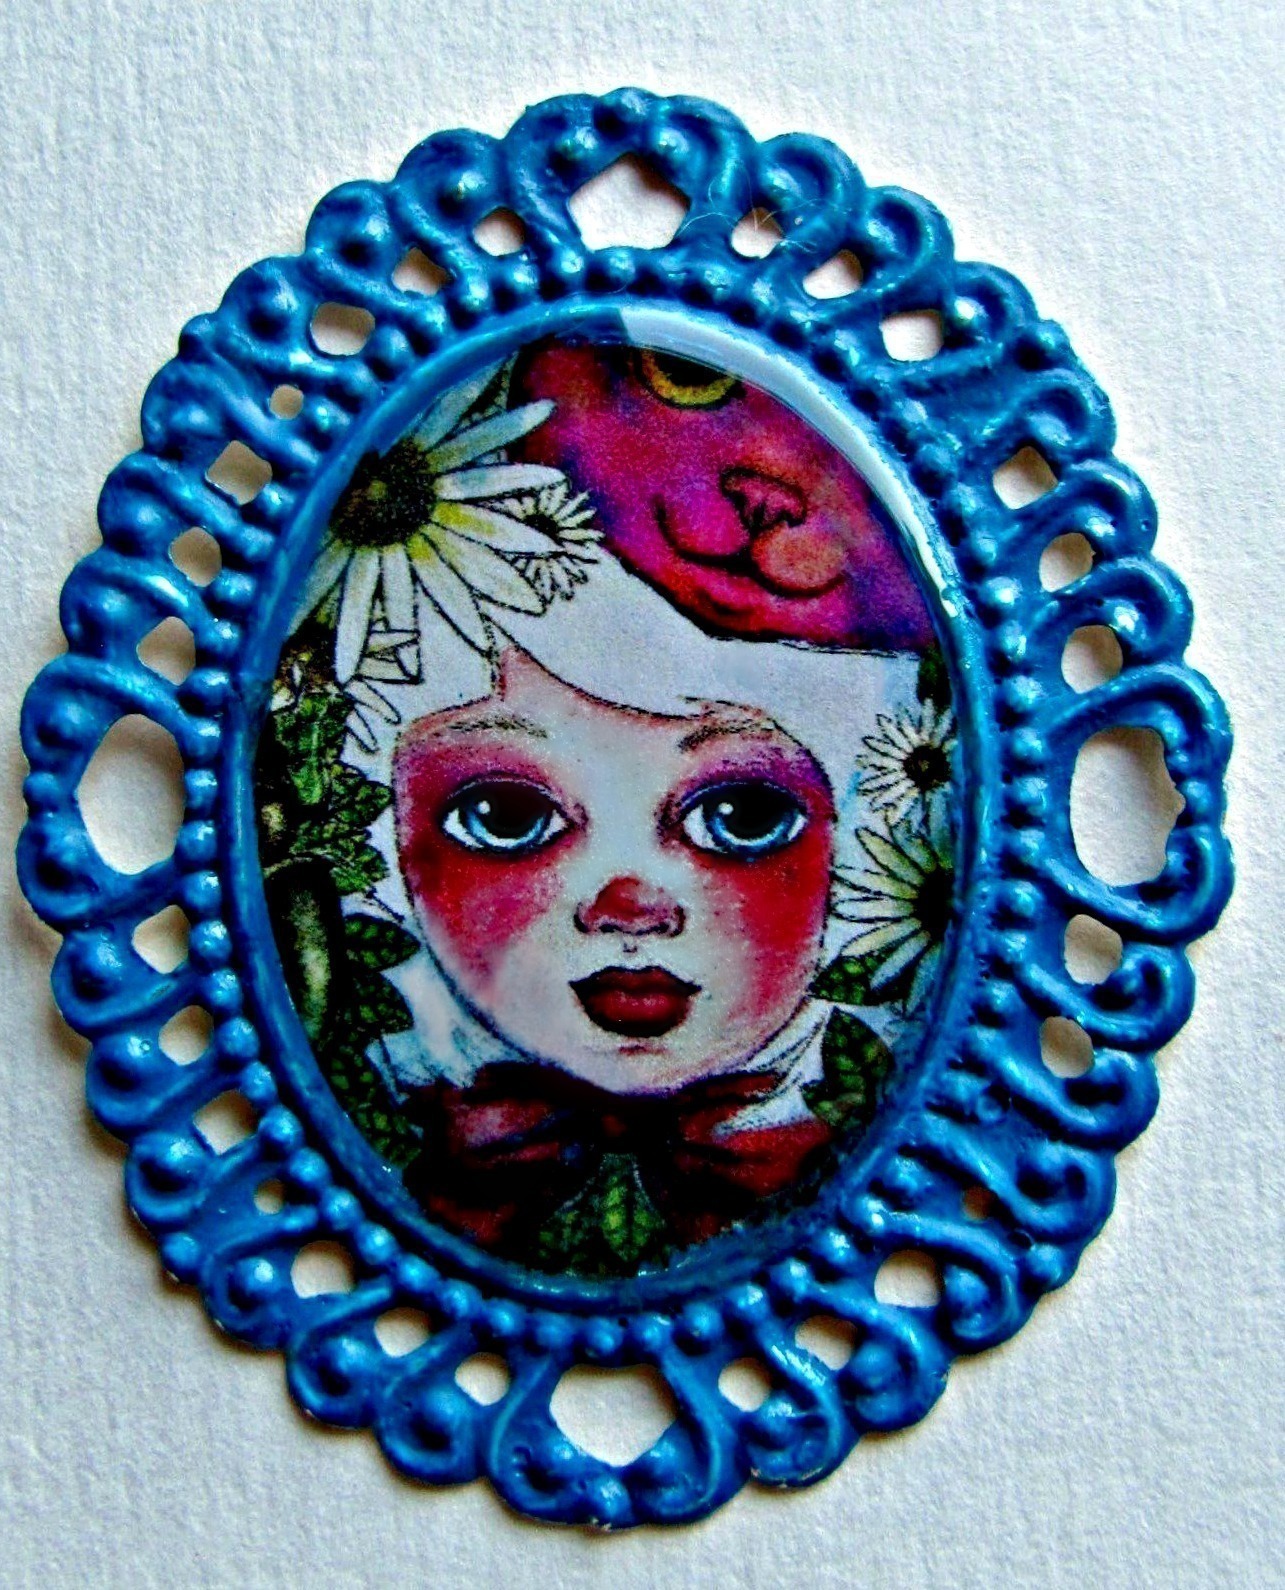
Here is my plastic cameo, in which I have painted with blue acrylic paint.
Instead of guessing what size you need to cut your image, start off by painting the middle with a thin THIN layer of Mod Podge.
-
 Step 4
Now place your image over the cameo and firmly push down on your image.
During this time you can move your image around and figure out what position you want it to be in.
I enjoy odd compositions so I decided to focus on this part of my artwork.
*****As your press down the Mod Podge keeps the image in place and creates a visible outline where the center of the cameo will be. This gives you an easy guide and shows where you need to cut with your exacto knife.
Now proceed to cutting around your image. Carefully tearing the excess paper away from the cameo.
-
 Step 5
******This is seriously the most important part of the project. If you skip it, the printer ink will bleed and ruin the whole brooch.
After you have carefully extracted the excess paper from the cameo, your next step will be to seal it completely.
***With your CLEAR ACRYLIC SPRAY PAINT, spray your cameo LIGHTLY from at least one foot away from the cameo. Do not use it at close range or continuously spray it. This will cause the ink to bleed.
Let it dry. Then Spray again.
***After the clear acrylic spray paint has completely dried. Use a small paint brush and to paint a THIN layer of Mod Podge over your image. Wait for the Mod Podge to completely dry, then repeat the process again.
Remember to always use a thin layer of Mod Podge or it won't dry clear.
-
 Step 6
Wait for the Mod Podge to completely dry before moving onto the next step.
-
 Step 7
Now it is time to seal the cameo forever with EASY CAST CLEAR CASTING EPOXY.
Measure out both equal parts of the resin and hardener. I used less than a teaspoon for both.
MIX VERY WELL.
If you mix this stuff really good, it will help eliminate any bubbles that could ruin the cameo.
-
 Step 8
Pour the resin onto your image.
WATCH YOUR RESIN.
It should spread out by itself slowly, so make sure you do not use a lot or it will seep out of the middle and onto the framed areas. You do not want that.
-
 Step 9
If you poured the resin correctly it should look like it is slightly bulging outward, convex.
During this time bubbles will rise to the top and pop, nothing to worry about in the beginning.
It usually takes 24 hours to cure so now it is time for the waiting game.
-
 Step 10
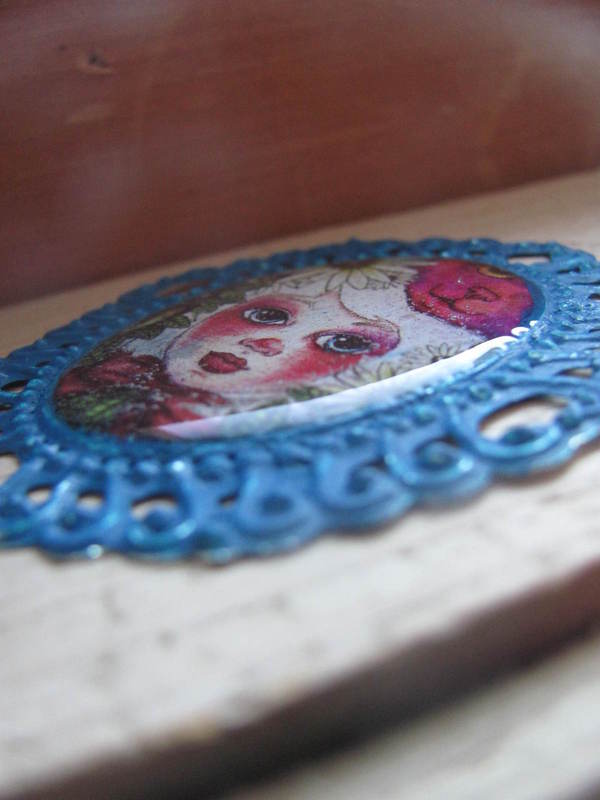
After the 24 hour wait it is now time to finish your cameo.
The one featured in this tutorial is still setting therefore I will show you how to apply the backing to the cameo.***
Using felt, cut out and size down a section for the back of the cameo. -
 Step 11
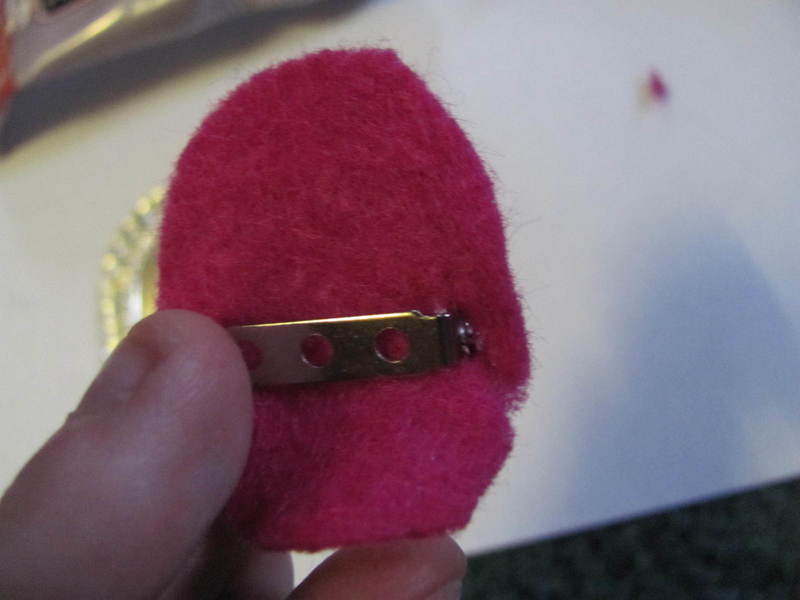
Place your pinback against the back of your felt to size up where it will be cut.
During this time I punched a small hole with my scissors on each side of the pinback through the felt to serve as a guide for the next step.
-
 Step 12
Now push each side of the pinback through the felt.
-
 Step 13
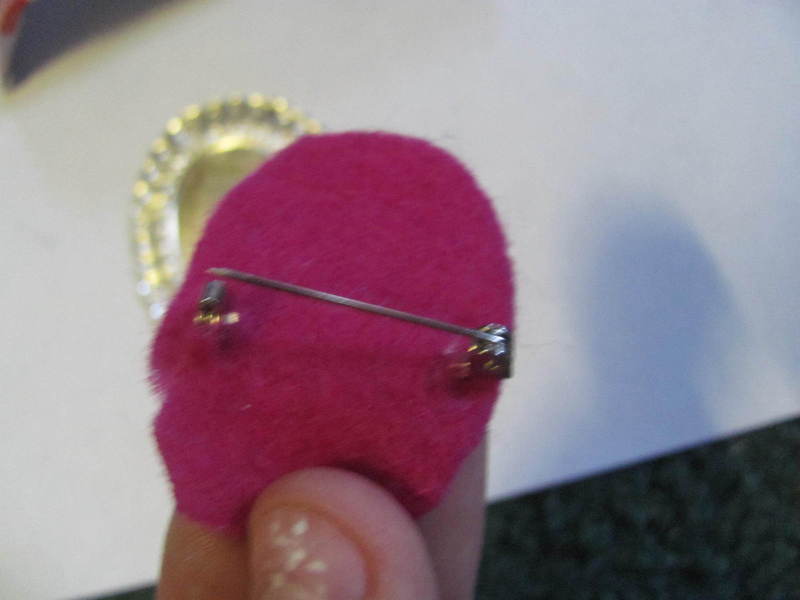
This is how the other side should look now.
-
 Step 14
Put a few drops of E-6000 Glue on the metal area of the pinback and on the back of the cameo. This will secure it further and prevent it from falling off.
-
 Step 15
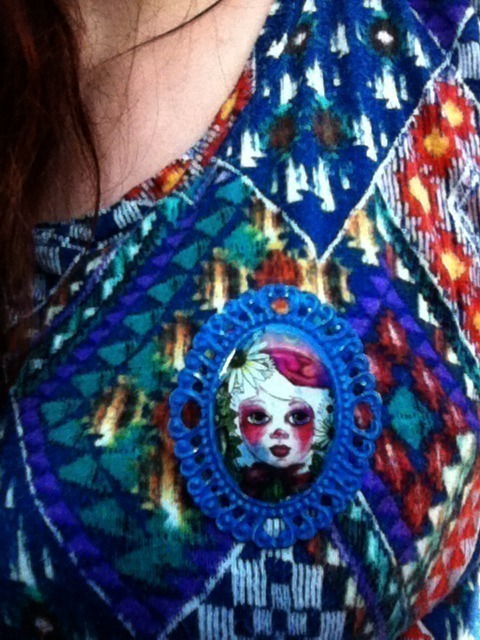
After the glue has dried YOU ARE FINALLY FINISHED!!!
Now you can wear any piece of art!!!
(whoops, I totally smeared paint on mine.)


 1
Books & Journals »
Locking Box And Journal
1
Books & Journals »
Locking Box And Journal
 2
Babies & Kids »
A Toy Kitchen For A Child
2
Babies & Kids »
A Toy Kitchen For A Child
 3
Origami Flowers »
Origami Orchid
3
Origami Flowers »
Origami Orchid
 4
Office »
Pretty Sketchbooks
4
Office »
Pretty Sketchbooks
 5
Charms & Keyrings »
Shugo Chara Inspired Pop It
5
Charms & Keyrings »
Shugo Chara Inspired Pop It

CO + K User
I use the same process to seal pictures onto the metal earrings i make. But i found that if you cover the picture with mod-podge 2 times BEFORE you spray-paint it. The spray wont make ink run at all, bc it cant touch the picture ...i had to learn that the hard way too. LOL