


About
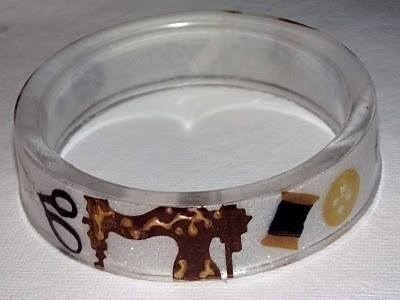
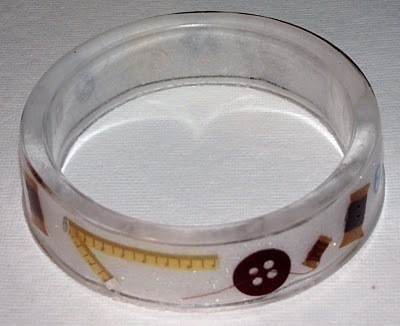
Make Do and Mend yourself a cute bangle!
I bought the resin jewellery making supplies from http://www.penny-dog.co.uk/ and the actually project was inspired by these two products:
1)http://modern-minnie.blogspot.com/2010/08/sewing-bits-and-bobs-bangle.html
2)http://www.cathkidston.co.uk/p-15205-cath-kidston-make-do-and-mend-cluster-necklace.aspx
You can buy your resin making supplies from the penny dog site of if you live in the USA you should check out Resin Obsessions website.
I learnt how to use resin with Penny Dog's e-book but she didn't have a tutorial for this particular bangle. I can't recommend her e-book highly enough it is great for beginners!
Tags
-
 KozmicBlues added Make Do And Mend Resin Bangle. to Anti-aburriment
18 Jan 15:51
KozmicBlues added Make Do And Mend Resin Bangle. to Anti-aburriment
18 Jan 15:51
-
 zoegirl221 favorited Make Do And Mend Resin Bangle.
21 Sep 17:21
zoegirl221 favorited Make Do And Mend Resin Bangle.
21 Sep 17:21
-
 eFenuska added Make Do And Mend Resin Bangle. to Really Must have
09 May 18:56
eFenuska added Make Do And Mend Resin Bangle. to Really Must have
09 May 18:56
-
eFenuska added Make Do And Mend Resin Bangle. to Jewelry and Accessories
09 May 18:55
-
 Marakyo favorited Make Do And Mend Resin Bangle.
20 Mar 21:17
Marakyo favorited Make Do And Mend Resin Bangle.
20 Mar 21:17
-
 Kianna N. added Make Do And Mend Resin Bangle. to Jewelry
28 Feb 12:38
Kianna N. added Make Do And Mend Resin Bangle. to Jewelry
28 Feb 12:38
-
 Shannon favorited Make Do And Mend Resin Bangle.
01 Jan 03:03
Shannon favorited Make Do And Mend Resin Bangle.
01 Jan 03:03
-
 johanne.tyrerparrish added Make Do And Mend Resin Bangle. to Resin
12 Nov 10:05
johanne.tyrerparrish added Make Do And Mend Resin Bangle. to Resin
12 Nov 10:05
You Will Need
-
 Step 1
You need to measure your bangle mould and decide how wide your strip is going to be.
And the cut it out! :)
-
 Step 2
Mine was a white glittery strip of paper that I then stuck the sewing decals on to. But you would need to do the same for fabric or other decoration you wanted to use.
-
 Step 3
You then need to decide on the positions of your decals.
-
 Step 4
Then glue your strip together so it can sit in the bangle mould correctly.
-
 Step 5
You then need to mix your resin as per your particular resins instructions. They all differ!
-
Step 6
Sorry I stopped taking pics at this point because resin and my camera is not worth risking!
So I then waited for the resin to rest for a couple of minutes placed the bang of paper into the bangle mould and poured.
-
Step 7
You then need to carefully check the mould for air bubbles etc. and try to move them out, dissipate them etc.
Some are unavoidable but if there are large ones in the mould you can use lolly stick etc. to move them about and bring them to the surface. -
Step 8
Then I left the resin to set for approximately 12 hours removed it and gave it a gentle sanding with fine sand paper and a buffer.
You then need to add a thin layer of car lacquer if you want to add a glossy shiny coating on your piece.
If you want to see more of my works in resin I will be adding them to my site:
http://www.minnieburton.co.ukThanks


 1
Home Accessories »
Diy Jewelry Box
1
Home Accessories »
Diy Jewelry Box

its so cute!
great idea