
About
Turn a beloved old t-shirt graphic into a back patch
Is there an old t-shirt you love, but it's totally falling apart and you want to rescue that graphic and give it new life? Have no fear! This tutorial will show you how to add structure to the fabric so it's sturdy enough to work as a large patch, and prepare it for sewing onto a denim jacket or bag. Note: This tutorial only covers the prep work, sewing time is not included in time estimate.
-
 Jill M. favorited T-Shirt Graphic Into Back Patch
02 Apr 02:25
Jill M. favorited T-Shirt Graphic Into Back Patch
02 Apr 02:25
-
 JadeSucksAtLife favorited T-Shirt Graphic Into Back Patch
23 Feb 16:43
JadeSucksAtLife favorited T-Shirt Graphic Into Back Patch
23 Feb 16:43
-
 CraftyCat added T-Shirt Graphic Into Back Patch to Sewing
14 Jan 08:47
CraftyCat added T-Shirt Graphic Into Back Patch to Sewing
14 Jan 08:47
-
CraftyCat favorited T-Shirt Graphic Into Back Patch
14 Jan 08:47
-
 jesta b. favorited T-Shirt Graphic Into Back Patch
25 Dec 01:36
jesta b. favorited T-Shirt Graphic Into Back Patch
25 Dec 01:36
-
 Crafterella featured T-Shirt Graphic Into Back Patch
22 Dec 23:00
Crafterella featured T-Shirt Graphic Into Back Patch
22 Dec 23:00
-
 Emma H. favorited T-Shirt Graphic Into Back Patch
22 Dec 02:47
Emma H. favorited T-Shirt Graphic Into Back Patch
22 Dec 02:47
-
 PixieFey added T-Shirt Graphic Into Back Patch to Shoes, Clothes, Accessories
21 Dec 11:13
PixieFey added T-Shirt Graphic Into Back Patch to Shoes, Clothes, Accessories
21 Dec 11:13
-
 Lais W. published their project T-Shirt Graphic Into Back Patch
20 Dec 09:54
Lais W. published their project T-Shirt Graphic Into Back Patch
20 Dec 09:54
-
 Step 1
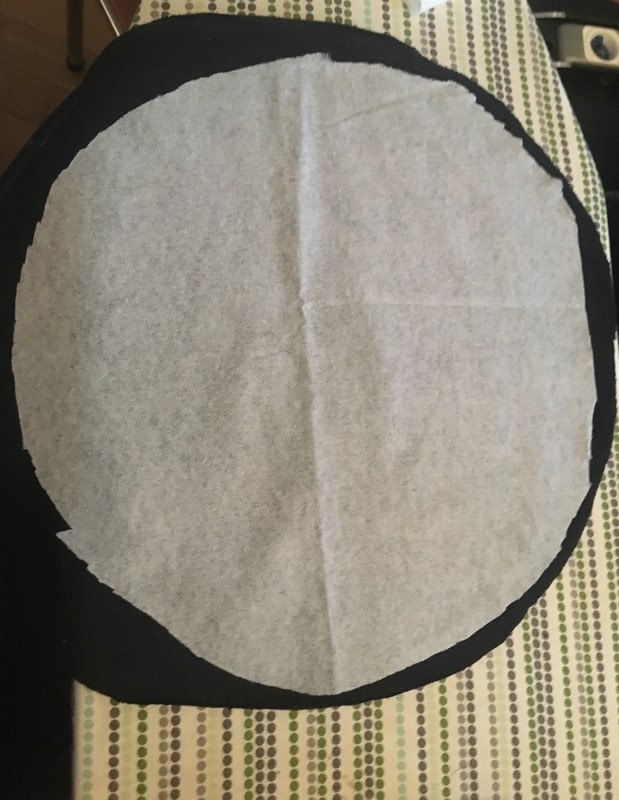
Select your t-shirt graphic and cut roughly around it so it, leaving plenty of room around the graphic and using rounded edges.
-
 Step 2
Get out your non-woven, fusible interfacing and read the directions. This one is made by HTC, I got it on Amazon.com for about $8 (15" x 3 yards). It says to put the interfacing rough side down on the back of your fabric and press with a steam iron at wool setting for 12 seconds, not moving the iron. Use a damp cloth if you don't have a steam iron or if your iron will not produce enough steam.
-
 Step 3
Place your design piece graphic-side down on the ironing board. Roughly cut a piece of fusible interfacing that is slightly smaller than your graphic fabric. Place it "prickly side" down, soft side up.
-
 Step 4
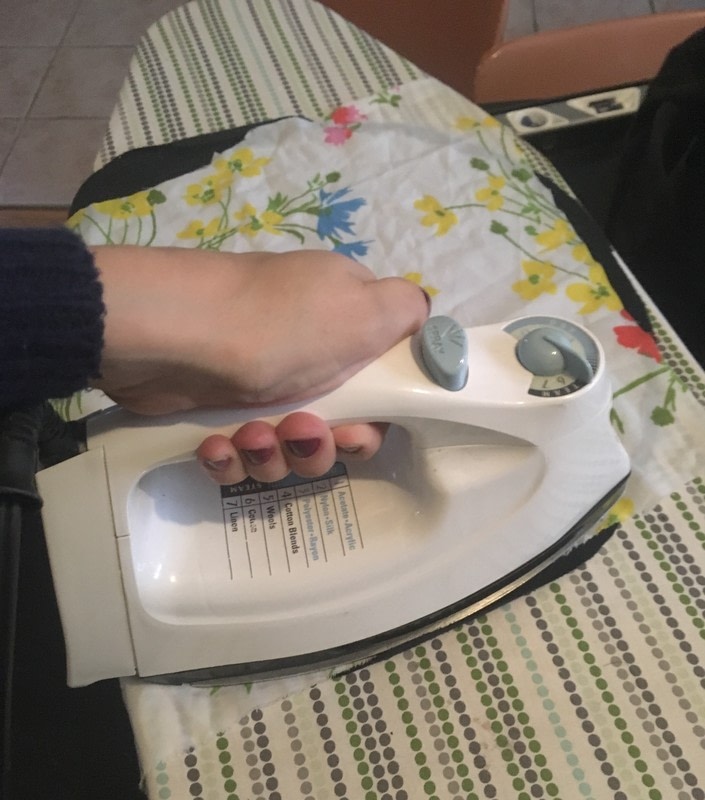
Dampen a piece of scrap fabric (a scrap cut from an old cotton pillowcase works great) slightly larger than your project and place it over both layers of fabric. You might want to put another piece of damp scrap cloth under the T-shirt first—the screen printing ink started sticking to the fabric of the ironing board cover a bit when I did this because of the high heat and pressure.
-
 Step 5
Hold iron still and press firmly for 12 seconds (or follow the directions if yours say something different). Move to the next area and go all around the piece until all areas have been ironed. (You'll be able to tell what areas you haven't hit yet because the scrap fabric will still be wet.)
-
 Step 6
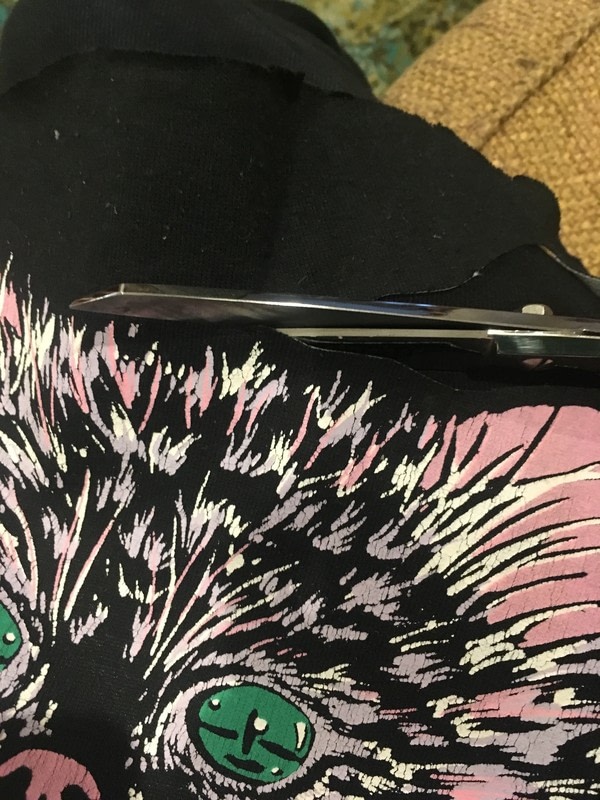
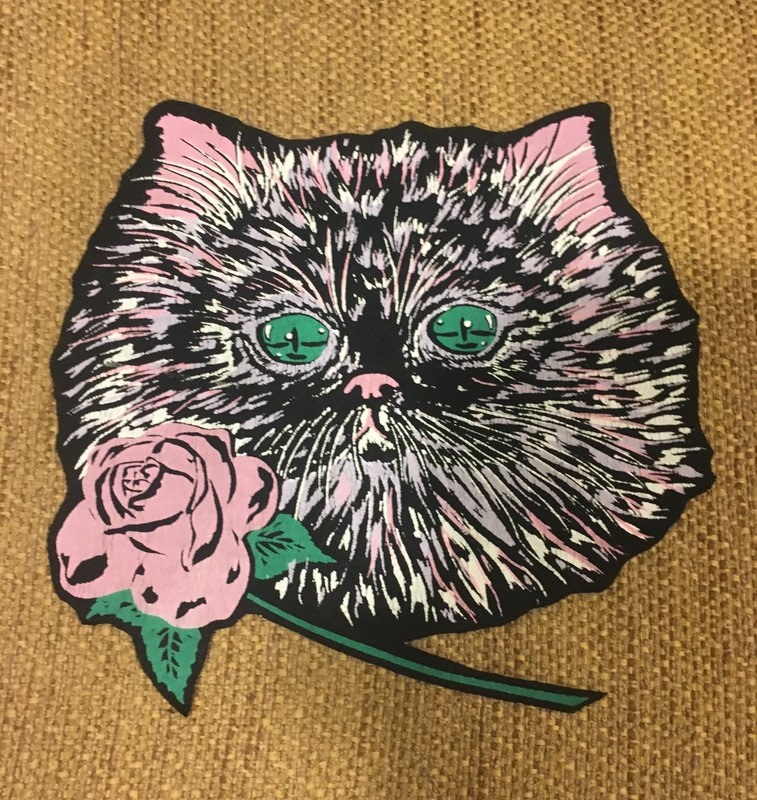
Congratulations, your T-shirt fabric is now sturdy enough to hold its shape and not bag out weird when you try to sew it to your jacket. Turn it over and cut more precisely around the design, leaving at least 1/4" of space around the edges of the design.
-
 Step 7
Admire your handiwork. See if there are any places you'd like to trim into more.
-
 Step 8
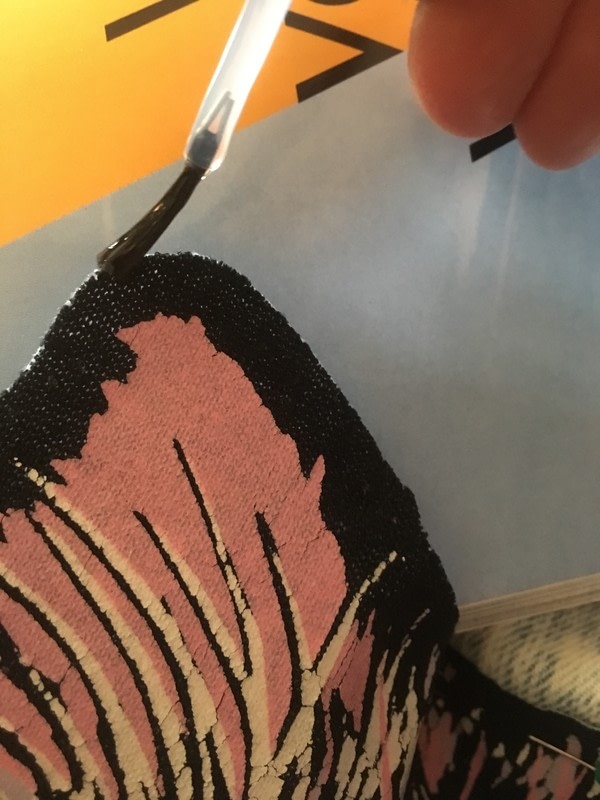
Put a magazine behind the fabric and lightly paint the edges with clear or matching-color nail polish so they don't fray. I recommend using matching-color polish (black here) for dark colors because the white interfacing sometimes shows a little on the edges. Any brand of nail polish is fine, but the quick dry types are best because you don't have to worry about it coming off on another surface when you put it down.
-
 Step 9
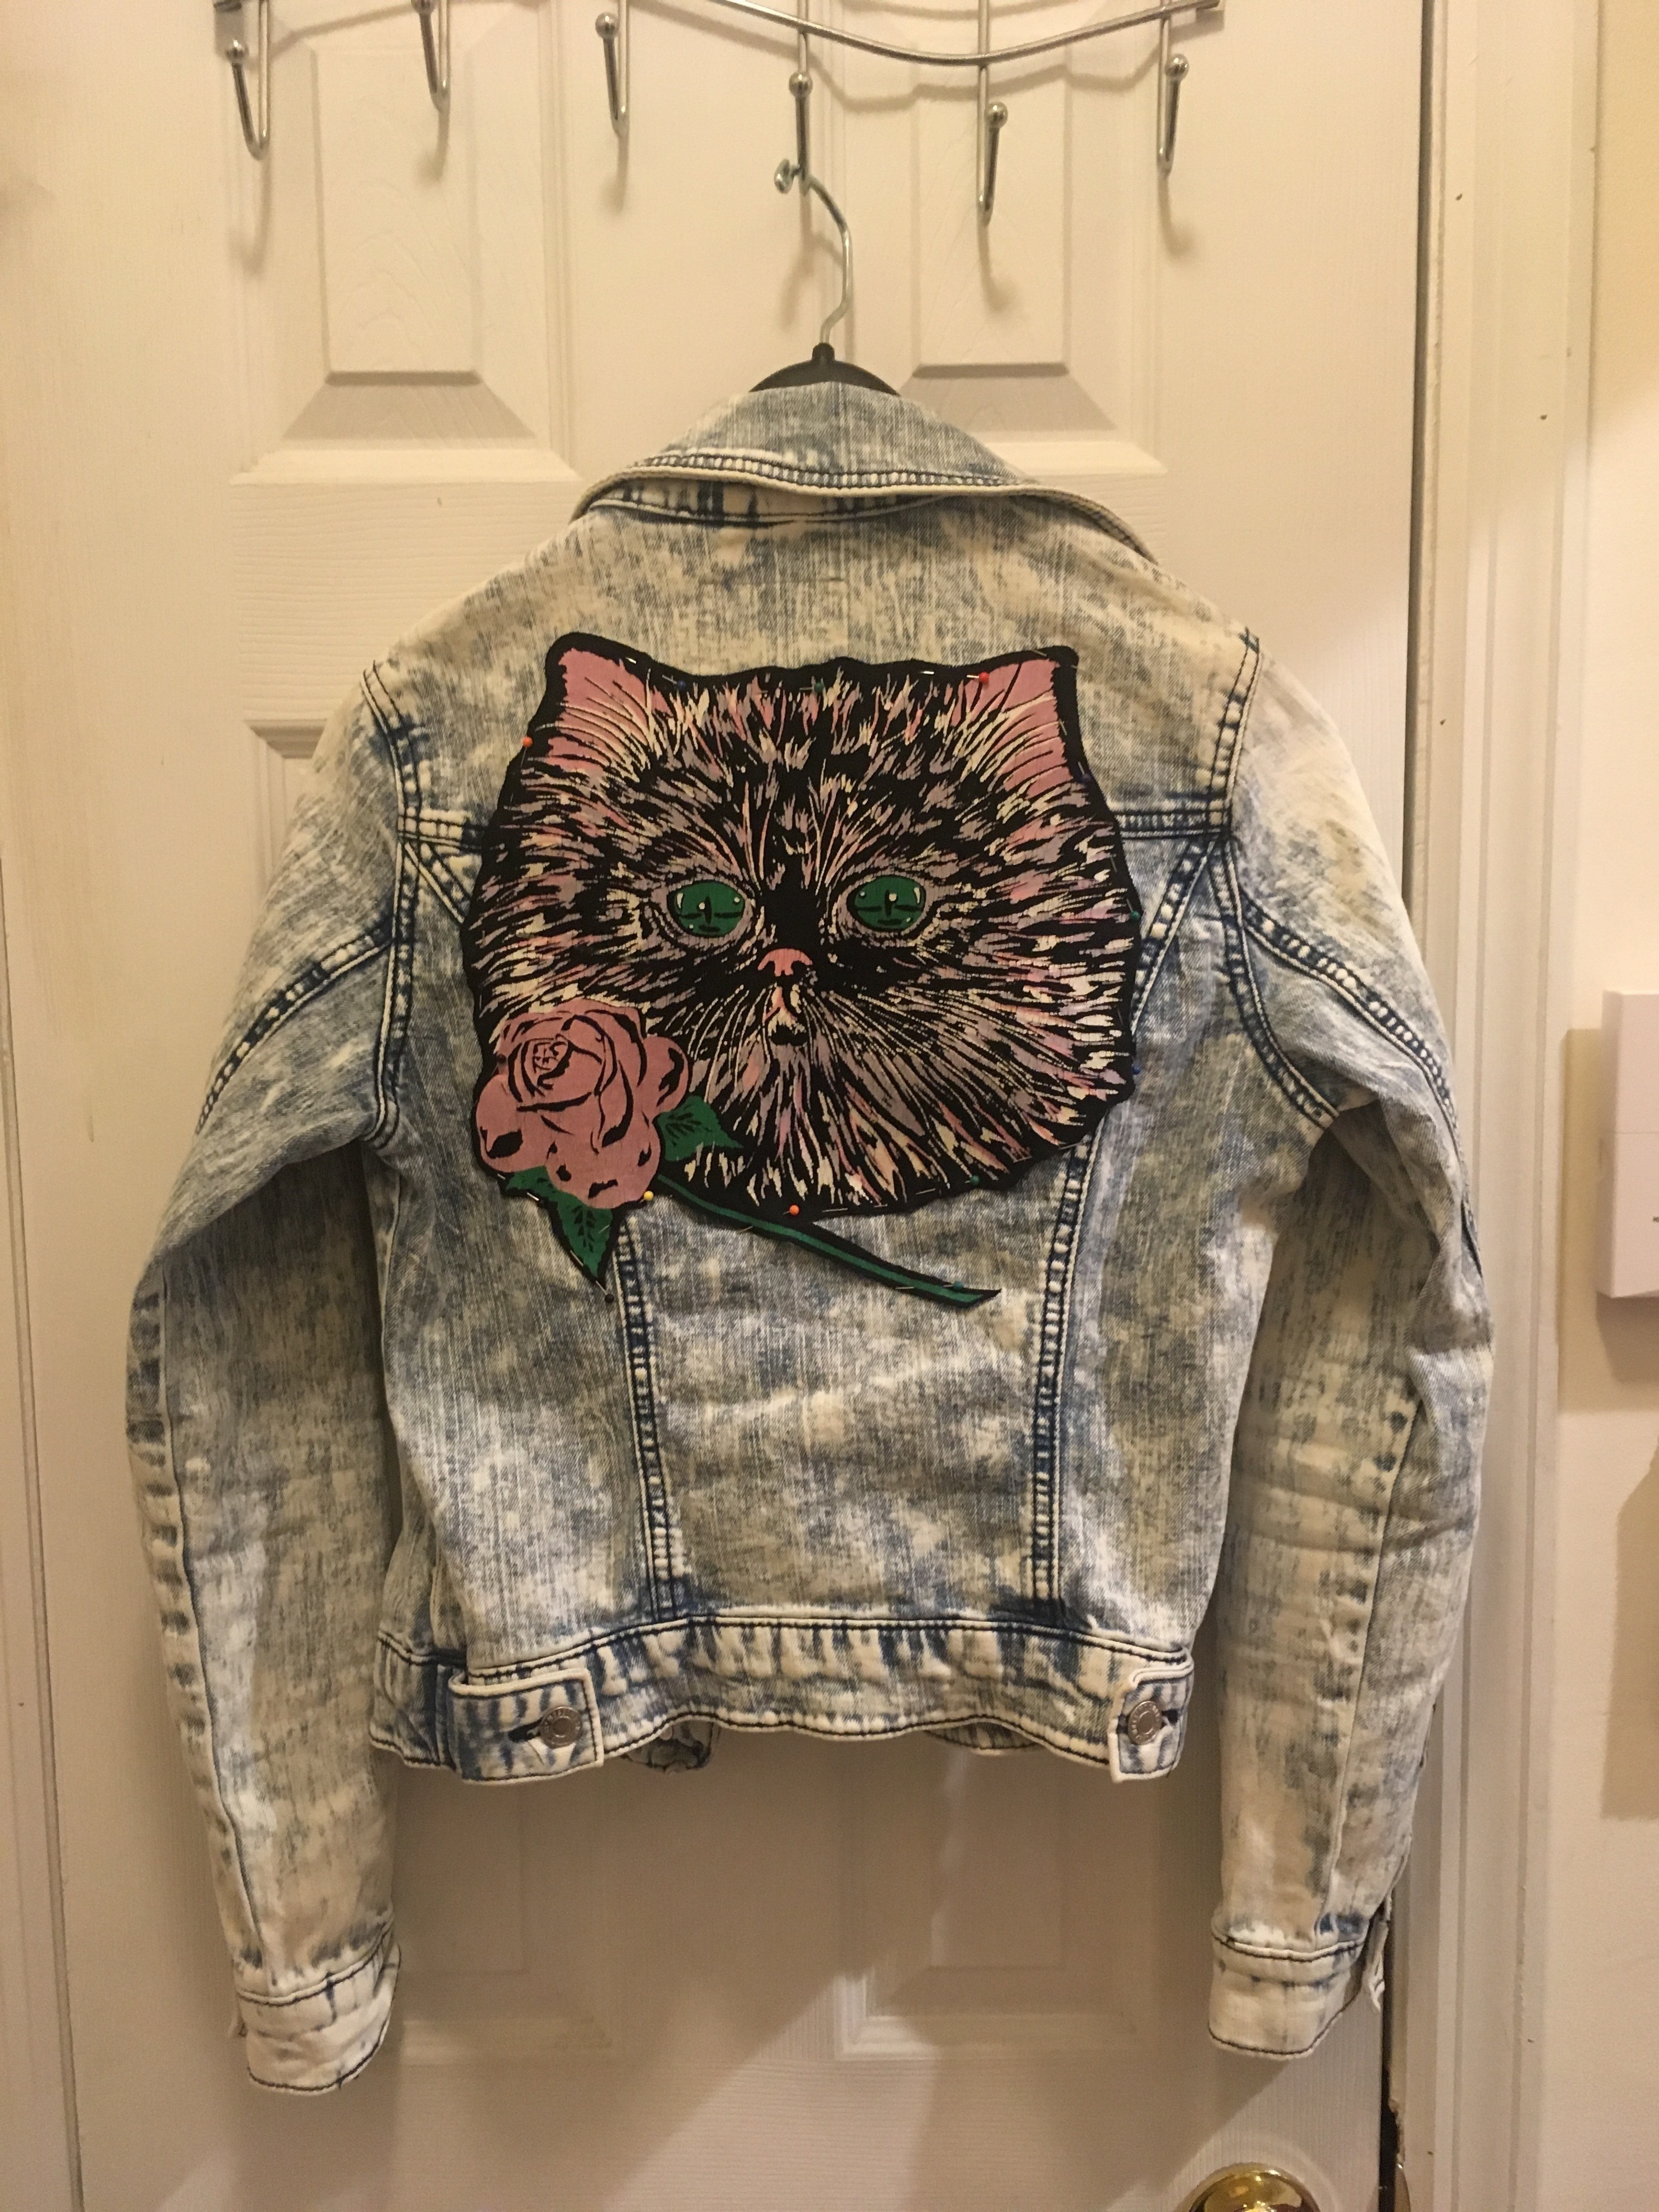
Place and pin your graphic to your jacket. Place the magazine under the jacket fabric to make sure you're just going through the t-shirt and back layer and not pinning all the way through to the front.
-
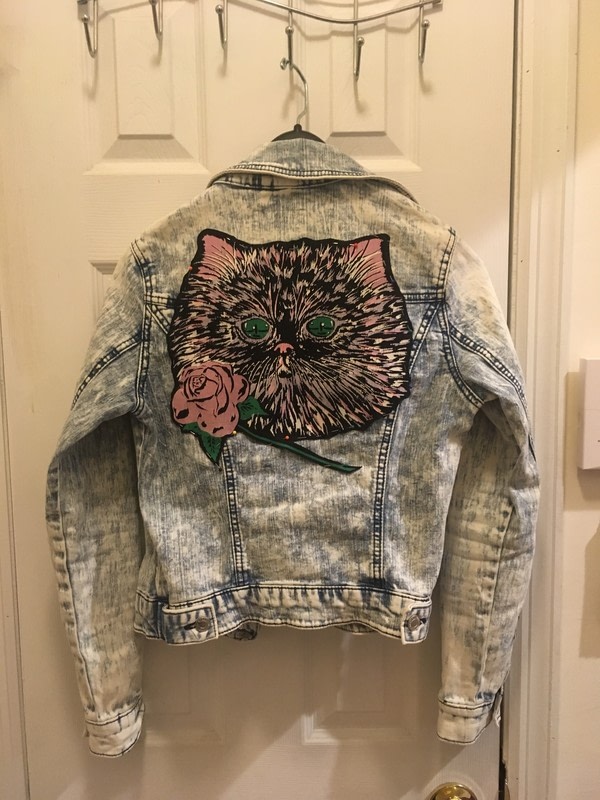
 Step 10
Hang it up and see if it's positioned exactly where you want it before sewing. After this, you can hand-sew or use a machine to sew your design to the back of your jacket.