Looping Headpins
Extract from Bead & Wire Fashion Jewelry • By Jessica Rose • Published by GMC Publications

About
Using headpins
Headpins are short lengths of wire with one flat or shaped end that allow you to thread beads onto them without them falling off. They are very useful for seamlessly attaching beads to chain, threads, or other jewelry parts. Depending on the item you are making, there are two main ways to use headpins.
-
 Sarah Sylvia S. favorited Looping Headpins
19 Jul 03:41
Sarah Sylvia S. favorited Looping Headpins
19 Jul 03:41
-
 Chudames favorited Looping Headpins
05 Feb 23:29
Chudames favorited Looping Headpins
05 Feb 23:29
-
 Kinhime Dragon favorited Looping Headpins
30 Dec 15:31
Kinhime Dragon favorited Looping Headpins
30 Dec 15:31
-
 GMC Group published her project Looping Headpins
10 Oct 00:10
GMC Group published her project Looping Headpins
10 Oct 00:10
You Will Need
-
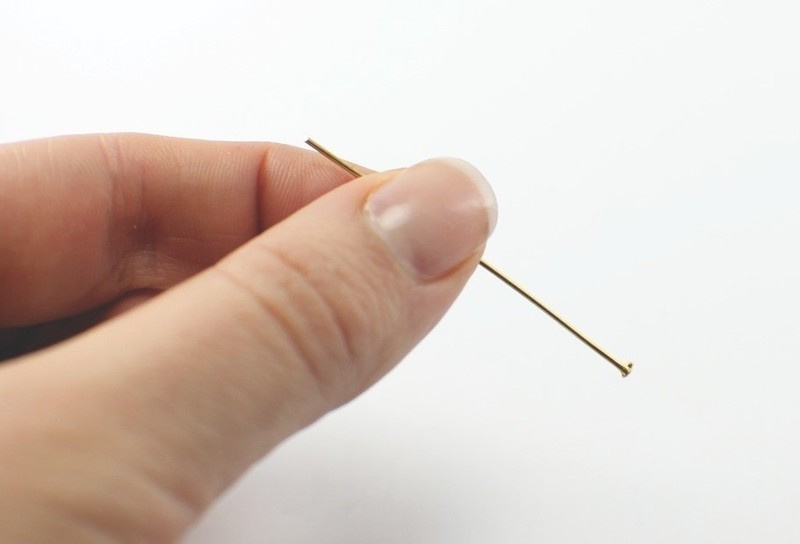
 Step 1
Take a headpin with the flat or ball-end at the bottom.
-
 Step 2
Thread on a bead then cut the wire down to 3⁄8in (10mm) above the bead.
-
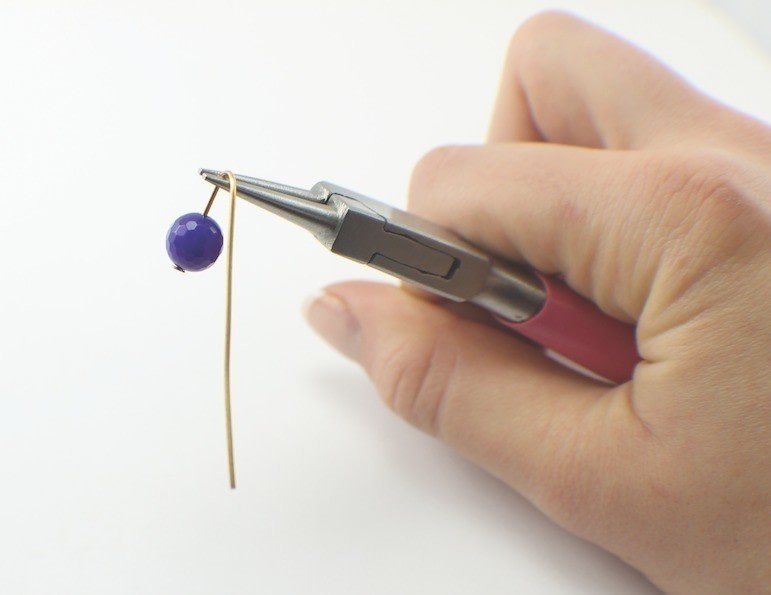
Step 3
Put the end of the wire into your round-nose pliers and twist the wire round to create a loop that meets the top of the bead. You can now use this to attach the bead to an earwire, bracelet, or necklaces.
-
 Step 4
Wire wrapping with headpins (bottom)
Thread a bead onto your headpin then place your round-nose pliers slightly above the bead, near the top of the pliers.
-
 Step 5
While holding the pliers shut with one hand, use your other hand to guide the wire up and over the plier jaw.
-
 Step 6
Pull the wire behind the bead and across to the left. If adding the beads to chain, thread the chain onto the loop at this stage before wrapping.
-
 Step 7
Now pull the wire forward and round, across the front of the bead, and continue wrapping in a clockwise direction around the top of the bead.
-
 Step 8
After a few wraps you will start to see the gap between the loop and the top of the bead close, and your bead should be sat securely in place.
-
 Step 9
Cut off any excess wire. The piece of jewelry should always be on the flat side of your cutters and the wire to be removed on the bevelled side.
-
 Step 10
Use your chain-nose pliers to tuck in the sharp end of the wire to finish.
This bead can now be attached to pieces using a jumpring. Alternatively, if you were attaching this to a piece of chain, you would thread the chain onto the headpin at step 3, just below your pliers, and trap the chain in the loop at the top of the piece.