

Liberty Cross Stitch Photo Frames
Extract from Liberty Cross Stitch • By Hlne Le Berre, Helene Le Berre, and Haelaene Le Berre • Published by Search Press


About
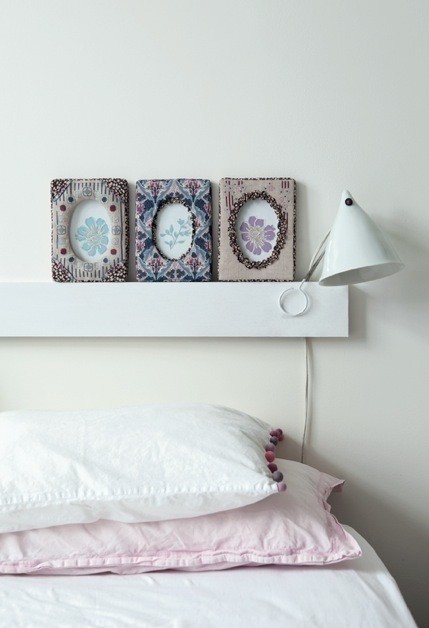
Create some gorgeous cross-stitch frames with Liberty of London.
Finished size: 13 נ18cm (5 נ7in)
Tags
Downloads
- cadre_patron.eps 190 KB [ Download ]
- cadre1_ill.eps 436 KB [ Download ]
- cadre2_ill.eps 323 KB [ Download ]
-
 Luna D. favorited Liberty Cross Stitch Photo Frames
24 Apr 16:19
Luna D. favorited Liberty Cross Stitch Photo Frames
24 Apr 16:19
-
Alissa B. favorited Liberty Cross Stitch Photo Frames
02 Oct 18:15
-
Alecia B. favorited Liberty Cross Stitch Photo Frames
01 Aug 16:19
-
 Jessica A. favorited Liberty Cross Stitch Photo Frames
27 Aug 22:02
Jessica A. favorited Liberty Cross Stitch Photo Frames
27 Aug 22:02
You Will Need
-
Step 1
EMBROIDERY
Centre the motif on the linen using the red reference marks on the charts. Work each stitch over two linen threads, using two strands of Special Mouliné cotton for the cross stitch and one strand for the backstitch. -
Step 2
FRAME APERTURE
1?Cut a 13 × 18cm (5 × 7in) rectangle of stiff interfacing. Trace an oval in the centre using the pattern, then cut it out with a pair of small pointed scissors.
2?Centre the embroidered linen carefully on the interfacing and pin in place – for the unembroidered frame use the 20 × 25cm (7¾ × 9¾in) rectangle of Liberty fabric instead. Trim away the fabric 1.5cm (5?8in) inside the oval – this margin is for a turning. Snip into the turning allowance at regular intervals up to the interfacing, then turn the fabric over the interfacing around the oval aperture and around the outer edges of the interfacing. Sew the linen allowance to the interfacing using large slip stitches, taking care not to go through to the right side. -
Step 3
CORNER FRAME DECORATIONS
1?Cut four 9 נ3cm (3½ נ1¼in) strips of Burnham fabric and fold each one in half lengthways, wrong sides together, to obtain a 9 נ1.5cm (3½ נ5?8in) strip. Press the strips.
2?Cut two 10cm (4in) squares from the Glenjade fabric and then cut them diagonally to obtain four triangles. Fold each diagonal edge to the wrong side by 1cm (3?8in) and press the fold.
3?Place one fabric strip under the diagonal of each triangle, allowing it to overhang by 8mm (3?8in). Pin the triangles to the four corners of the embroidered linen, making them overhang by 5mm (¼in) on the outside. Turn down the excess fabric at the back of the interfacing and sew with slip stitch. -
Step 4
RUCHED FRAME DECORATIONS
1?Cut a 70 נ3cm (27½ נ1¼in) strip from the Glenjade fabric. Fold each side over 7mm (¼in) to the wrong side and press. With a long length of thread, stitch along the strip in a wavy line (sinusoidal). Pull up the thread until the strip fits around the oval aperture with enough left over for an overlap to hide the raw edges; fasten off.
2?Pin the ruched strip around the oval aperture on the right side. Fold its ends wrong sides together and then sew using discreet stitches. -
Step 5
DECORATIONS FOR THE UNEMBROIDERED FRAME
Make a ruched strip as explained for the previous frame. Attach it around the oval aperture on the wrong side so that half of it shows on the right side. -
Step 6
ASSEMBLY
Note: use the Glenjade fabric for the embroidered frames and the Burnham fabric for the unembroidered one.
1?From interfacing cut two 1.5 × 18cm (5?8 × 7in) strips and two 1.5 × 13cm (5?8 × 5in) strips. From fabric cut two 5 × 20cm (2 × 7¾in) strips and two 5 × 15cm (2 × 6in) strips. Spray glue on to the wrong side of the strips of fabric and place the corresponding strips of interfacing on top, leaving a margin of 1cm (3?8in) on three sides and 2.5cm (1in) along the remaining long edge. Press the three 1cm (3?8in) margins over the interfacing. Fold the fourth side over by 1cm (3?8in) then glue the remaining fabric over the interfacing – the two long edges should meet.
2?Working with overcast stitch, sew the strips to the back of the embroidered linen, one along each edge of the frame, then join at the four corners. This fabric frame will hold the picture frame inside.
3?Stick a piece of double-sided adhesive tape to the four corners, under the fabric frame, then slip the picture frame in place.TIP
IF YOU CANNOT FIND A PLAIN PICTURE FRAME TO FIT INSIDE YOUR DECORATIVE FRAME, SIMPLY CUT A 13 × 18CM (5 × 7IN) RECTANGLE OF HARDBOARD AND ATTACH PICTURE FIXINGS TO THE BACK TO HANG IT BY. INSTEAD OF GLASS, CUT A PIECE OF ACETATE TO PROTECT YOUR CHOSEN PICTURE OR PHOTOGRAPH.
