About
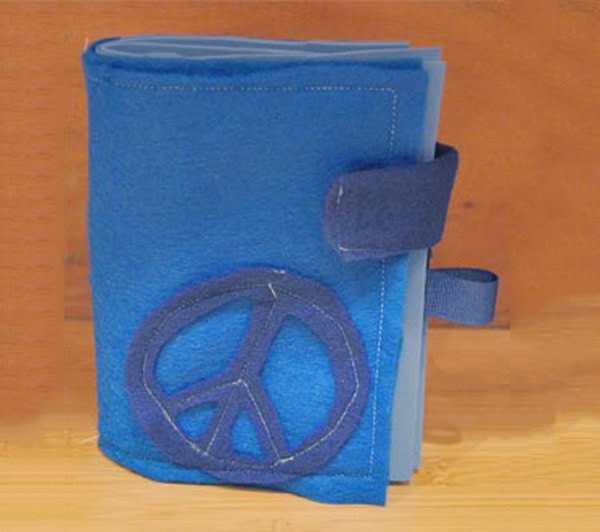
With felts, foams and simple stitches, you will create a fabulous portable earring holder! Especially this earring holder diy possesses a rather attractive appearance, which is qualified to be the most stunning one among our previous jewelry holders diy.
With felts, foams and simple stitches, you will create a fabulous portable earring holder! Especially this earring holder diy possesses a rather attractive appearance, which is qualified to be the most stunning one among our previous jewelry holders diy.
Tags
-
 Amber L. favorited Jewelry Holders Diy A Chic Booklet Earring Holder Diy
02 Apr 03:27
Amber L. favorited Jewelry Holders Diy A Chic Booklet Earring Holder Diy
02 Apr 03:27
-
 Tierney R. favorited Jewelry Holders Diy A Chic Booklet Earring Holder Diy
29 Oct 08:41
Tierney R. favorited Jewelry Holders Diy A Chic Booklet Earring Holder Diy
29 Oct 08:41
-
Muthoni M. favorited Jewelry Holders Diy A Chic Booklet Earring Holder Diy
24 Jun 11:09
-
 Sophia K. favorited her project Jewelry Holders Diy A Chic Booklet Earring Holder Diy
24 Jun 07:28
Sophia K. favorited her project Jewelry Holders Diy A Chic Booklet Earring Holder Diy
24 Jun 07:28
-
 CreativeGirl79 favorited Jewelry Holders Diy A Chic Booklet Earring Holder Diy
22 Jun 18:50
CreativeGirl79 favorited Jewelry Holders Diy A Chic Booklet Earring Holder Diy
22 Jun 18:50
-
 axelstyle added Jewelry Holders Diy A Chic Booklet Earring Holder Diy to Other
19 Jun 14:06
axelstyle added Jewelry Holders Diy A Chic Booklet Earring Holder Diy to Other
19 Jun 14:06
You Will Need
-
 Step 1
Step 1: make the cover of booklet
1st, cut sky-blue felt and cyan foam sheet into two halves; here you need to decide the size of your booklet;
2nd, tailor out your favorite pattern with dark blue felt, and sew it to one half of sky-blue;
3rd, line up the other half of sky blue and cut a small piece of dark blue felt;
4th, fold the dark blue tab longwise, insert a bit in between the sky-blues and sew them up all the way around;
5th, attach a pair of Velcro pieces onto near-by-edge-sides of cover and tab;
-
 Step 2
Step 2: fill pages to this booklet
1st, fold foams in half to create visible creases;
2nd, cut a bit of ribbon, roll it into a loop, and sew it with a Velcro piece;
3rd, attach another Velcro piece and above ribbon combined one to both sides of foam;
4th, repeat to make another identical foam page;
5th, lay one foam page onto inside cover, put the other page in reverse direction and sew along the crease.
-
 Step 3
Our earring holder DIY shows you the final look: