


About
With a few folds and craft supplies you can turn an ordinary A4 envelope into a pretty party bag
I wanted to make some party bags for my daughter's 6th birthday. I was only making a few, so I wanted something a bit more special than your standard bright, plastic party bag.
Brown A4 envelopes are perfect for making gift bags out of as they're much heavier than a regular paper bag, so it feels like a quality item, especially when they're embellished with stamps, ribbon and lace.
Here's a neat little trick for making a gift bag out of an envelope
Tags
-
 Charlene V. favorited How To Turn An Envelope Into A Gift Bag
09 Feb 18:55
Charlene V. favorited How To Turn An Envelope Into A Gift Bag
09 Feb 18:55
-
Joann S. added How To Turn An Envelope Into A Gift Bag to cards/paper crafts
19 Apr 15:19
-
 Rachael H. added How To Turn An Envelope Into A Gift Bag to Envelopes/Paper
22 Jan 04:09
Rachael H. added How To Turn An Envelope Into A Gift Bag to Envelopes/Paper
22 Jan 04:09
-
Rachael H. favorited How To Turn An Envelope Into A Gift Bag
22 Jan 04:08
-
 Kt Bing added How To Turn An Envelope Into A Gift Bag to To Make ASAP!
14 Jan 16:22
Kt Bing added How To Turn An Envelope Into A Gift Bag to To Make ASAP!
14 Jan 16:22
-
Kt Bing favorited How To Turn An Envelope Into A Gift Bag
14 Jan 16:22
-
 Emma H. favorited How To Turn An Envelope Into A Gift Bag
20 Dec 00:05
Emma H. favorited How To Turn An Envelope Into A Gift Bag
20 Dec 00:05
-
 Kathryn {Craft me Happy} entered her project How To Turn An Envelope Into A Gift Bag to Secret Santa
15 Dec 13:39
Kathryn {Craft me Happy} entered her project How To Turn An Envelope Into A Gift Bag to Secret Santa
15 Dec 13:39
-
 anita.n.g added How To Turn An Envelope Into A Gift Bag to Xmas jazz
12 Dec 19:26
anita.n.g added How To Turn An Envelope Into A Gift Bag to Xmas jazz
12 Dec 19:26
-
 LUPE68 favorited How To Turn An Envelope Into A Gift Bag
09 Dec 09:14
LUPE68 favorited How To Turn An Envelope Into A Gift Bag
09 Dec 09:14
-
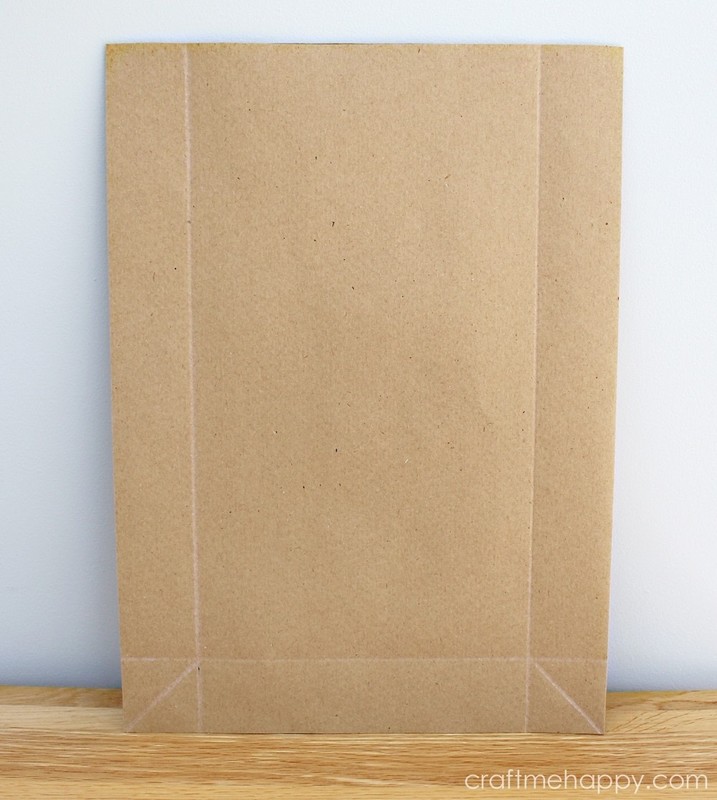
 Step 1
Cut the flap off an A4 envelope. (US Letter is the closest equivalent.)
Using a scoring board and a bone folder, score the left, right and bottom edges of the envelope 3cm from all three edges.Score diagonally through the centre of the two small squares that are created in the bottom corners.
-
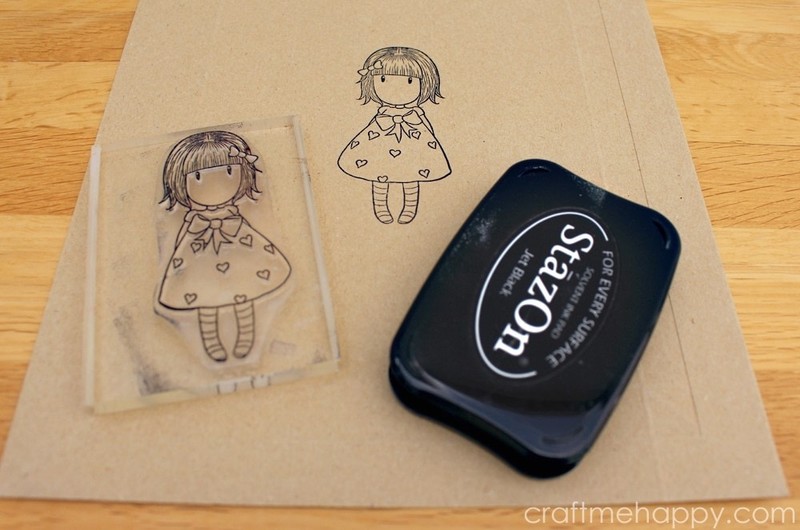
 Step 2
If you're going to stamp an image on your envelope, now's a good time. I used a Little Gorjuss clear stamp and some black Stazon ink .
-
 Step 3
Fold the 2 sides over along the score lines and then fold up the bottom fold. Turn it over and reverse the folds so that each score line has been folded over in both directions. Press the folds down firmly. Pinch the corners along the diagonal lines to form a sort of box shape. All of this folding just helps the envelope to 'remember' the creases when you start turning it into a bag.
-
 Step 4
Put your hand inside the envelope and open the sides out so that the side folds become the four side corner edges of the bag. Now pinch along the diagonal line to create two triangular flaps at the base of the envelope. Two of the side folds will need pinching to change them from valley folds to mountain folds. Reverse the original side folds of the envelope by pinching them and pushing them in so that you have valley folds on either side.
-
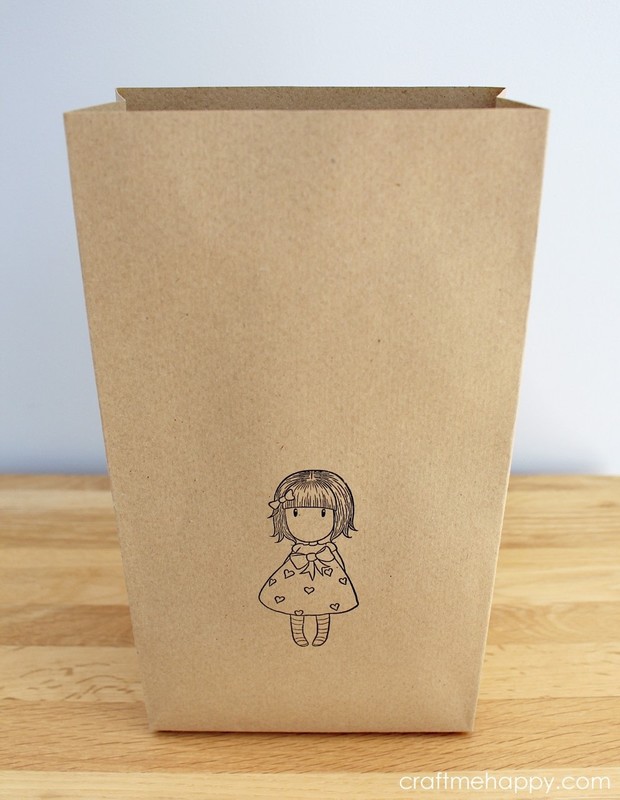
 Step 5
Use strong double sided sticky tape to stick the triangular flaps down to the base of what is now a bag!
Fold the top 3 cm of your bag over and embellish it however you like.
-
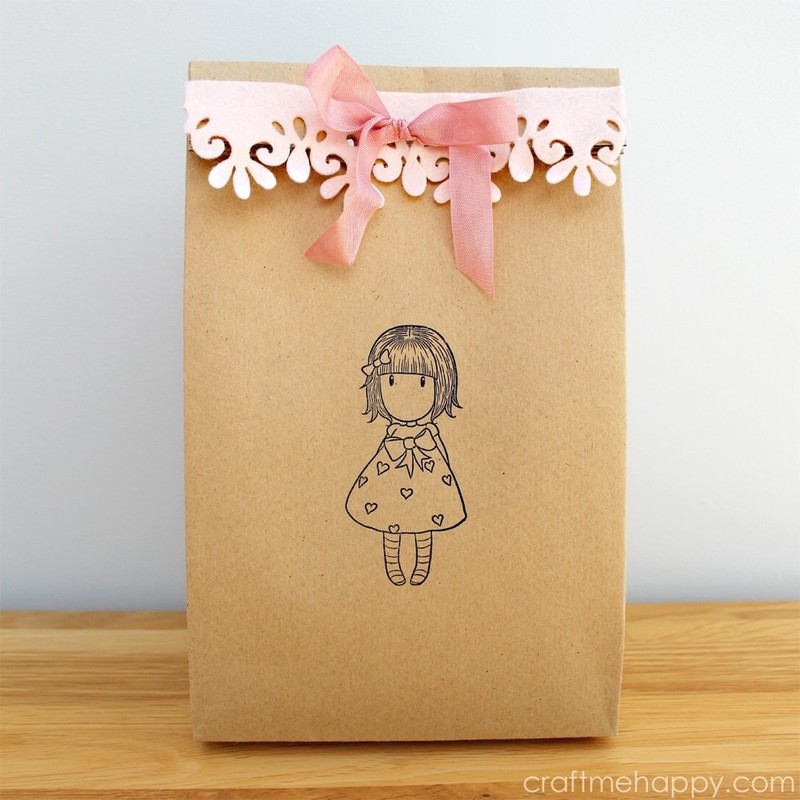
 Step 6
I used a cupcake liner die cutter to make a lacy felt trim for the top of the bag, but some pretty lace would work well too. Attach double sided sticky tape to the top edge of your trim and stick it down, trimming it on either side to neaten it up.
-
 Step 7
With a pen, mark two holes for the ribbon and use a hammer and hole punch to punch two holes through all of the folded layers.
Thread ribbon through the holes and tie in a neat bow at the front.
For further information, please check out my website.


Comments

 1
Home Accessories »
Diy Jewelry Box
1
Home Accessories »
Diy Jewelry Box
