

About
How to Make a Waist Stay
Add a waist stay to a dress to anchor the waist in position and give a neat, fitted look.
-
 Anael MarsW commented on How To Make A Waist Stay
21 Oct 15:42
Anael MarsW commented on How To Make A Waist Stay
21 Oct 15:42
-
 Belle W. favorited How To Make A Waist Stay
02 Jul 12:39
Belle W. favorited How To Make A Waist Stay
02 Jul 12:39
-
 x_niccadee added How To Make A Waist Stay to make this
25 Jun 20:01
x_niccadee added How To Make A Waist Stay to make this
25 Jun 20:01
-
 Emma H. favorited How To Make A Waist Stay
23 May 23:27
Emma H. favorited How To Make A Waist Stay
23 May 23:27
-
 Amanda S. favorited How To Make A Waist Stay
16 May 21:16
Amanda S. favorited How To Make A Waist Stay
16 May 21:16
-
 Chloe A. added How To Make A Waist Stay to Ginger Rogers
23 Apr 16:04
Chloe A. added How To Make A Waist Stay to Ginger Rogers
23 Apr 16:04
-
Chloe A. favorited How To Make A Waist Stay
18 Apr 21:00
-
Kassandra R. favorited How To Make A Waist Stay
24 Mar 22:45
-
Alissa B. favorited How To Make A Waist Stay
14 Mar 20:36
-
 Julie favorited How To Make A Waist Stay
12 Mar 16:12
Julie favorited How To Make A Waist Stay
12 Mar 16:12
You Will Need
-
 Step 1
A length of grosgrain or Petersham ribbon ⅝"to 1"wide, whatever width is most comfortable for you.
The ribbon should measure the exact length of your waist plus at least 6" for fiddling about with. -
 Step 2
A set of waistband hooks and eyes. My preference was the kind of hook used on a bra or swimsuit.
-
 Step 3
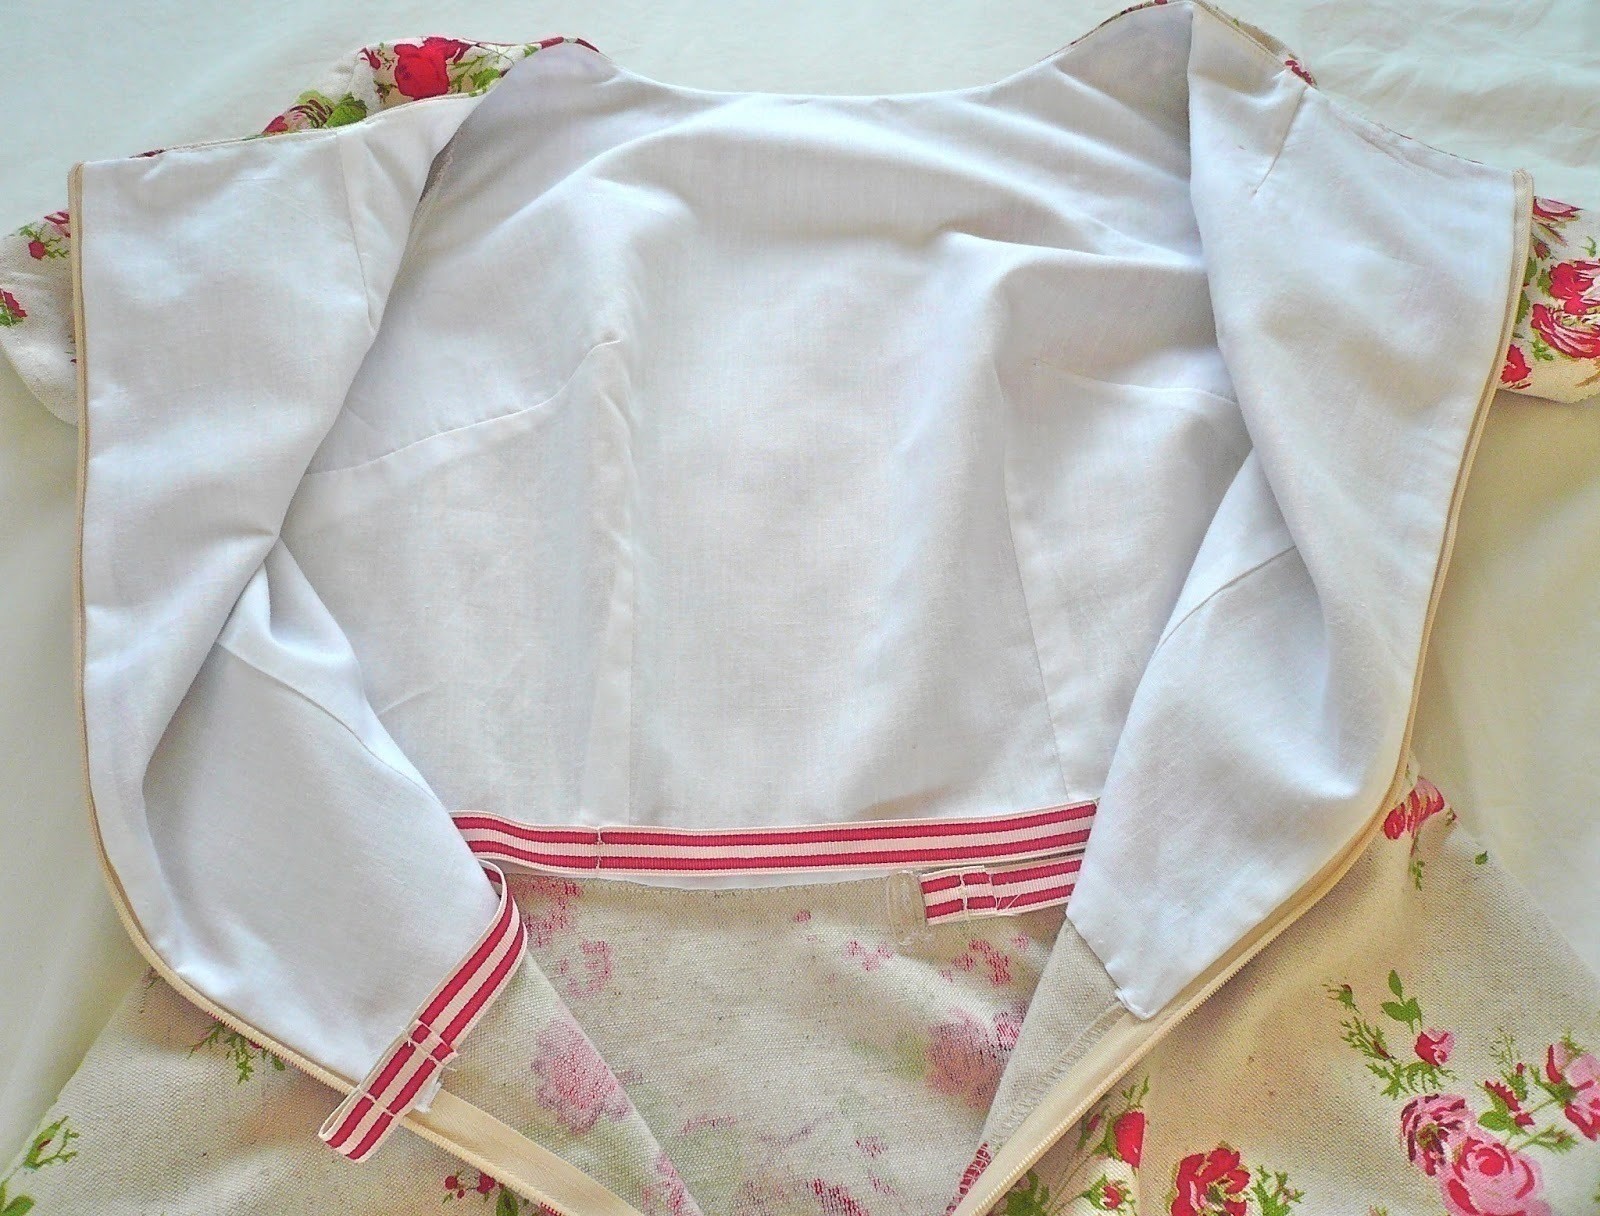
Fold your ribbon in half and mark it with a pin. Pin this to the centre of the waistline on your dress, (usually equidistant between the front bodice darts if you have them.)
-
 Step 4
Continue pinning the ribbon to the waistline seams and darts. Pin it to the zip openings as well, just to hold it in place.
-
 Step 5
Now hand tack the ribbon to the seams/darts, backstitching a few times for security. I attached mine to both front and back darts for extra anchorage. Don't tack it to the zip as you need the few inches around the opening to float free.
-
 Step 6
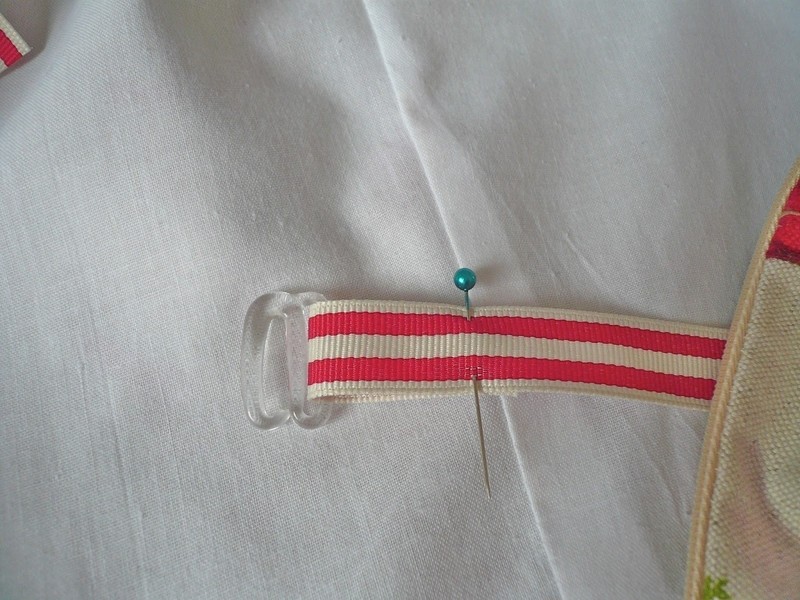
Make a loop at one end of the grosgrain ribbon, thread your hook through and pin.
-
 Step 7
At the other end, make a loop with your ribbon and pin.
You now need to try the dress on and adjust the pins so that the waist stay fits securely around your waist. I just tried the dress on back to front - it works! -
 Step 8
If, like me, you find you have a very different waist measurement pre- and post-lunch, then you may wish to add an extra hook/row of stitches for this eventuality. This genius idea came from Claire at http://sew-incidentally.blogspot.co.uk. Simply add add two rows of stitches instead of one: the one furthest away from the end is for your actual waist measurement and the one nearer the end is the looser fitting one to accommodate your stomach after lunch. Here's Claire's diagram which explains it perfectly.
I went for the two loop option. You may need to fiddle with your pins to get them in the right positions, just make sure that your actual waist measurement is the pin furthest from the end. -
 Step 9
The final stage is to simply stitch where your pins where to create the loops for hooking. Make sure you backstitch a few times to keep them secure.
-
 Step 10
And there you have it, a waist stay! Now you can go dancing, eat pies, or do both at once and your dress will stay securely anchored at the waist.


Comments

 1
Home Accessories »
Diy Jewelry Box
1
Home Accessories »
Diy Jewelry Box
