


About
Burlesque,Lolita,Dolly Kei, FASHION
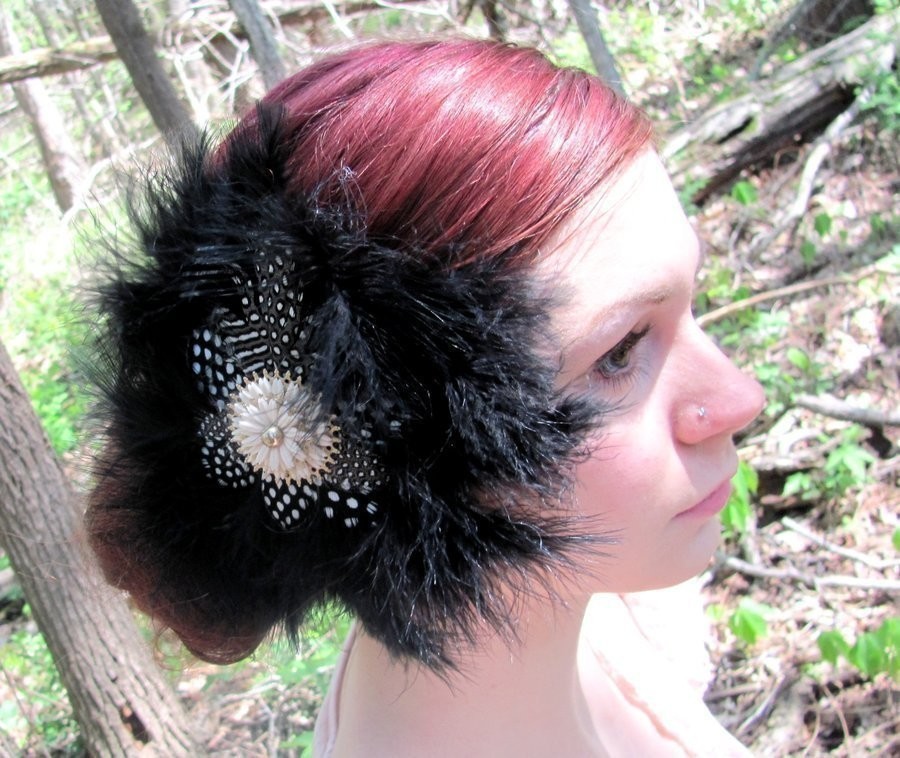
An easy tutorial for a simple and beautiful fascinator
Tags
-
 Key West Witch favorited How To Make A Hair Fascinator
08 May 14:22
Key West Witch favorited How To Make A Hair Fascinator
08 May 14:22
-
 JoAnna D. favorited How To Make A Hair Fascinator
05 Nov 15:44
JoAnna D. favorited How To Make A Hair Fascinator
05 Nov 15:44
-
 VillainousNinja added How To Make A Hair Fascinator to Inspiration
23 Aug 23:29
VillainousNinja added How To Make A Hair Fascinator to Inspiration
23 Aug 23:29
-
 Carla B. added How To Make A Hair Fascinator to Style my locks...
21 Jul 18:50
Carla B. added How To Make A Hair Fascinator to Style my locks...
21 Jul 18:50
-
Carla B. favorited How To Make A Hair Fascinator
21 Jul 18:49
-
 Stephanie H. favorited How To Make A Hair Fascinator
25 Jun 15:28
Stephanie H. favorited How To Make A Hair Fascinator
25 Jun 15:28
-
Lisa W. favorited How To Make A Hair Fascinator
14 May 18:12
-
 Emma H. favorited How To Make A Hair Fascinator
29 Mar 13:51
Emma H. favorited How To Make A Hair Fascinator
29 Mar 13:51
-
 NanaBlue favorited How To Make A Hair Fascinator
04 Feb 23:21
NanaBlue favorited How To Make A Hair Fascinator
04 Feb 23:21
-
 Pollie P. favorited How To Make A Hair Fascinator
24 Jan 18:32
Pollie P. favorited How To Make A Hair Fascinator
24 Jan 18:32
-
 Step 1
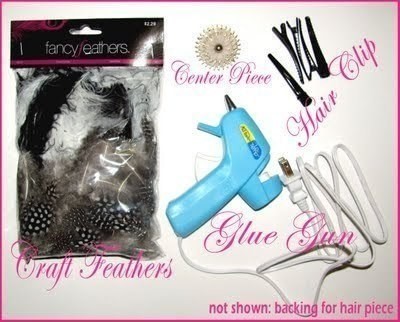
Materials Needed:
-Hot Glue Gun
-Craft Feathers (can be found at Hobby Lobby)
- Hair clip (ex. alligator clips)
-Center Piece (I used a vintage earring)
-Backing for your fascinator (not shown)Felt is a good choice for this -
 Step 2
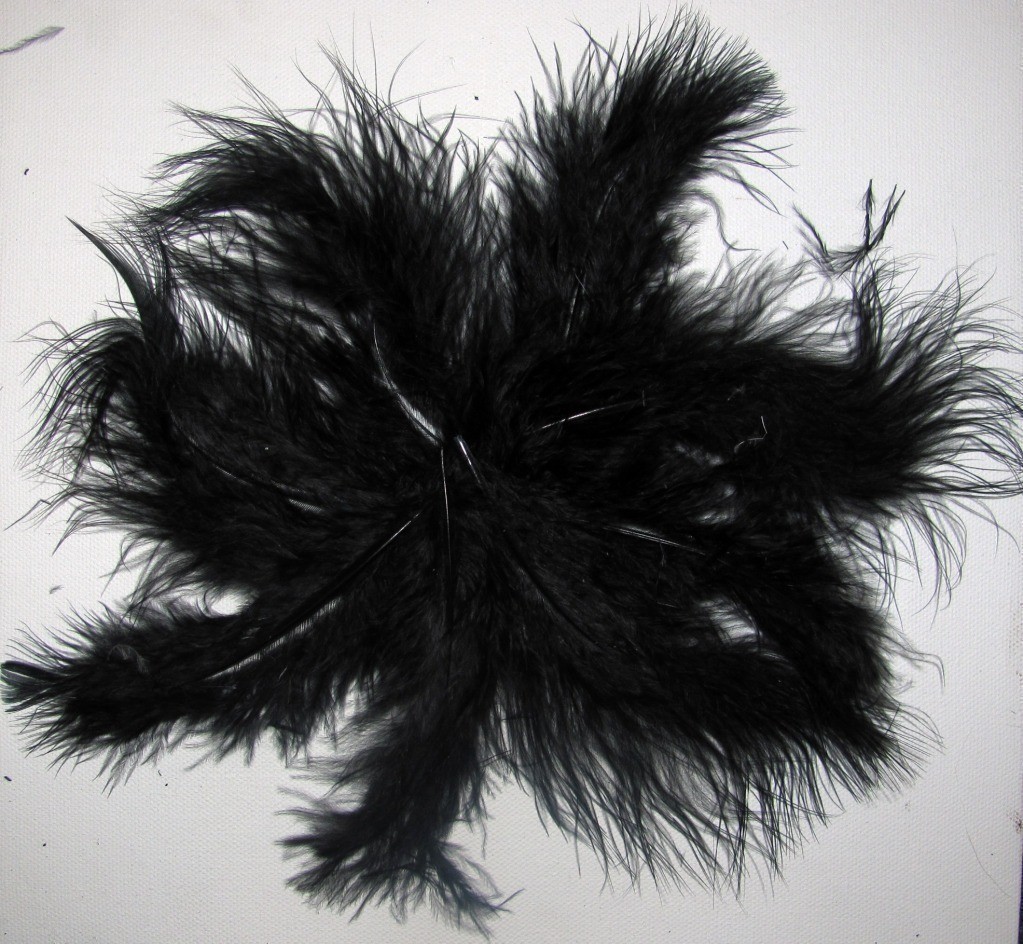
1. You will have to sort through your feathers to find good ones that you will be able to use. Most of my feathers's vanes were torn apart so I just tossed them in a pile because I wouldn't be using them for this project.
2. I sorted my feathers into three groups: Contour feathers, Semiplumes, and then the small Guinea feathers.The feathers in your pack may be different but usually the same feathers are in every pack...especially if you buy yours from Hobby Lobby
-
 Step 3
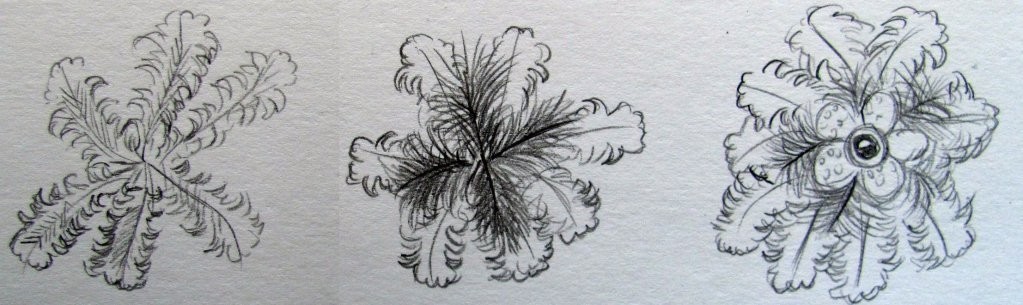
3.My sketch of a contour feather is on the left which is basically a feather you would recognize...it is the flight feathers on a bird. The semiplume on the right is a more feathery sort of feather.
-
 Step 4
Do not glue yet, just get a feel of what the base will look like for your fascinator so this will minimize any mess ups.
Take the contour feathers and place them as shown in the photo above on the left and right. If your feathers do not fit together very well because of different sizes...I would advise cutting the ends of the quills to shorten them. -
 Step 5
This sketch shows the way I went with adding feathers. You don't want to just place them everywhere for the heck of it...trust me I tried. It looks a lot "cleaner" this way.
-
 Step 6
At this time you should cut out you backing into a circle. My circle is 3" across. Then using your hot glue gun place the glue on the quill of a contour feather and place the feather onto your backing.
-
 Step 7
Keep gluing your feathers onto your backing until you have made your way all the way around. It start to look somewhat like a star. (DO NOT worry about how the middle looks because it will eventually be covered up with more feathers and your center piece.)
-
 Step 8
Now it is time to add your semiplume feathers to the fascinator. Placement isn't that critical, but you should take a look at your fascinator and find any areas that seem bare and place the semiplumes in those areas so that it will make an illusion that there are feathers everywhere.
-
 Step 9
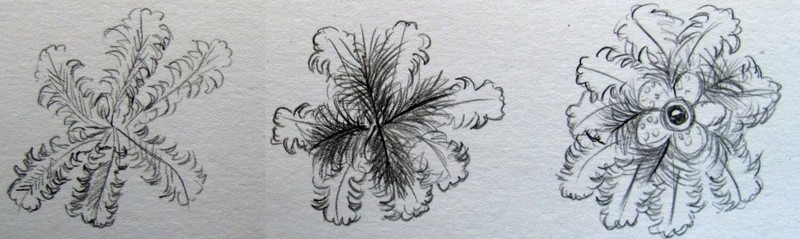
"click photo to view the full layering process"
The main point about this tutorial is "layering."
From left to right this is how I layered my fascinator.
I first added the contour feathers as a base, then the semiplumes in bare areas, and finally I added my Guinea feathers on top of the semiplumes and placed my center piece in the middle of the whole thing covering all the weirdness you will see occurring in the middle area. -
 Step 10
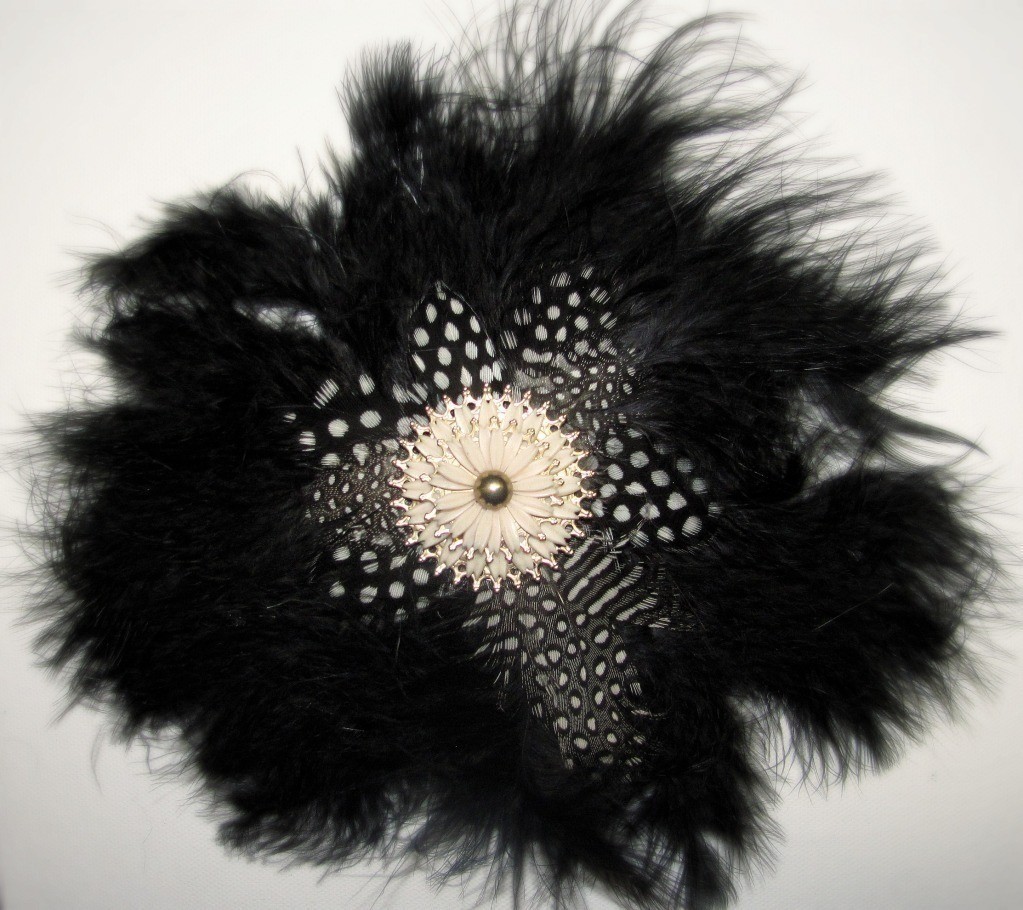
Glue center piece...in the center. haha
-
 Step 11
To finish and wear your hair fascinator you will have to add a clip. I used an alligator clip and in which I put glue on top of the clip then held it open while placing it onto the back of my hair piece so it didn't glue itself shut. I held it for about 20 seconds or so and closed it.
-
 Step 12
It should end up looking like this
-
 Step 13
LAST STEP.
SHOW IT OFF and enjoy. ;)


 1
Home Accessories »
Diy Jewelry Box
1
Home Accessories »
Diy Jewelry Box
