

How To Draw A Woodland
Extract from Drawing is Easy • By Susie Hodge • Published by Arcturus Publishing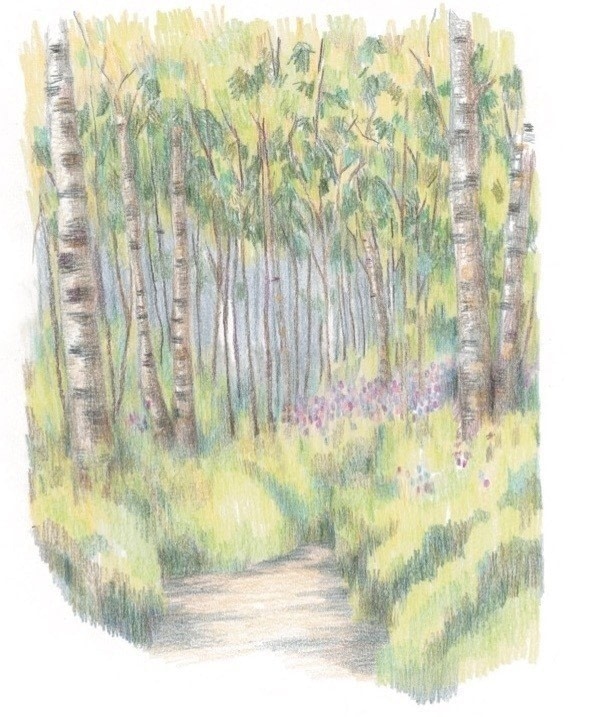


About
Drawing is Easy
This is another view of trees but in a more dense forest than in the previous project. The birch trees here are slender, with contrasting marks on their trunks.
-
 CraftyCat added How To Draw A Woodland to Draw
02 Jul 05:44
CraftyCat added How To Draw A Woodland to Draw
02 Jul 05:44
-
CraftyCat favorited How To Draw A Woodland
02 Jul 05:44
-
 Amanda P. added How To Draw A Woodland to Drawing Tutorials
17 Jun 15:17
Amanda P. added How To Draw A Woodland to Drawing Tutorials
17 Jun 15:17
-
 Marie P. favorited How To Draw A Woodland
27 Apr 04:55
Marie P. favorited How To Draw A Woodland
27 Apr 04:55
-
 Emma H. favorited How To Draw A Woodland
19 Apr 21:49
Emma H. favorited How To Draw A Woodland
19 Apr 21:49
-
 Carla B. favorited How To Draw A Woodland
19 Apr 16:38
Carla B. favorited How To Draw A Woodland
19 Apr 16:38
-
Peter U. commented on How To Draw A Woodland
16 Apr 11:27
-
 Crafterella featured How To Draw A Woodland
10 Apr 23:00
Crafterella featured How To Draw A Woodland
10 Apr 23:00
-
 campaspe favorited How To Draw A Woodland
10 Apr 04:19
campaspe favorited How To Draw A Woodland
10 Apr 04:19
-
 RareJewel favorited How To Draw A Woodland
09 Apr 07:55
RareJewel favorited How To Draw A Woodland
09 Apr 07:55
You Will Need
-
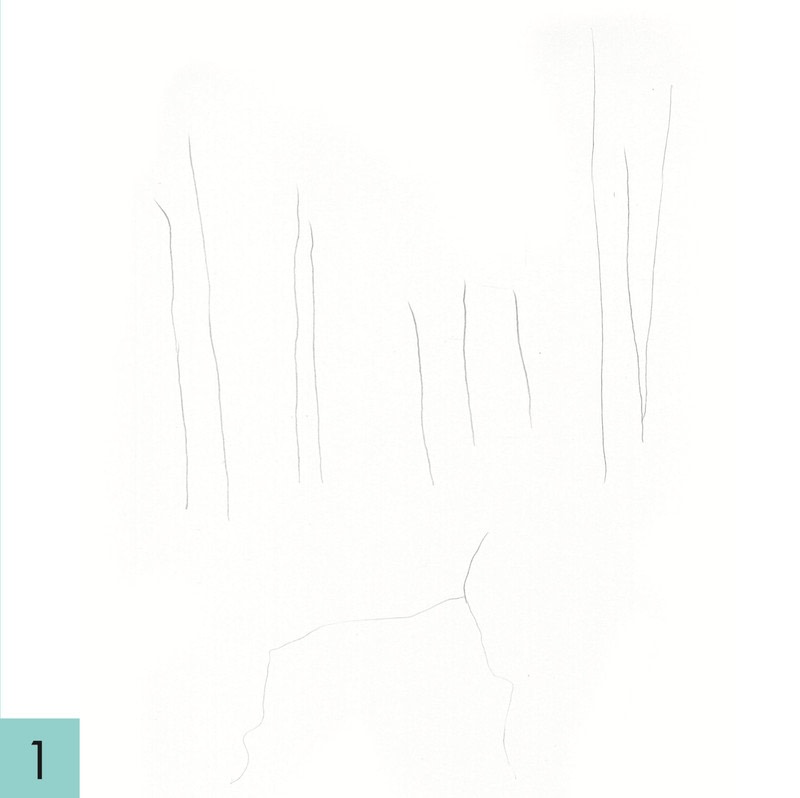
 Step 1
As the trees are clustered together in this scene, begin by marking on some roughly vertical lines to indicate where some of the trees will stand. Use the B pencil for this. As a guide, and to
keep the composition centred on the paper, also lightly mark on the area that leads into the grass – such an ‘arrow’ will point to the main part of the drawing and subconsciously attract viewers’ eyes. -
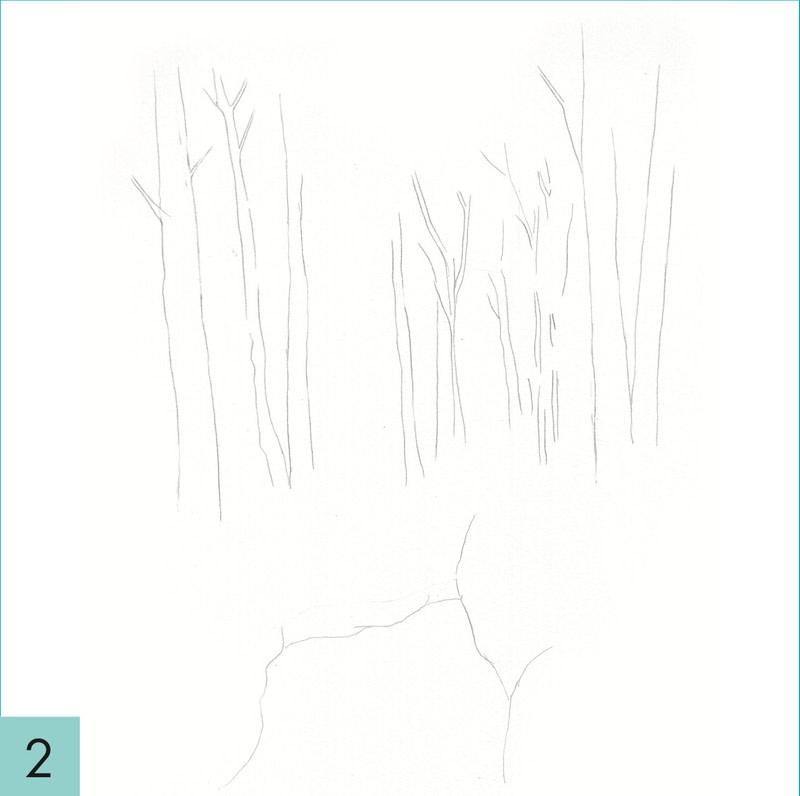
 Step 2
Firm up the ‘arrow’ of land at the front, then start to draw in some more definite tree trunks. The outer trunks are wider than the central ones, because of perspective; they are closer to viewers than the trees in the centre.
-
 Step 3
Continue drawing the trees. Although tall and thin, none is uniform or symmetrical; all have branches that spread at the top, and each trunk appears to become narrower as it recedes into the distance. You can also introduce some soft, short tufts of grass.
-
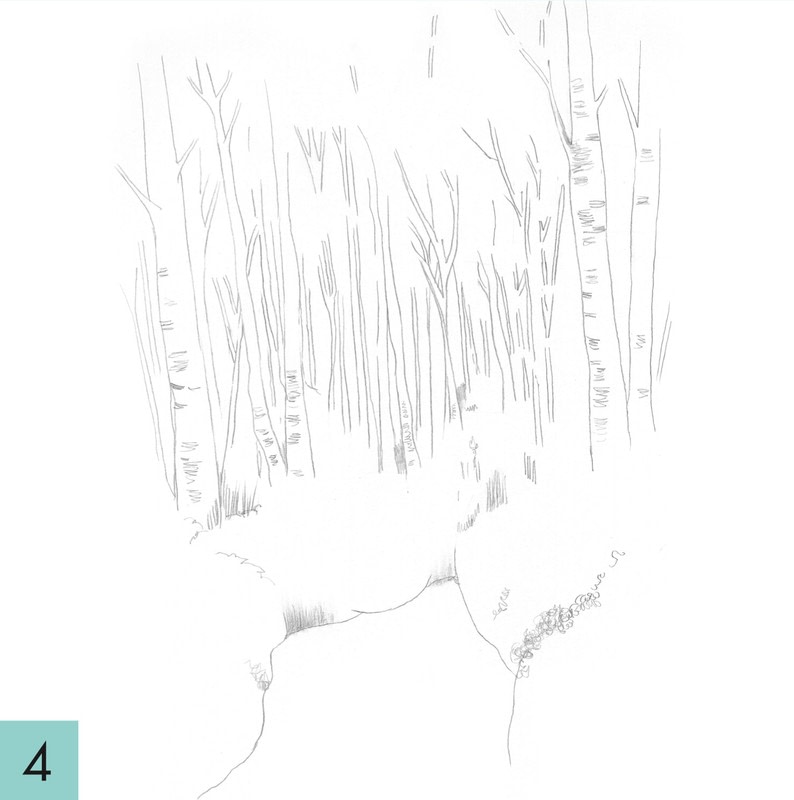
 Step 4
Using the 2B pencil, begin drawing marks on the tree trunks. As with the trunks and branches themselves, such marks should be haphazard and asymmetrical because they are organic. Notice too that the trees themselves occupy more than half of the composition.
-
 Step 5
Make sure that your trees overlap in places to show linear perspective, while some parts in the distance will be lighter and less detailed to show aerial perspective. Build up more marks on the trunks, some grass and some cast shadows, always using a light touch.
-
 Step 6
Squint your eyes to see where the light is coming from and apply shadows consistently across the scene. Use the 5B pencil and make sure some trunks and leaves are much darker than the lightest areas. The grass in the foreground is more apparent and carefully drawn than the overall sense of flowers closer to the tree trunks. The narrower trunks appear much darker than the broader ones, as they are in shadow – behind the lighter trunks and under the canopy of leaves.
-
 Step 7
This is the same scene but rendered in coloured pencils. Use loose, tight, long and
short marks, plus scribbled- type marks for the leaves and straighter marks for the grass. Also build up contrasting marks on the tree trunks. Intense greens are created through layers, always bearing in mind where the darkest shadows
are. Some of the darkest areas of green were made with dark blue and brown layered over green. No black was used, as this can flatten the look of
a picture. Because coloured pencils can sometimes be a bit too vivid and unnatural for a landscape, I also added some layers of light grey in places. Be patient; this kind of coloured pencil drawing takes time.


Comments

