
About
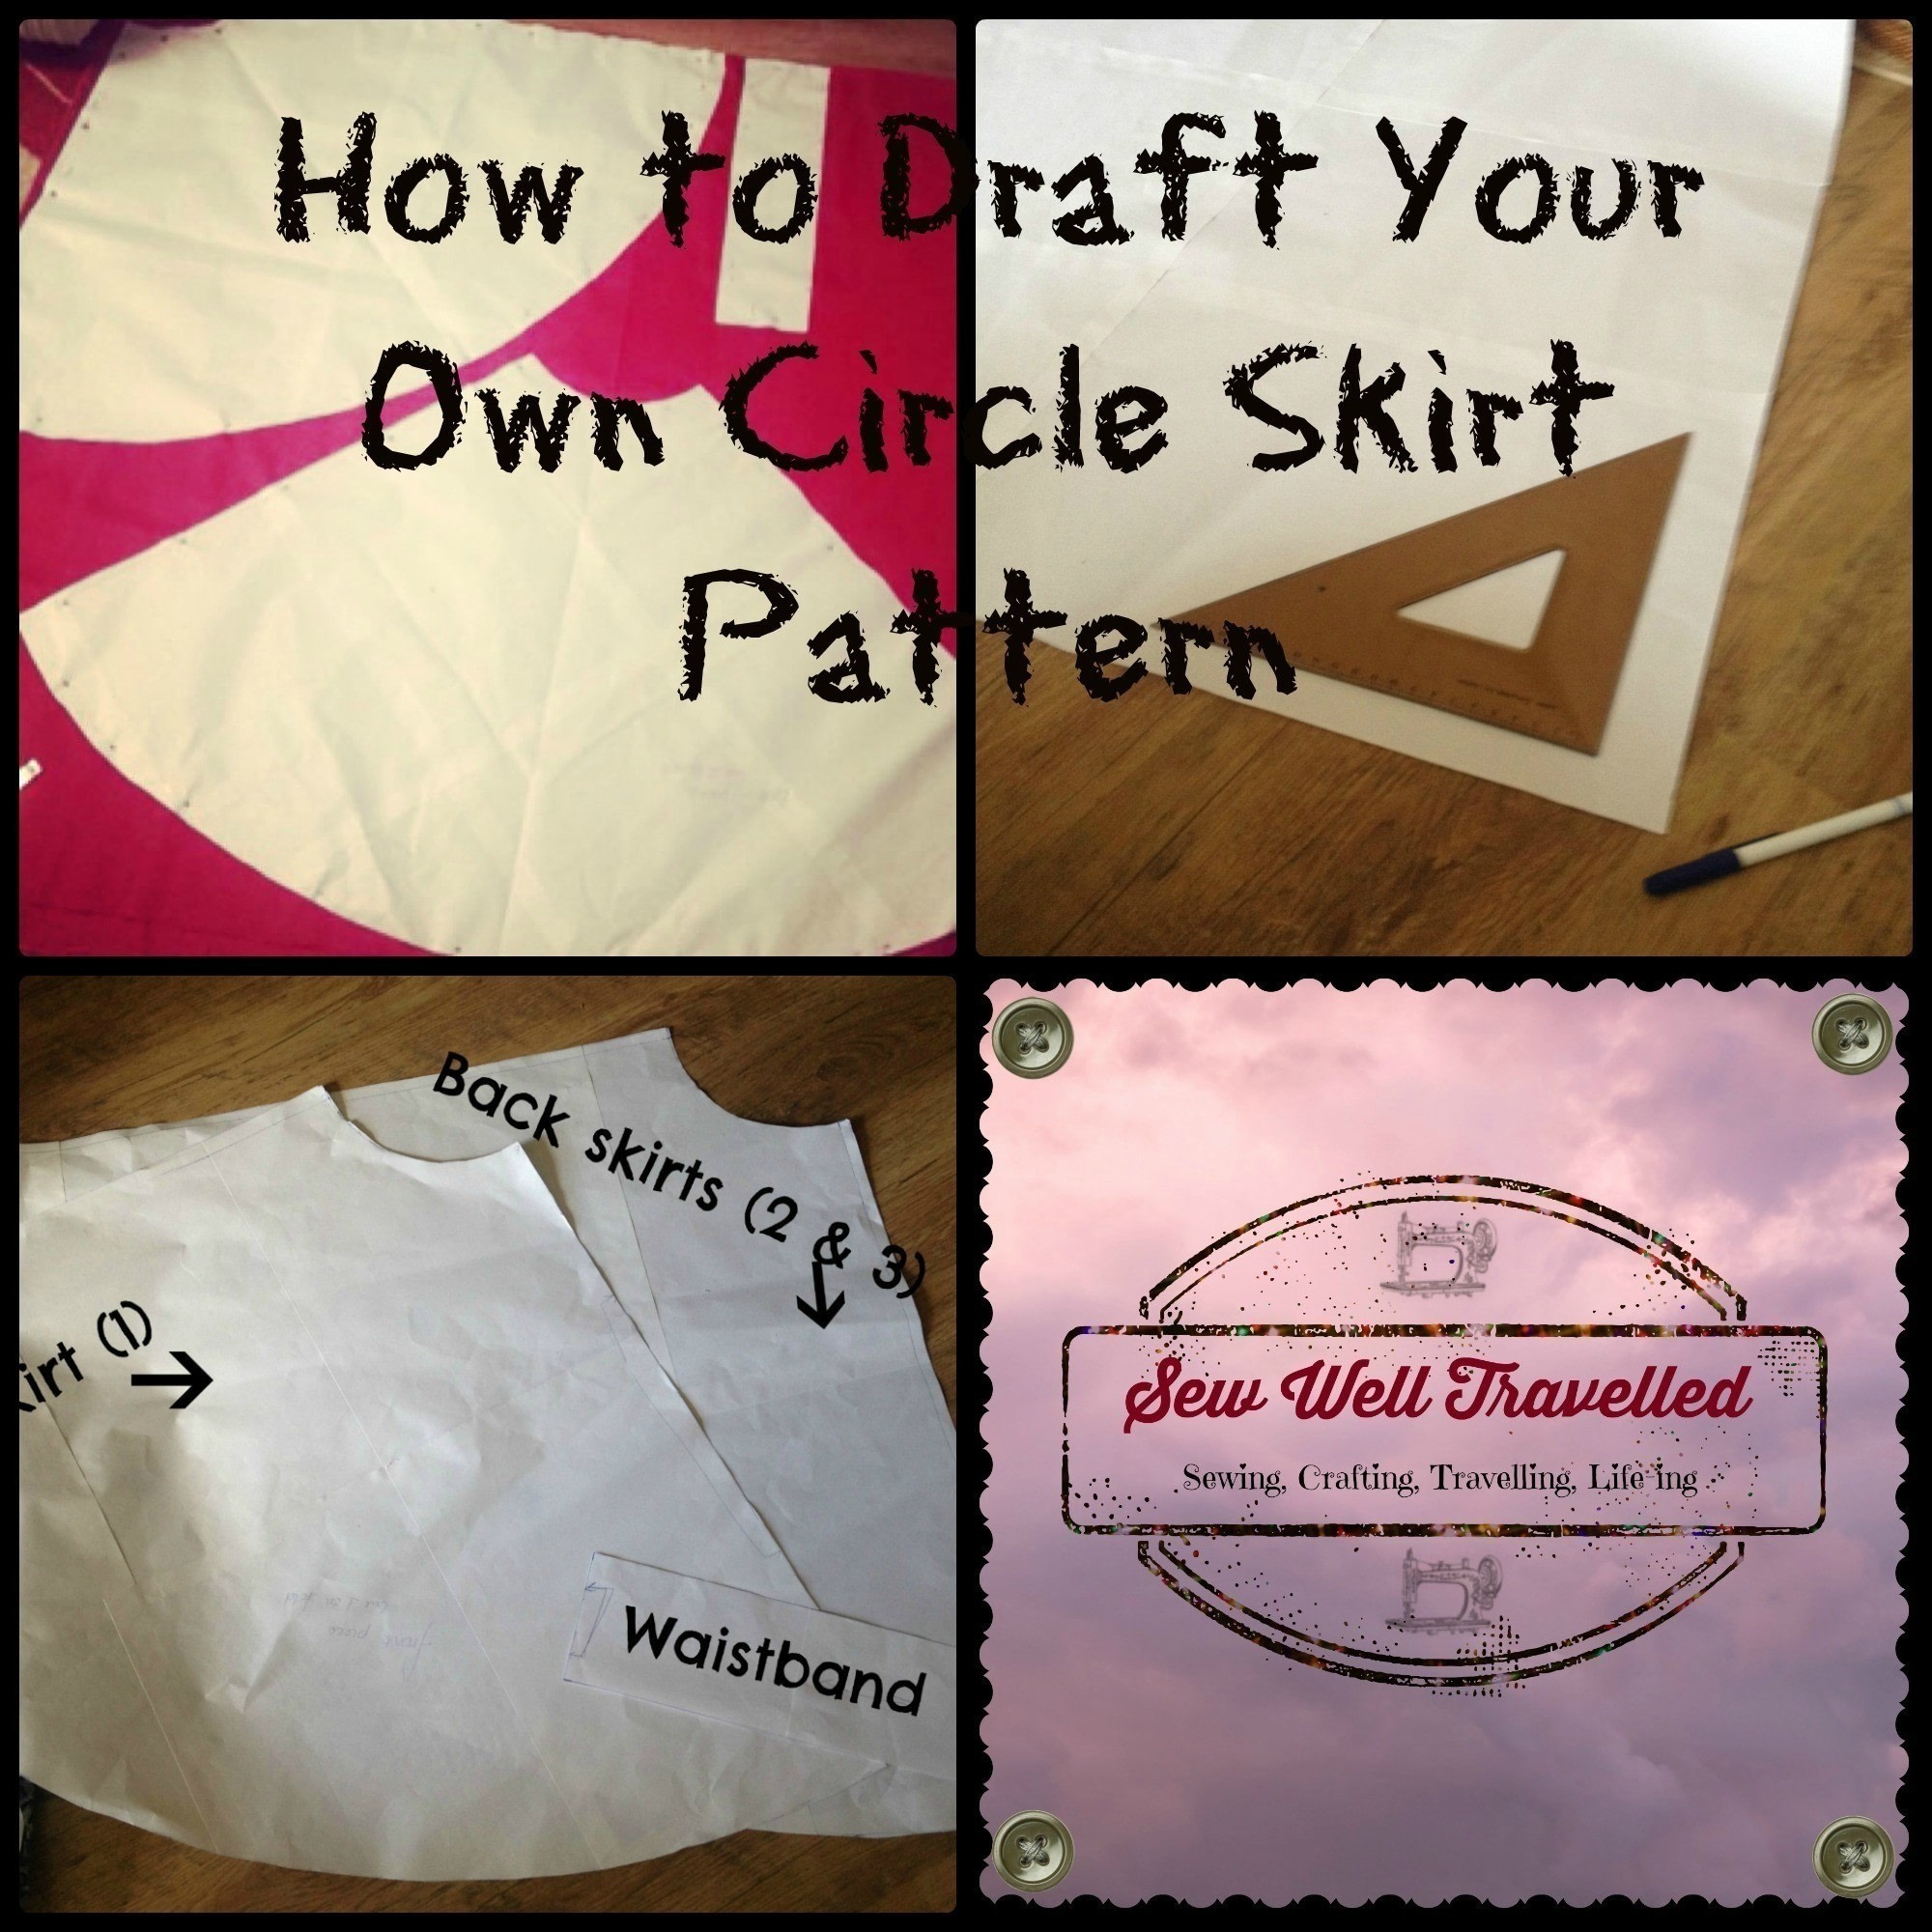
Make a Circle Skirt Pattern from Scratch!
This year I feel like I have mastered pattern drafting in a way that makes sense to me, and lately I have been perfecting circle skirts. This tutorial shows you how to use the magic of maths and paper and tools you are likely to already have to make your own made to measure vintage inspired circle skirt!
Tags
-
 Key West Witch favorited How To Draft Your Own Circle Skirt
28 Jun 18:54
Key West Witch favorited How To Draft Your Own Circle Skirt
28 Jun 18:54
-
 shari.martin2 added How To Draft Your Own Circle Skirt to Skirt patterns
23 Jan 22:44
shari.martin2 added How To Draft Your Own Circle Skirt to Skirt patterns
23 Jan 22:44
-
 Nicole S. favorited How To Draft Your Own Circle Skirt
19 Feb 17:53
Nicole S. favorited How To Draft Your Own Circle Skirt
19 Feb 17:53
-
Ghost C. favorited How To Draft Your Own Circle Skirt
23 Jan 19:23
-
Melissa S. added How To Draft Your Own Circle Skirt to Skirts
19 Jan 16:54
-
Melissa S. favorited How To Draft Your Own Circle Skirt
19 Jan 16:54
-
 kimberley.proctor added How To Draft Your Own Circle Skirt to clothing
03 Nov 15:56
kimberley.proctor added How To Draft Your Own Circle Skirt to clothing
03 Nov 15:56
-
Khatie K. added How To Draft Your Own Circle Skirt to Skirts
24 Oct 08:02
-
Sidney S. favorited How To Draft Your Own Circle Skirt
03 Sep 22:33
-
mapachita favorited How To Draft Your Own Circle Skirt
20 Aug 23:28
You Will Need
-
Step 1
You need to take your waist measurement and the desired length of the skirt. I take the waist measurement snugly so I can just fit 2 fingers between the tape measure and the waist. This way it will hug the body when worn and accentuate your waist. To take the length of the skirt, measure from the point of your waist down to where you want it to stop. For the one I was making it was 67cm, which stops at my friend's knee. But obviously, everyone is different!
-
 Step 2
So I don't use pattern paper or anything for circle skirts, since the pieces are so large it would cost a fortune. Instead I always have a pad of A3 paper on hand and stick about 9 sheets together.
-
 Step 3
Once all the pieces are stuck together you need to draw a right angle in the corner, it doesn't matter which one!
-
Step 4
You now have to do some maths magic, and don't get too excited when I tell you that you get to use pi. Divide your waist measurement by pi (or 3.14 if you don't have a pi button) and then by 2. This will give you the radius of the circle which will form the waist of the skirt. I usually round it to 1 decimal place, but I don't think it would cause too much difficulty if you rounded it to the nearest whole number.
-
 Step 5
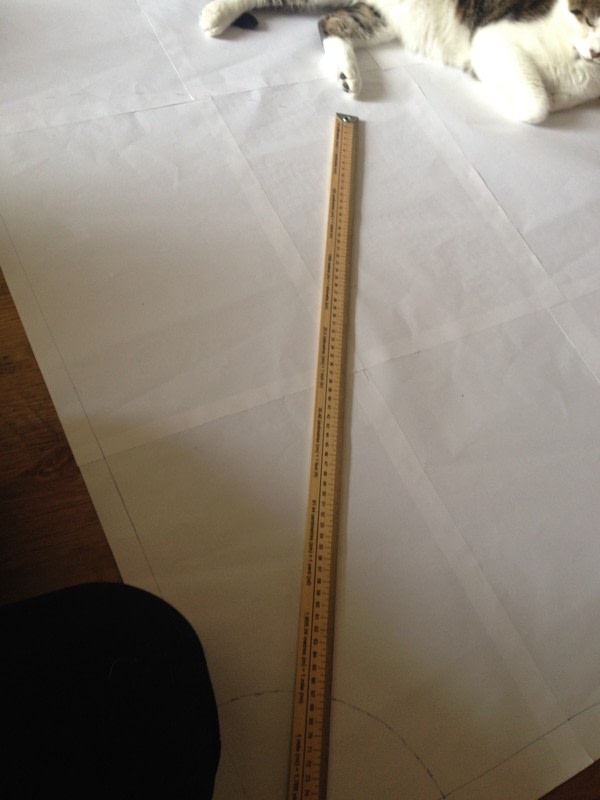
Draw from the point of the right angle straight lines which are the length of your radius. (This was a really difficult instruction to phrase... see photo)
Label the right angle A, the vertical line B and the horizontal line C -
 Step 6
You then need to take your radius and mark a series of points from your right angle between the space B to C. This will form a curve.
Join the dots (YAY!) and you have your waist for your skirt (DOUBLE YAY!). -
Step 7
Now draw a straight line from points B and C - this line should match your skirt length with about 2cm added for seam allowance. Label your new points D and E.
You should now have a corner called A; waist labelled BC; a straight line BD and another CE.
-
 Step 8
Repeat the join the dots interval measurement trick that we did with the waistline to create a curved hem for the skirt.
(For an extra challenge, have a cat chase your ruler whilst you do this)
-
Step 9
Now add a 1.5cm seam allowance to line CE. You can do it from point A to E if you want but we don't actually need to talk about A anymore. A can go.
Add a fold line to line BD. -
Step 10
Cut out and copy this exact pattern onto another piece of pattern paper, but with adding the 1.5cm seam allowance to BOTH lines (CE and BD) this time.
If it helps you keep track, the first pattern piece we made (with the fold line) can be labelled front skirt and piece 1; and the second pattern piece can be labelled back skirts and pieces 2 and 3. Pieces 2 and 3 are cut by cutting 2 pieces of fabric but not on the fold, as we need that centre back seam for the zip. -
Step 11
Make the waistband: Take your original waist measurement and add 8cm to this. This is because of stuff to do with pi which I don't fully understand but intend to work out! Draw a rectangle which is this measurement divided by 2 (in my case 87cm + 8cm = 95cm/2 = 47.5cm ) by 12cm. You can change the 12cm around if you want a wider or narrower waistband, I just think 12cm is a nice width). Add a fold line to one of the shorter sides to the rectangle so that you can cut this on the fold.
-
 Step 12
And once you've done all of that, you should be left with all the pieces you need to make your very own circle skirt which *should* fit you perfectly!