How To Construct An Origami Base
Extract from 3D Origami Fun! • By Stephanie Martyn • Published by F+W Media


About
3D Origami Fun!
The secret to a sturdy 3D origami structure is having a solid base. It may take some time getting used to manipulating the small folded pieces to fit into each other’s pockets and points, but with practice and persistence, this process will become second nature. It is important to glue your base as you construct it. 3D origami structures start off fragile in the beginning, but you will notice that as you continue building, the structure becomes amazingly sturdy. The number of pieces that goes into a base depends on the specific design. This one uses 20 pieces in each row.
Technically, only the orange pieces make up the base, but it’s necessary to have the blue pieces (row 1) to hold the base together. To keep things simple, we’ll consider row 1 as part of the base. Thus, 2 rows of paper make up the base. Refer to the diagram or instructions for each specific project for further information.
-
 FW Media published his project How To Construct An Origami Base
26 Feb 09:00
FW Media published his project How To Construct An Origami Base
26 Feb 09:00
-
 Step 1
Hold 2 folded Size A origami pieces next to each other with their points facing up and smooth sides facing you. These orange pieces represent the foundation of the base. These pieces will not be visible in most structures.
-
 Step 2
You will now add a piece to row 1 of your structure. This is represented by the blue piece. Use your finger to wedge open the bottom pockets of the blue piece. This will make it much easier to insert the orange points. Now place a dab of glue between the points of the orange piece, where your orange and blue pieces will connect. Face the blue piece in the opposite direction (rough side toward you) and insert the orange points into the blue pockets. Push the blue piece as far down as you can.
-
 Step 3
Add 2 more orange pieces on both sides of your working circle. Glue 2 more blue pieces onto the points of the orange piece.
-
 Step 4
Continue repeating step 3.
-
 Step 5
Don’t forget to add glue during these crucial steps; it will keep your base from slipping apart.
-
 Step 6
Once you reach the amount of pieces you need in a row for your base (orange), join both sides with a final piece (blue) to connect the circle.
-
 Step 7
Row 2 should have the same amount of pieces as your base and row 1 (unless your design tells you to increase/decrease).
-
 Step 8
The base will start to shape itself as you work your way up and add more rows. You can help it along by shaping it so that you create a flat bottom (orange pieces). This can be done by scrunching the blue pieces together so their points are facing down. As you do this, you’ll see the pockets of the orange pieces rise in the middle. The pocket edge of the orange pieces make up the flat bottom.
-
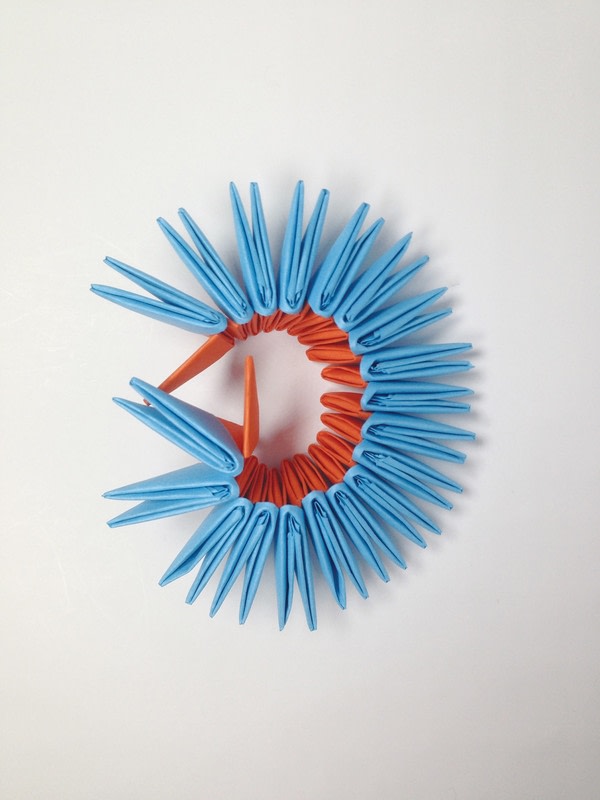
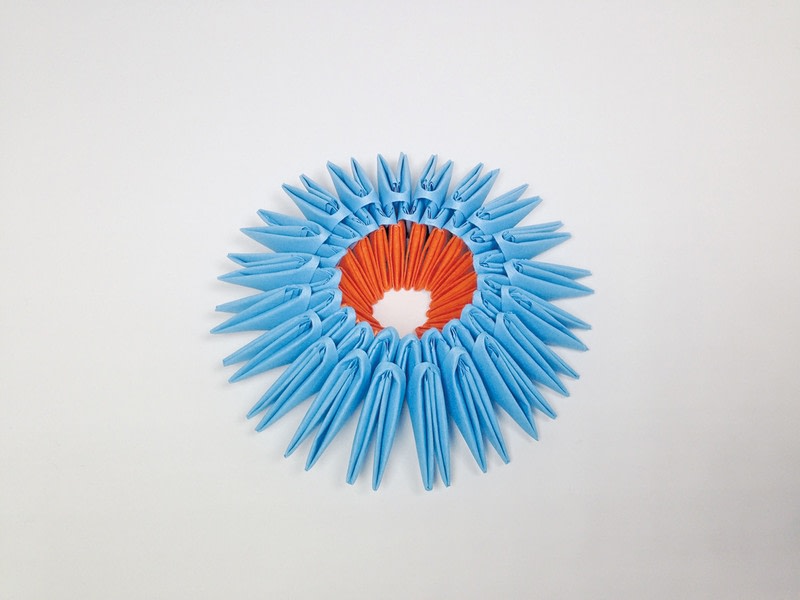
 Step 9
Now flip it over so the orange part is on the bottom and the blue pieces are pointing upward. Your base is complete! Build upward from this while following your project’s colored diagram and see a work of art form before your eyes. Photos show two different angles.