
About
Ombre hair, don't care. Ombre nails don't fail.
Hi everyone!
Here is a post and a video on how I do the ombre pattern on my nails. It seems like the ombre design wasn't as big as before but despite the trend fading away, I still really like the design! It took me a while to learn how to do it. I used to find it very difficult. I could never blend it well. I have tried to find other items to replace the sponge but I felt the sponge was the best choice. If you don't want too much clean up, I do recommend putting tape around your nails, It's just that I dont have that habit.
I also would like to add on the difference between ombre and gradient. I have seen this term used interchangeably but I wasn't too sure of the exact difference. From what I found, an ombre design is when the colors come from the same family from light to dark and vice versa. For example, sky blue to baby blue to periwinkle blue to dark blue. A gradient design is when colors from different shades are mixed and blended together. For example, a sunset. You can see hints of orange and yellow with bits of blue and maybe pink.
I hope you guys will like this nail art! If you have any questions, feel free to ask! Thank you! (:
-
 autumnrose.lee favorited How I Do Gradient Nail Art + Types Of Sponges! (:
11 Mar 11:32
autumnrose.lee favorited How I Do Gradient Nail Art + Types Of Sponges! (:
11 Mar 11:32
-
 kiki w. added How I Do Gradient Nail Art + Types Of Sponges! (: to Makeup
31 Jan 15:34
kiki w. added How I Do Gradient Nail Art + Types Of Sponges! (: to Makeup
31 Jan 15:34
-
Meagan V. favorited How I Do Gradient Nail Art + Types Of Sponges! (:
25 Aug 17:53
-
 autumn rose l. favorited How I Do Gradient Nail Art + Types Of Sponges! (:
13 Aug 21:48
autumn rose l. favorited How I Do Gradient Nail Art + Types Of Sponges! (:
13 Aug 21:48
-
 Jemmy L. favorited How I Do Gradient Nail Art + Types Of Sponges! (:
01 Jul 16:26
Jemmy L. favorited How I Do Gradient Nail Art + Types Of Sponges! (:
01 Jul 16:26
-
 Carissa R. published her project How I Do Gradient Nail Art + Types Of Sponges! (:
02 Dec 13:53
Carissa R. published her project How I Do Gradient Nail Art + Types Of Sponges! (:
02 Dec 13:53
-
Step 1
If you prefer to see a video version of the design, please feel free to take a look at it (: I decided to post a picture version as well! I hope it isn't too repetitive. You can choose either one you prefer.
-
 Step 2
Honestly, I tried various things before sponges since I was reluctant to buy them initially. I tried other things such as tissue paper, cotton pads and cotton buds/qtips but none of them worked as well as a sponge.
Eventually, I resorted to buying a sponge. But I wasn't sure which type would work better. So before I started, I did a small experiment on the different types of sponges.
The first sponge is from the dollar store, second is a kitchen sponge and the last sponge are those you find in new bags or items.
-
 Step 3
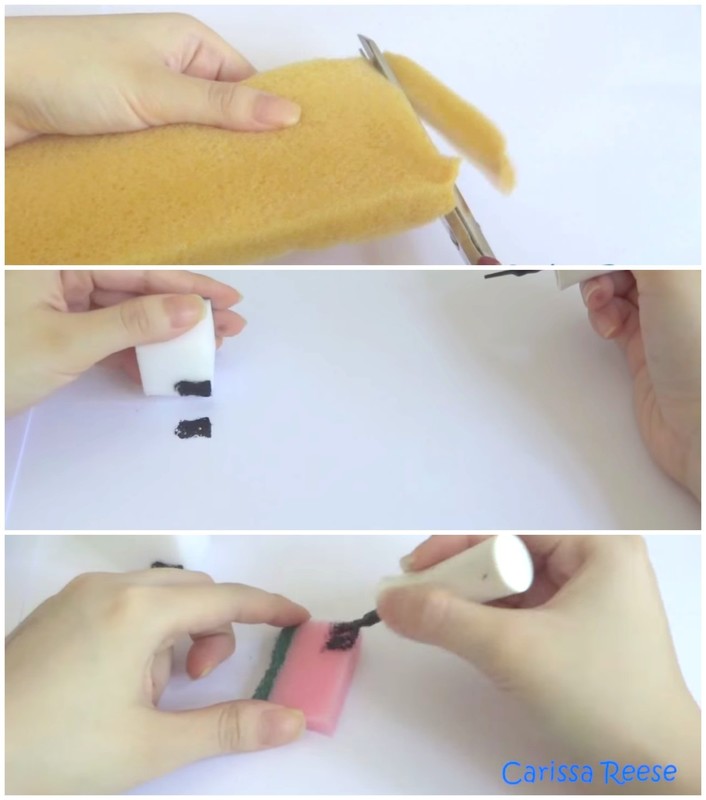
I cut up the large sponges since I felt that I didn't need such a big piece.
To make the experiment fair, I applied 2 coats of black nail polish on each of the sponge.
It doesn't matter if the sponge absorbs the nail polish, I still made 2 coats each.
-
 Step 4
Then, I dab it onto a piece of paper to see the results.
I feel that it doesn’t matter what kind of sponges you used, as long as the sponge has little holes compared to a coarse sponge in terms of texture with bigger holes.
Sometimes the nail art might not look smooth but once you apply a top coat, it will look better.
-
 Step 5
The items I used are the base coat, white, blue and dark blue nail polish , the top coat, a brush and cotton pads to remove any mess.
-
 Step 6
Moving onto the nail art itself, start by applying a base coat to protect your natural nails.
These steps are optional but you can choose to put tape around your nails to prevent your cuticles from getting nail polish around it. I decided to skip that since I didn’t want the hassle. I mean you can easily use nail polish remover later on.
You can choose to paint the base color white to make the colors appear brighter and more opaque. (But again, I skipped that step. I just added this picture here.)
Since this is for the base, you do not need to apply a very thick layer because the other colors will cover it up later on. A thin coat should do just fine.
You can choose to skip this step but you will need to put 2 or 3 coats of nail polish later on. To do that, just dab the sponge a few more times.
-
 Step 7
Next, I apply all 3 nail polish colors onto the sponge close to each other.
-
 Step 8
To enhance the gradient effect, I use my brush to blend the colors together.
-
 Step 9
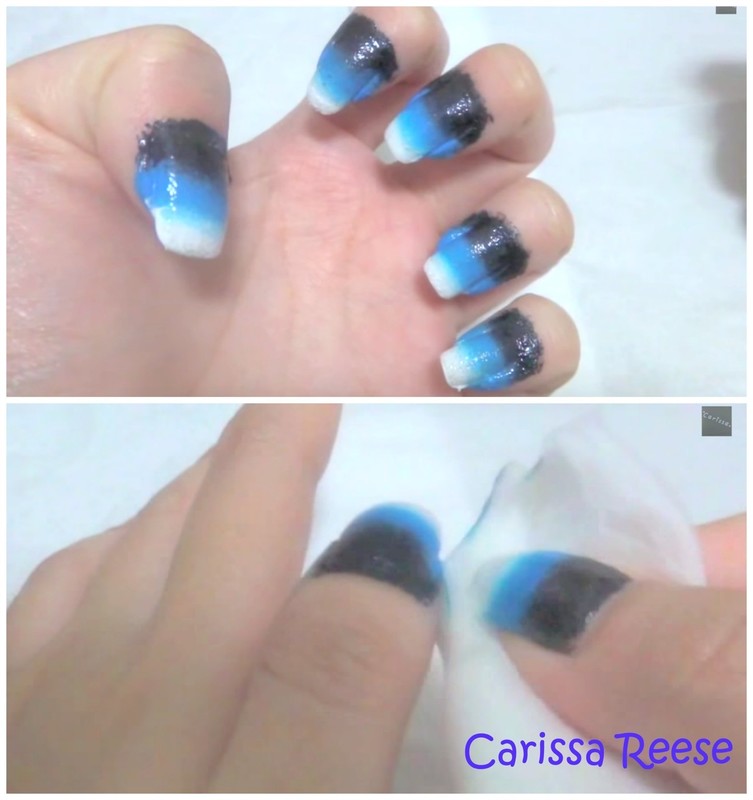
Then, taking the sponge, I press the sponge onto my nails to transfer the colors. The colors came out a little too light especially since I did not apply the white base coat. So I apply the nail polishes onto the sponge, blended the colors again and transfer it over. I used 2 coats of nail polish.
-
 Step 10
Once you done, due to the sponge, there will be some mess around your nails. I take a cotton pad and remove any excess mess.
-
 Step 11
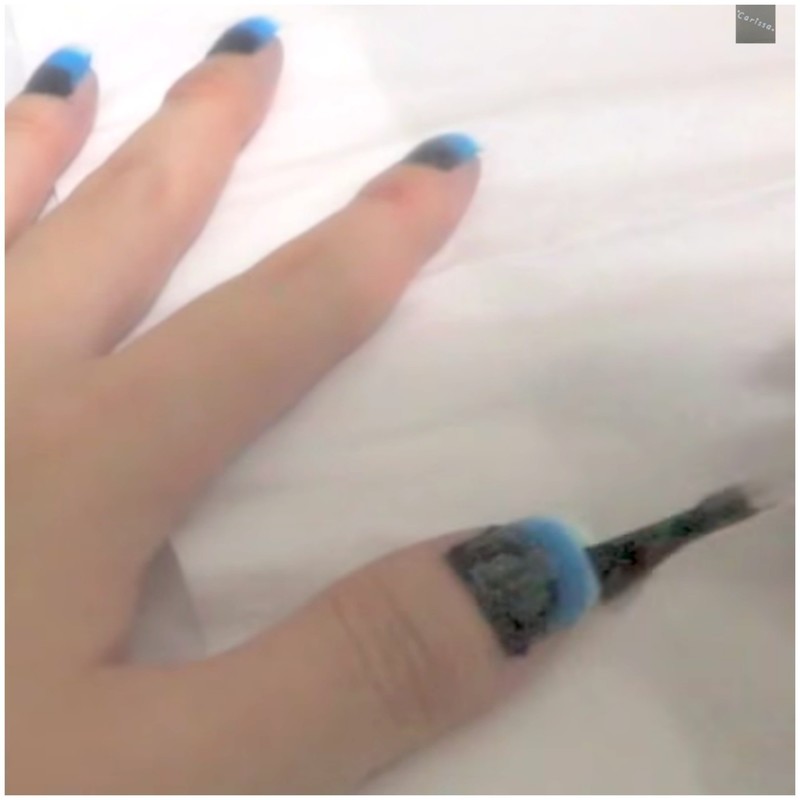
Applying the top coat helps to give your nails a shine, seal in the design and to prevent the nail polish from chipping off. Make sure your nails are dry when applying the top coat if not smudging will occur.
As for me, instead of using an ordinary plain top coat, I used one with a bit of glitter to give the design a slight shimmer.
-
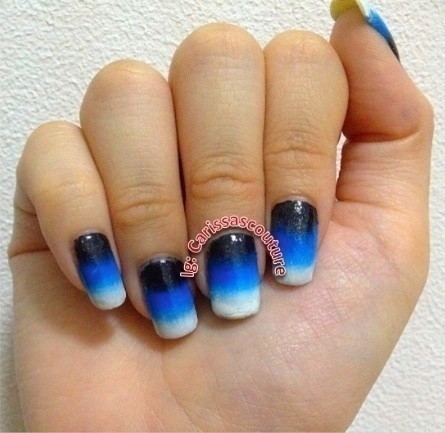
 Step 12
We have come to the end of my gradient nail art. I hope you will find it helpful. If you have any questions, feel free to ask! (: