


About
Or, as I like to call it, how to have hair like Merdia from Brave!
Before we get started lets lay some ground rules, as well as go over some henna misconceptions.
1) DO NOT USE ANYTHING METAL when handling henna! Okay? Metal reacts with henna. This is bad. Don't use a metal pot, don't stir your henna with a metal spoon!!
2) There is only one kind of Henna. What, you ask? You've seen black henna? Blond henna? Well, I'm sorry to tell you, but henna (that is, the plant called Lawsonia Inermis) only comes in red! There is no black henna, or blond henna, only red henna! Be carful what you buy; those other things are usually only 1%-10% henna, and can contain harmful chemicals and metals and other dyes. I would suggest only buying 100% Lawsonia Inermis!
3) That being said, there are different organic things you can do to henna to bring out different colors. For example, you can add fresh coffee (darker red), tea, yogurt, lemon (lightens color), and other organic materials to change the color of the henna. Just make sure its organic! No metals!
4) Always do a strand test before dying your hair. Mix up a little bit of henna with some hot water and dye some hair from your hairbrush. You should do four strand tests--leaving each one on for 30 min, 1 hour, 2 hours and 3 hours. Pick what color you like best and that is how long you will leave the henna on your hair!
5) I bought my henna from this etsy shop. (http://www.etsy.com/shop/hennaking) I did have to use two packs on my hair, but I have very very thick hair.
6) This henna will dye your skin also. Or your forehead. Be careful! On my pale skin it only took about 3-5 minuets to change my creamy completion to pumpkin orange. Use a friend to help spot check you!
The henna that falls on the floor that got on my shower did not dye the floor or shower. Even when it stuck on there for awhile--just to let you know. Your shower/floor maybe be different through, so don't take my word for it! The henna did, however, irreversibly stain the clothes I was wearing, so don something you don't mind discarding after this (or saving for future henna treatments!)
Okay, now on to the tutorial!
Tags
-
 Carla B. commented on Henna Hair Tutorial
20 Jan 00:53
Carla B. commented on Henna Hair Tutorial
20 Jan 00:53
-
 Stitches added Henna Hair Tutorial to Project 1
16 Jan 05:12
Stitches added Henna Hair Tutorial to Project 1
16 Jan 05:12
-
Stitches favorited Henna Hair Tutorial
16 Jan 05:12
-
breanna w. favorited Henna Hair Tutorial
23 Jun 04:09
-
 Nina H. favorited Henna Hair Tutorial
02 Jun 10:24
Nina H. favorited Henna Hair Tutorial
02 Jun 10:24
-
 Monice M. favorited Henna Hair Tutorial
19 May 07:35
Monice M. favorited Henna Hair Tutorial
19 May 07:35
-
 Ariane D. favorited Henna Hair Tutorial
23 Oct 17:13
Ariane D. favorited Henna Hair Tutorial
23 Oct 17:13
-
 psychedelesis favorited Henna Hair Tutorial
18 Aug 00:59
psychedelesis favorited Henna Hair Tutorial
18 Aug 00:59
-
 Rachael T. favorited Henna Hair Tutorial
29 Jul 21:11
Rachael T. favorited Henna Hair Tutorial
29 Jul 21:11
-
 GothicYolita favorited Henna Hair Tutorial
28 Jul 04:24
GothicYolita favorited Henna Hair Tutorial
28 Jul 04:24
You Will Need
-
 Step 1
Did you skip the introduction? (in summery above) If so, shame on you. Go back and read it RIGHT NOW, or you might turn out looking like an oompa loompa. Seriously!
-
 Step 2
YOU WILL NEED:
A pair of gloves
Scissors
A plastic bag or bowl
Henna
Hair clips (for long hair)
Plastic spoon (I just used my hands)
Lemon (optional)
blow dryer (optional) -
 Step 3
1) Poor your henna into a plastic bowl or bag. Yes, it smells like really strong green tea. Yes, your hair will smell like that for 1-2 washes. Personally, I like the smell.
2) Don your gloves!
3) I added a lemon to lighten the henna.
4) Now add hot water. I used 200 grams of henna and about 3-4 cups of hot water. You want your henna to look like thick pancake batter. Just add one cup slowly as you stir and mash, until you get the required consistency.
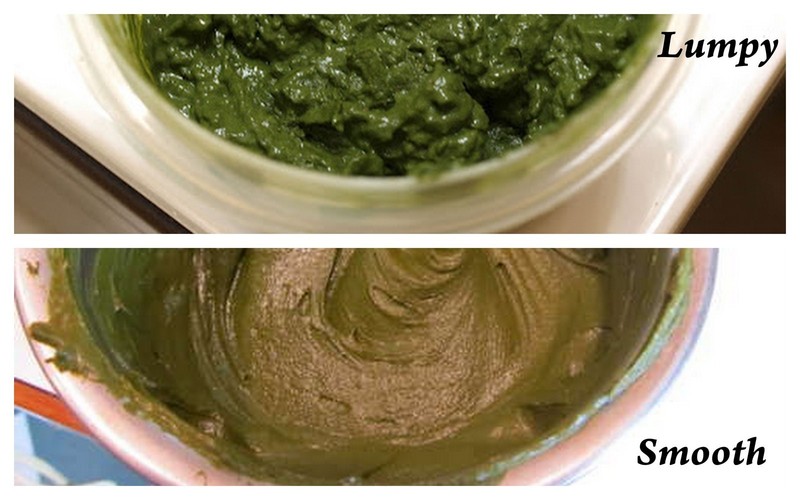
5) Mash your henna all up or stir with a plastic spoon/fork. There will be lumps. Now, cover your henna and let it sit for 30 minuets to 2 hours. Some people even let their henna sit overnight. I don't do that. 30 min is good for me. -
 Step 4
After your henna is smooth,
Now it is time to APPLY YOUR HENNA!
(Are you excited? I'm exited!) -
 Step 5
Pin up sections of your hair. Acknowledge you look like an idiot.
-
 Step 6
Apply henna like you would any hair color treatment. Start at your roots and go down.
At this point the henna is like mud. It will get everywhere. Clean it off your skin and anything else you think might stain, but its just a fact. Henna is really messy and never stays in one place.
-
 Step 7
When you are done with one side, flip it all up on your head and secure with clips so it can soak while you do the other side.
-
 Step 8
Do the other side of your hair. Realize your arms hurt.
Also before putting on the shower cap do a quick check all over to make sure there are no dry spots!
-
 Step 9
Cap yourself!
Now comes the hard part. Based on your strand test (you did a strand test, right?) leave the henna on your hair for anywhere between 30 minutes to 3 hours. I left mine on for about 3 hours.
Some people put heat on their hair while waiting (via a blow dryer) I did that the first time and it made my hair to orange, so I'm not doing it today.
Also, don't let your hair dry out. Henna needs to be moist (that is why you wear a cap) for the whole time its on your head. If it dries out it is no longer dying your hair.
-
 Step 10
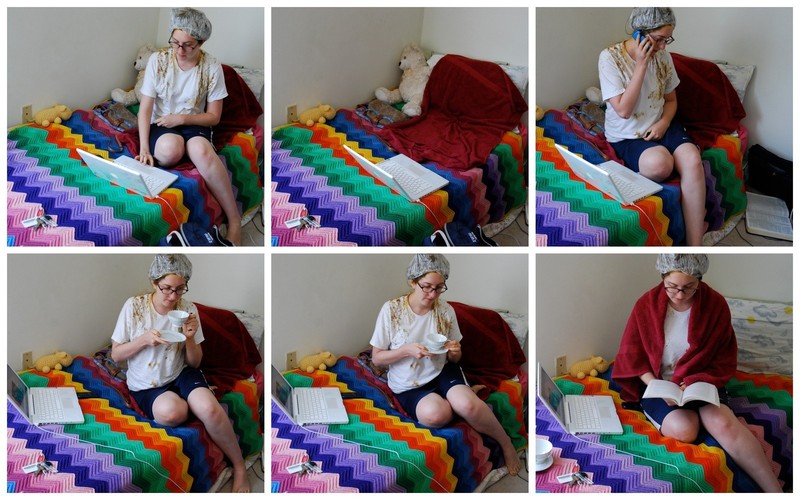
Amuse yourself while feeling like a green-tea mud-yuck-slime monkey.
-
 Step 11
After the appropriate time has passed, wash out the henna from your hair (still wearing your gloves or you WILL dye your fingernails orange) and get all dressed up to take pictures with your new color! I hope it turned out well!
Please check out my web-sight for more hair tutorial and sewing how-tos! http://ruthography.blogspot.com/
Some further notes:
Henna does fade over time. Mine seems to need reapplication every 2-3 months. I'll be sure to post pictures of what it looks like after each wash :) Stay tuned! And I'd love to see what color red yours turned!
Henna also turns out different on everyone's hair. It does not really "dye" your hair more as it "coats" your hair in a red color, making each hair different based on what color you start out with.
Happy Henna-ing :)


I order mine through:
http://www.mehandi.com/SearchResults.asp?Cat=170
It doesn't fade for a very long time, because - left on long enough - it soaks all the way to the center of your hair's core (As opposed to just *to* the core). My hair was/ is going gray/white, and this stuff is amazing. The key really is that plastic covering! If the henna dries, it can break - and take your hair with it! The plastic (&It can even just be a plastic grocery bag tired on! ) holds the moisture in, keeping the henna working.
A few side notes on henna:
1. It is a natural deep conditioner for your hair, adding amazing strength, fullness, and luster.
2. It is an effective anti-dandruff treatment
3. It is a natural lice repellant!
4. Used to dye the skin, it has not only many beautiful design possibilities, but in some cultures is often thought to ensure a happy, prosperous & fertile marriage, for brides
5. In those same cultures, is often believed to bring blessings and good health to both mother and child, when used to dye designs onto the sweet, bulging bellies of pregnant moms!
Happy Henna-ing!
I always understood that the color from henna mixes with something inside the hair. This stuff inside the hair is what gives each hair it's own color. Since henna only adds to that the strands will slightly differ, making it look more realistic than dyes that coat and thus mask the natural differences of the hair.
I also read on a henna site that mixing it with the plant that makes indigo can get you brown to black hair and there was some other plant that will make it more yellow-ish. Unfortunately the link was lost from my bookmarks.
Anyway, sorry for this epistle. Great tutorial, though I always get my boyfriend to put the goo in my hair while I wear a towel around my neck to protect everything below it. ;) Less messy for me.