

About
Easy loom knit hello kitty bow + how to use a Knifty Knitter
This is both a tutorial for the Hello Kitty bow AND how to use a Knifty Knitter.
This can work on ANY size loom. I used the smallest Knifty Knitter loom (the peach one), but for tinier bows i use the bloom-knitting loom. All of the steps apply, but you have to turn the bottom out the top of the loom much sooner.
Tags
-
 Julie R. favorited Hello Kitty Loom Knit Bow
30 Oct 19:31
Julie R. favorited Hello Kitty Loom Knit Bow
30 Oct 19:31
-
 Angzii Attackz favorited Hello Kitty Loom Knit Bow
21 Jan 01:29
Angzii Attackz favorited Hello Kitty Loom Knit Bow
21 Jan 01:29
-
 Stefunny128 favorited Hello Kitty Loom Knit Bow
31 Oct 02:46
Stefunny128 favorited Hello Kitty Loom Knit Bow
31 Oct 02:46
-
 Heather P. favorited Hello Kitty Loom Knit Bow
07 Feb 04:53
Heather P. favorited Hello Kitty Loom Knit Bow
07 Feb 04:53
-
 Mai added Hello Kitty Loom Knit Bow to jewelry and hair stuff
21 Jan 03:46
Mai added Hello Kitty Loom Knit Bow to jewelry and hair stuff
21 Jan 03:46
-
 Claire M. favorited Hello Kitty Loom Knit Bow
31 Oct 20:31
Claire M. favorited Hello Kitty Loom Knit Bow
31 Oct 20:31
-
Franchesca Angelou d. favorited Hello Kitty Loom Knit Bow
08 Aug 18:43
-
 Step 1
Get your supplies.
Scissors
Knitting needle
Yarn ((i use lion brand))
Smallest Knifty Knitter Loom ((peach))
Knitting hook -
 Step 2
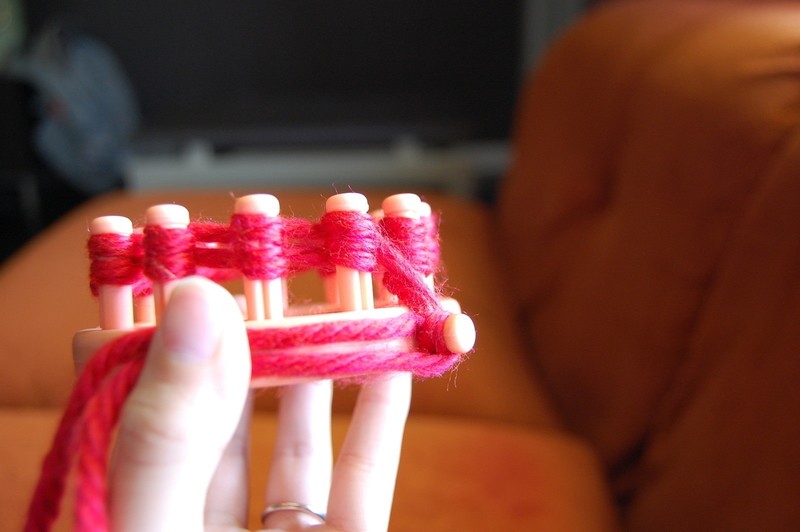
Start off by wrapping a good three inches around your knitting notch.
Loop all the way around your loom til you get back to the notch.
-
 Step 3
Slide your yarn half way down your pegs.
-
 Step 4
Repeat step 2 then wind your attached string around your notch.
-
 Step 5
Hook your yarn to the right of the notch and flip over the top of the peg and repeat until you've come full circle. Repeat steps 2-5. Repeat. Repeat. Repeat.
-
 Step 6
Once your product is even with the bottom of the loom, unhook the yarn on your notch and let it dangle.
-
 Step 7
Once you've made a good three inches.. Turn over your loom ((it's easiest to do on a flat surface)).
-
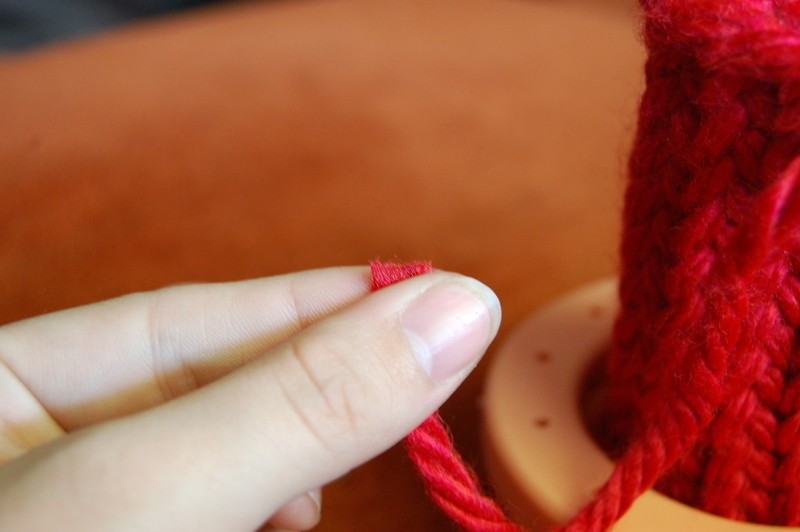
 Step 8
Cut your dangling thread ((NOT YOUR THREAD THAT'S ATTACHED TO YOUR YARN BALL)) so you can thread it through your knitting needle.
-
 Step 9
Thread through all top row and sinch as you go along.
-
 Step 10
Sinch completely and knot off twice.
-
 Step 11
Resume knitting until you've reached your desired length ((mine is more scrunchy, so until you can fold it to meet the ends comfortably, but you can go however long you want)).
-
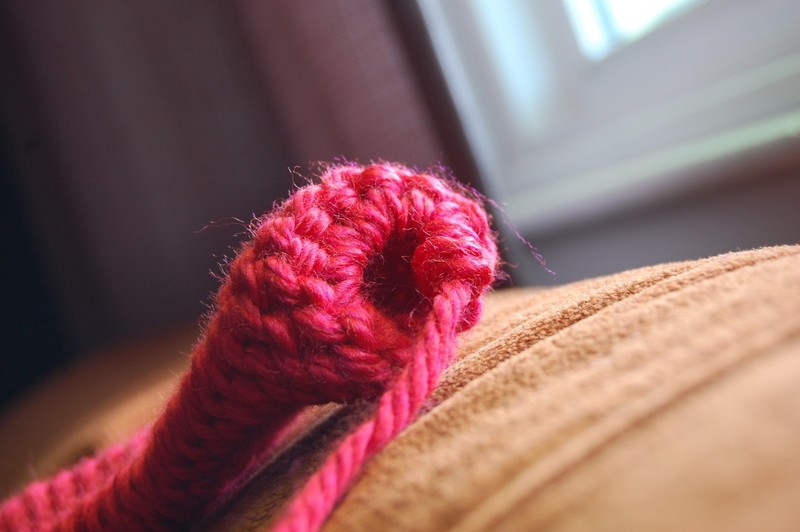
 Step 12
GENTLY turn your product inside out so it's coming out of the top of the loom instead of the bottom ((this is so we have a nice round top)).
-
 Step 13
Wrap your attached yarn around your loom 1.5 times ((so you have a nice length to work with)) and cut. Thread your needle.
-
 Step 14
Start with the peg to the right of your notch and hook your needle under the yarn and slide it onto your needle, lifting it off of the peg. Repeat til you have come full circle.
-
 Step 15
Sinch and knot twice. Lay out flat so all the pattern is going in the same direction.
-
 Step 16
Keeping the string intact, thread through the opposite end of your bow. Pull tight.
-
 Step 17
Center your bow. Thread to the front of the bow ((pick a nice loop to go to the right of and go back down to the left of)). Pull tight.
-
 Step 18
Come up to the left of your favorite loop and back down on the right of the same loop. Pull tight and knot twice. Cut thread.
-
 Step 19
With your ball of yarn, take a good five inches ((still attached)) and center it, with a good five inches on one side, in the middle front of your bow. Flip over and tie tight.
-
 Step 20
Keeping your loose yarn to the left of the bow, wind ((with front of bow in view)) around your bow. Make it as thick or thin as you like. Flip over and double knot.
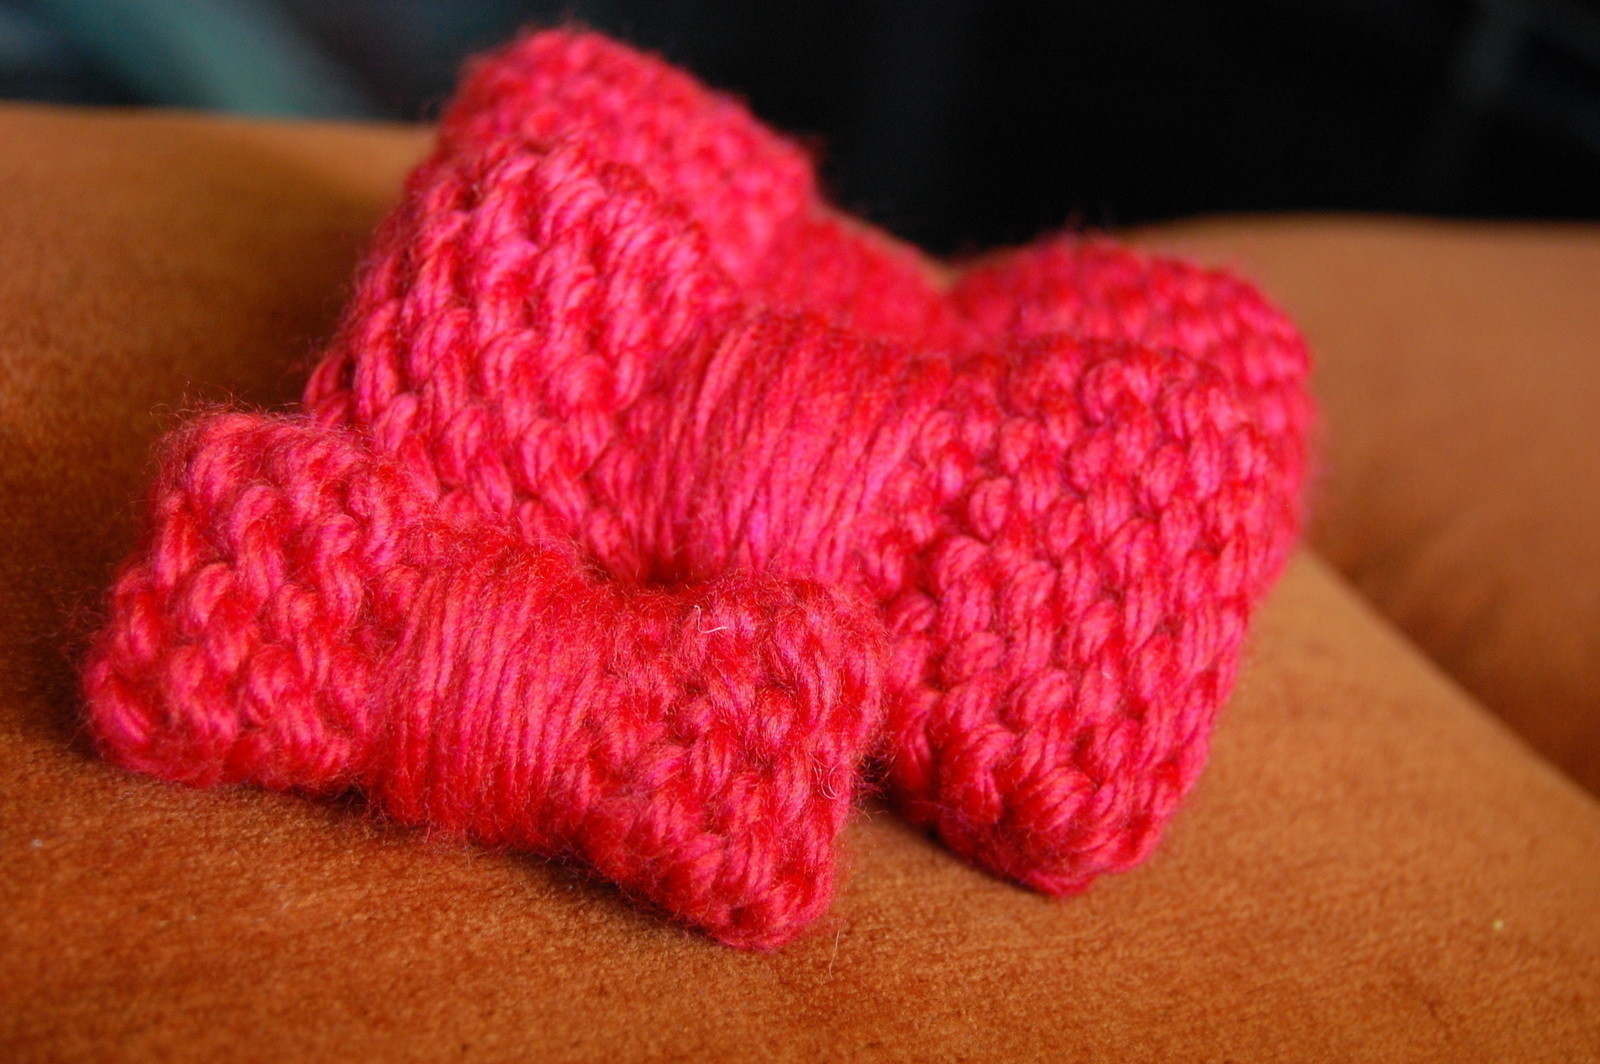
AND THERE'S YOUR BOW
-
 Step 21
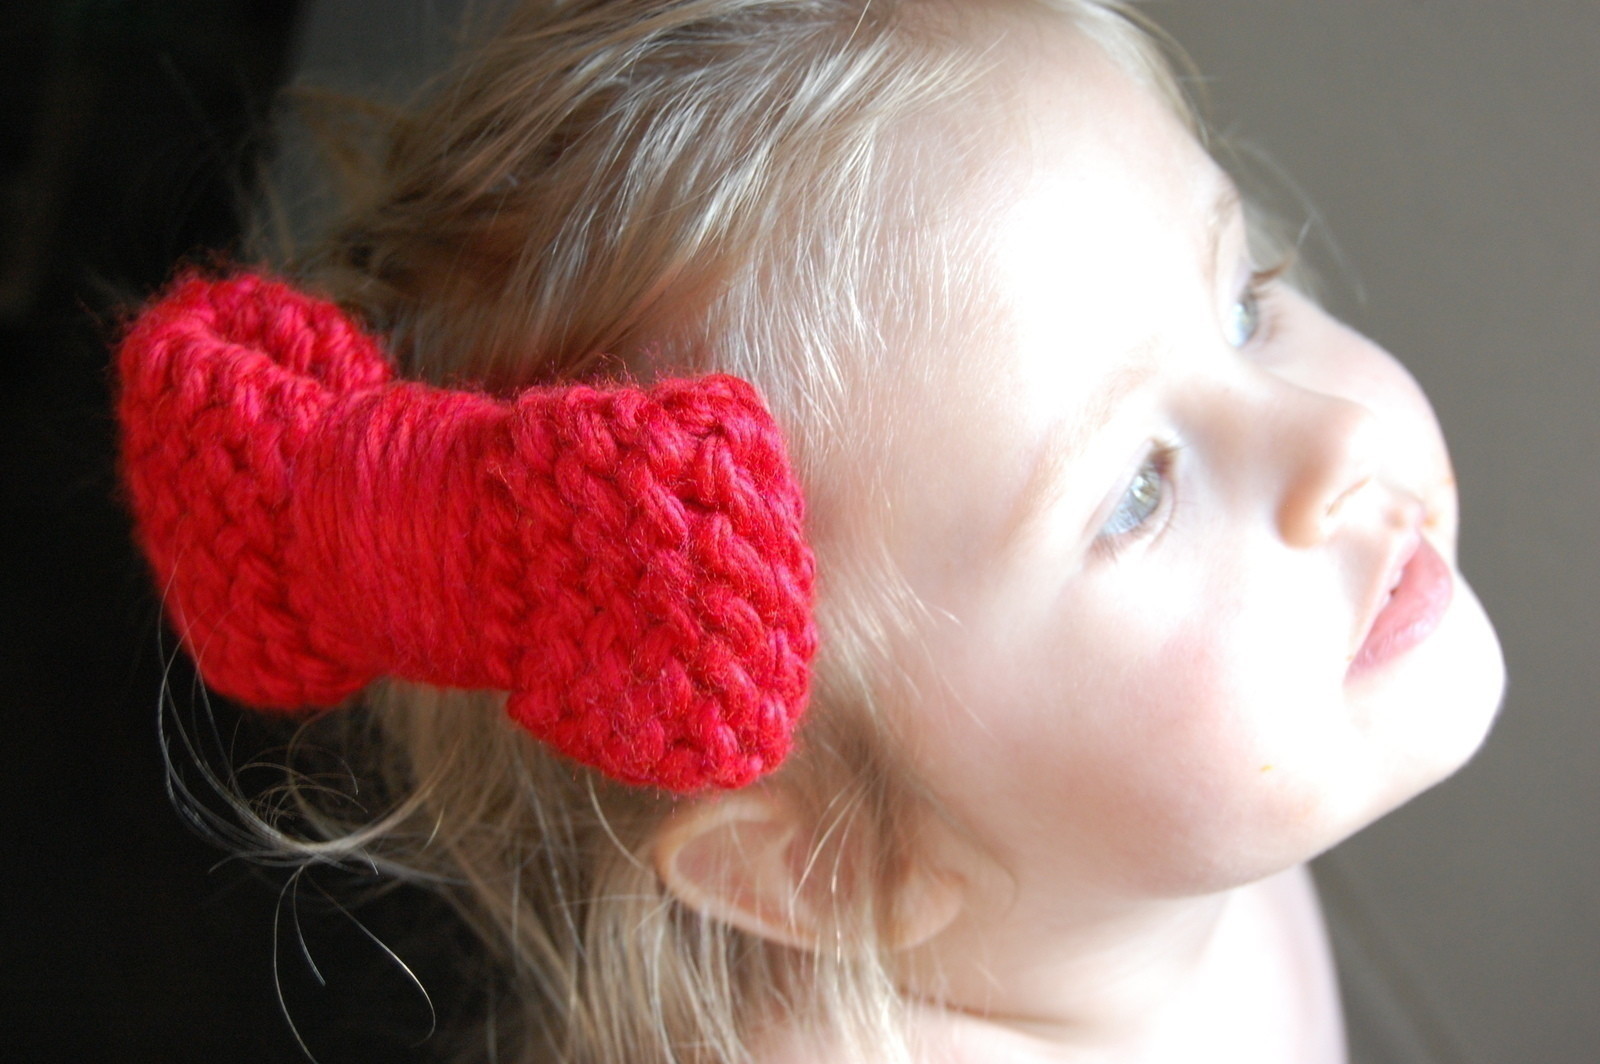
You can attach these to headbands, hats, or clips. I've got a few options for you.
-
 Step 22
For a hair clip, LAZY VERSION, I've taken a 1.75" snap clip and just put it through a couple of the strings in the back.
-
 Step 23
For a hair clip, NOT SO LAZY VERSION, I've taken a 1.75" snap clip and put it through a couple of the strings in the back and sew both the bottom and top to the bow.
-
 Step 24
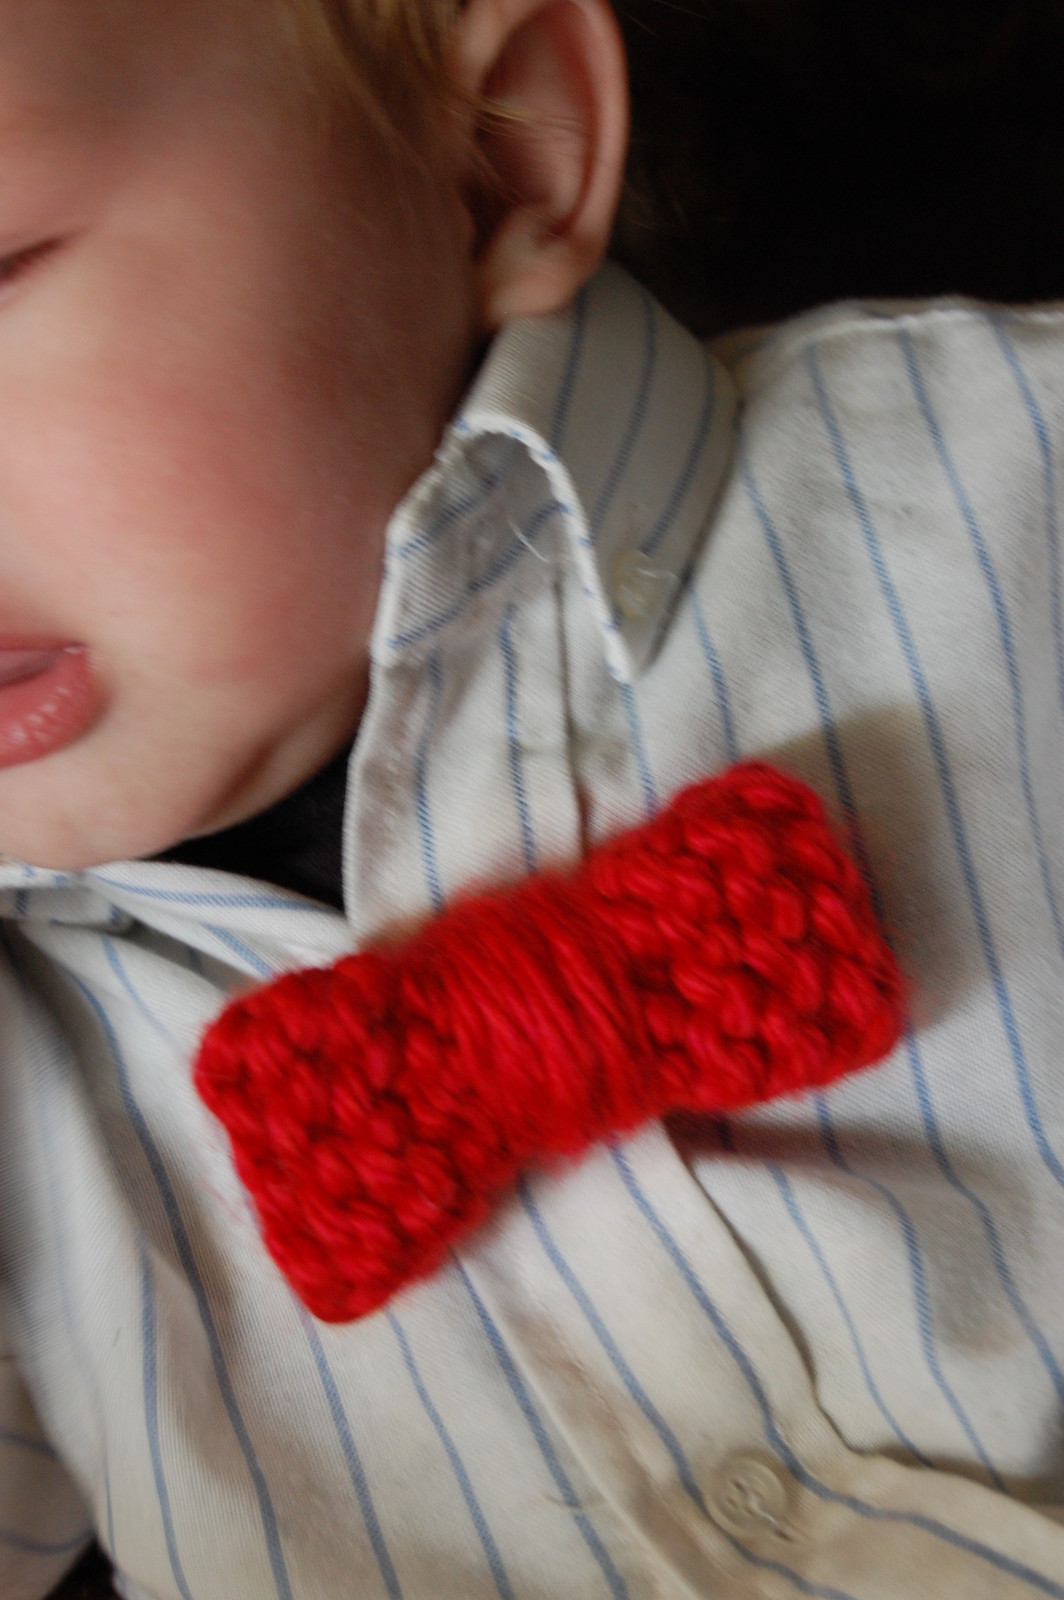
Or for a bowtie, i just slipped an alligator clip through some of the strings.


 1
Books & Journals »
Locking Box And Journal
1
Books & Journals »
Locking Box And Journal
 2
Babies & Kids »
A Toy Kitchen For A Child
2
Babies & Kids »
A Toy Kitchen For A Child
 3
Origami Flowers »
Origami Orchid
3
Origami Flowers »
Origami Orchid
 4
Office »
Pretty Sketchbooks
4
Office »
Pretty Sketchbooks
 5
Charms & Keyrings »
Shugo Chara Inspired Pop It
5
Charms & Keyrings »
Shugo Chara Inspired Pop It


i have those knitting looms as well, but i never used them, normal knitting is by me much quicker.LOL
hey well done!!!;-D really adorable!!!