
About
A Cute Heart-themed Adjustable Apron with KAMsnaps
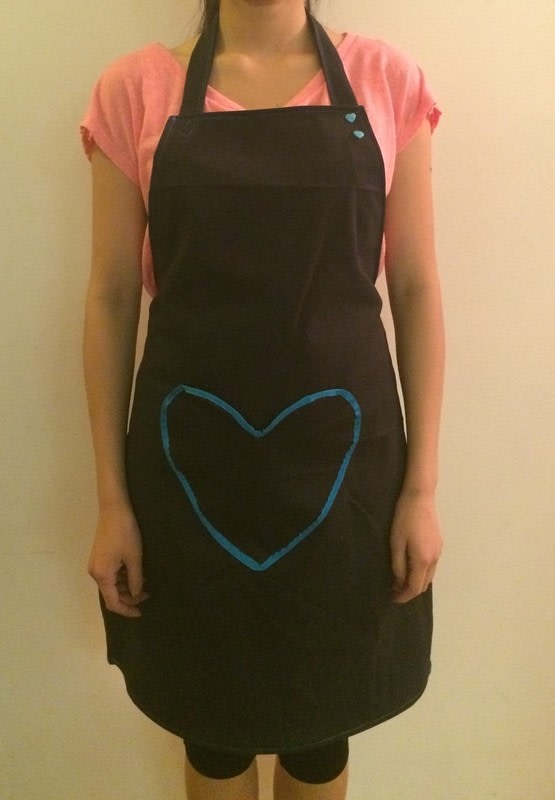
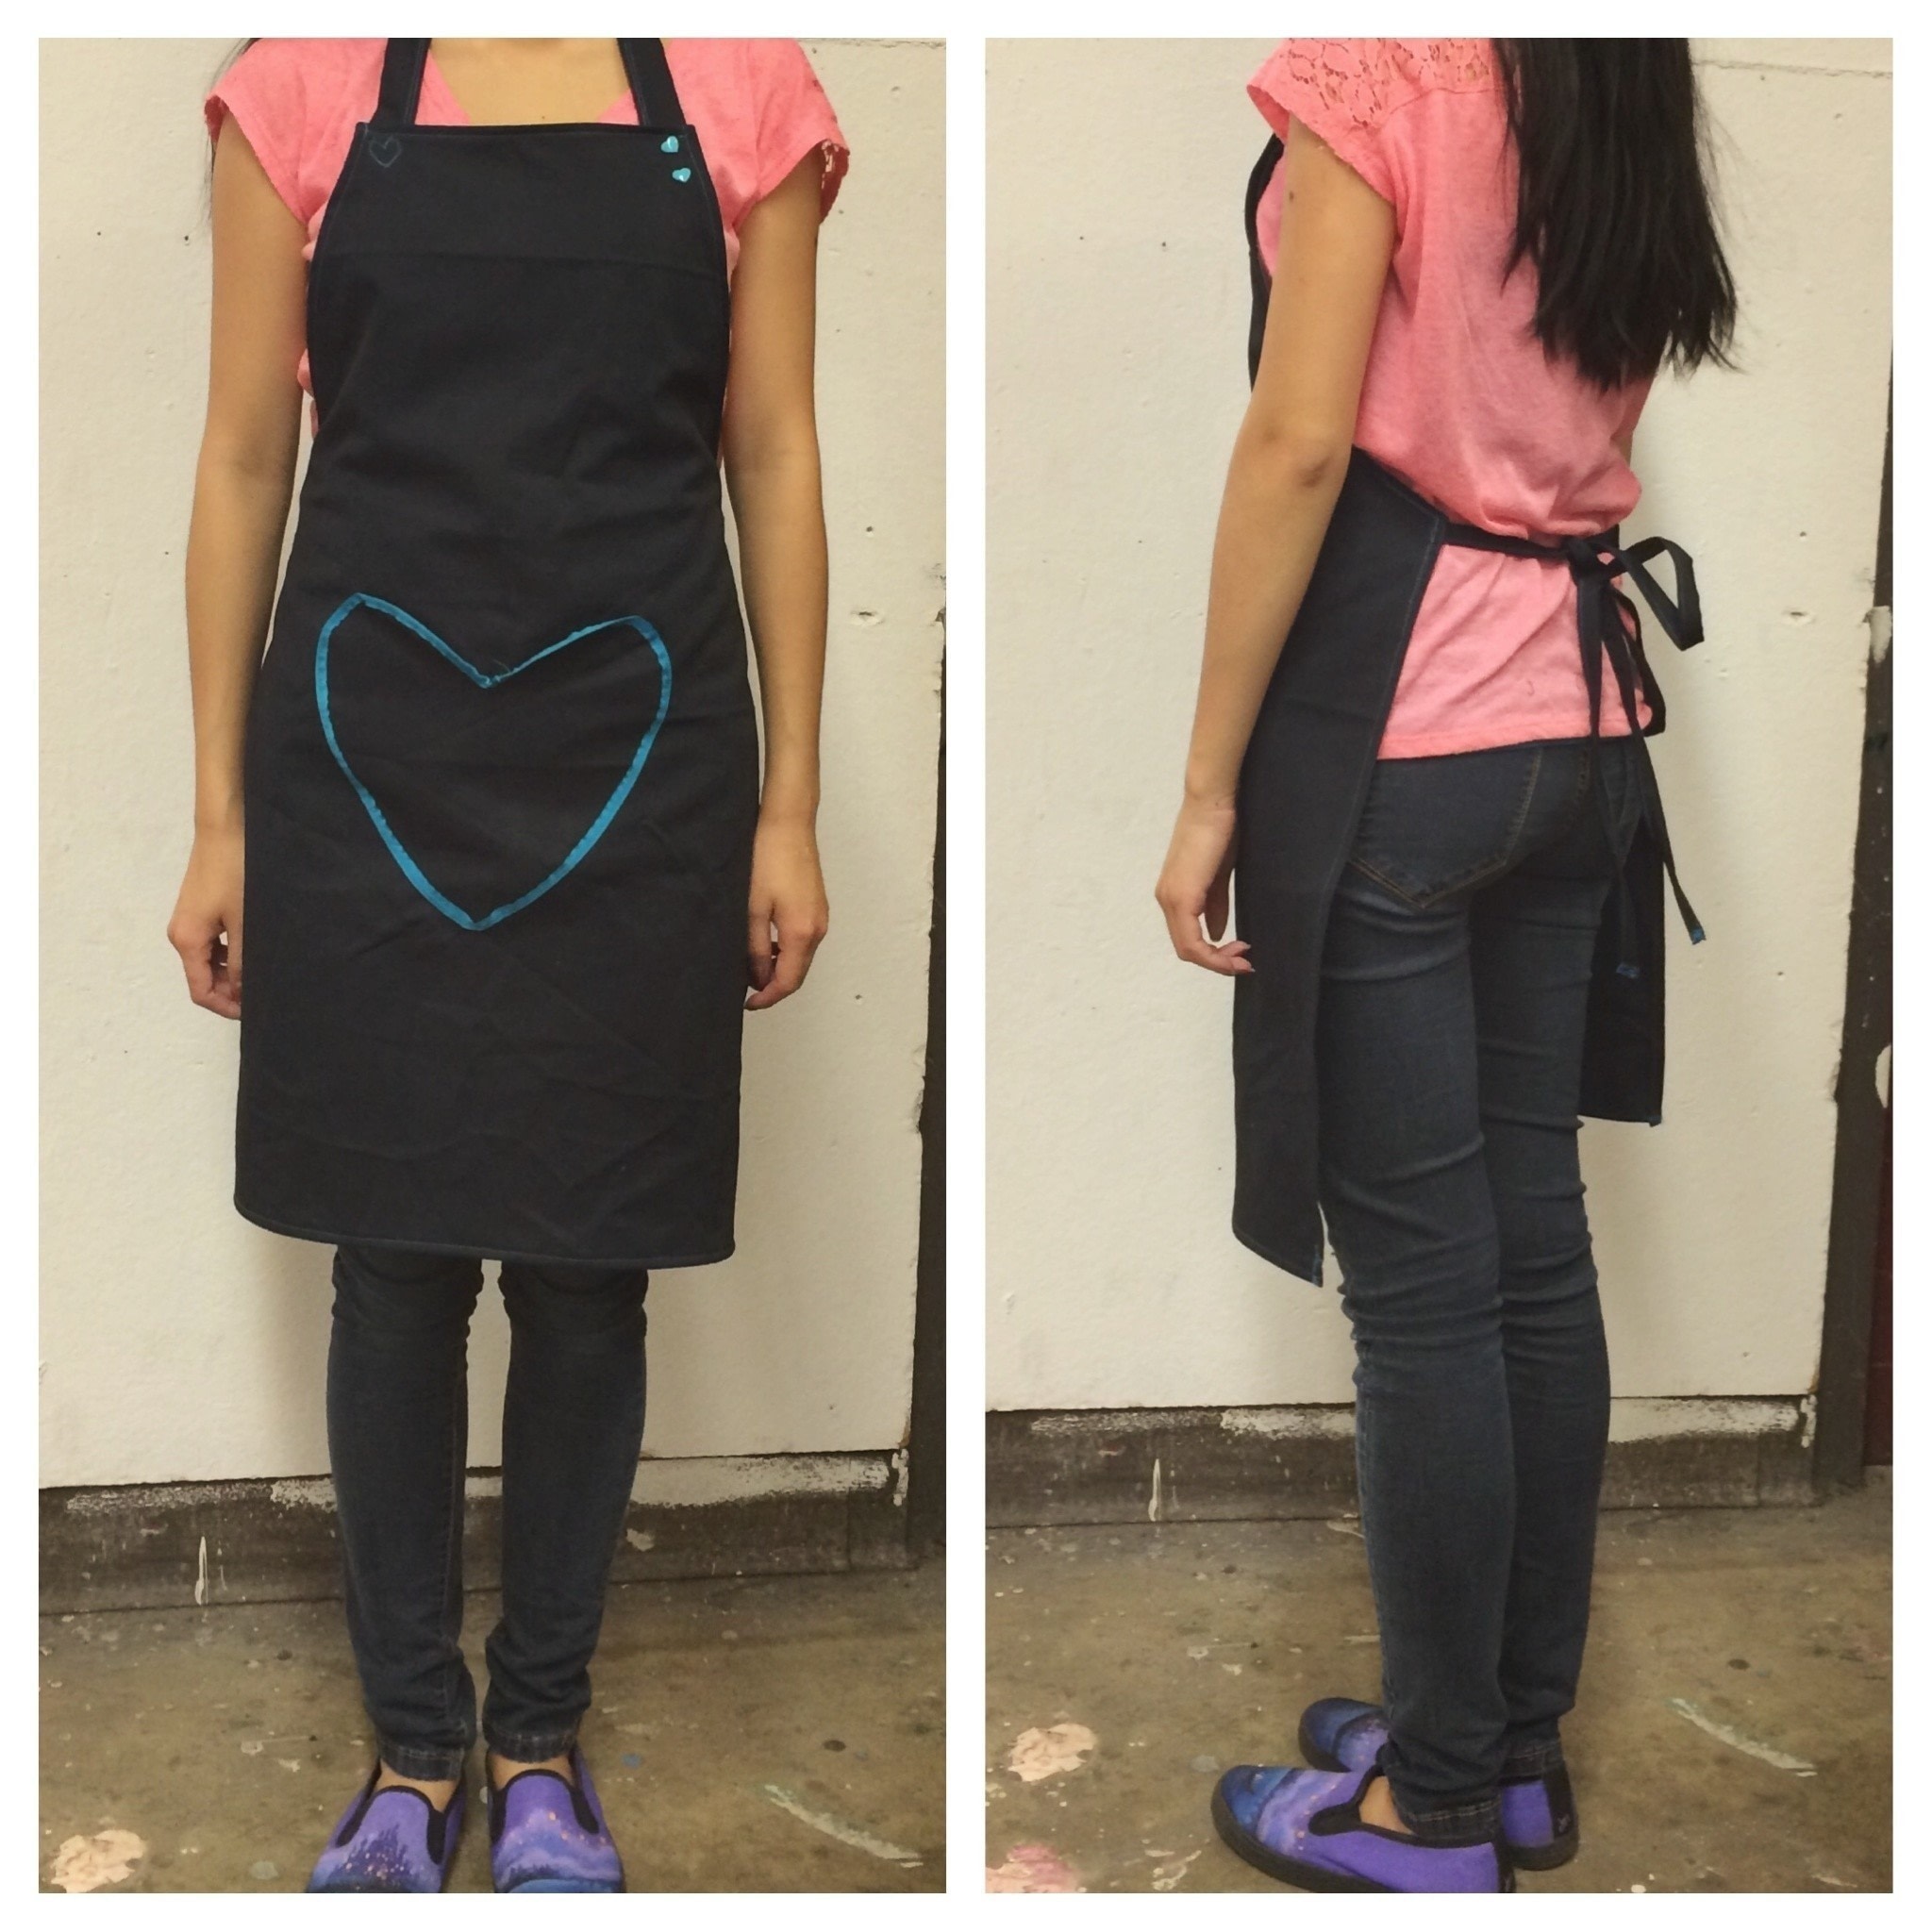
Make a cute heart-themed adjustable apron with the help of KAMsnaps! It has cute heart details including a heart-shaped pocket, heart stitching, and heart-shaped snaps! Perfect to use as an artist's smock or as a baking apron!
Tags
-
 Inger Marie K. favorited Adjustable Heart Themed Apron Using KAMsnaps
18 Mar 04:06
Inger Marie K. favorited Adjustable Heart Themed Apron Using KAMsnaps
18 Mar 04:06
-
 Joanne N. published her project Adjustable Heart Themed Apron Using KAMsnaps
17 Nov 06:00
Joanne N. published her project Adjustable Heart Themed Apron Using KAMsnaps
17 Nov 06:00
You Will Need
-
 Step 1
Start off by tracing around an existing apron - I added about an inch on each side so I can tuck those edges in to create a finished edge. Adjust the length to your liking, I extended the length because the apron I traced from was too short for me! If you don't have an existing apron, just roughly draw in chalk the shape of an apron.
-
 Step 2
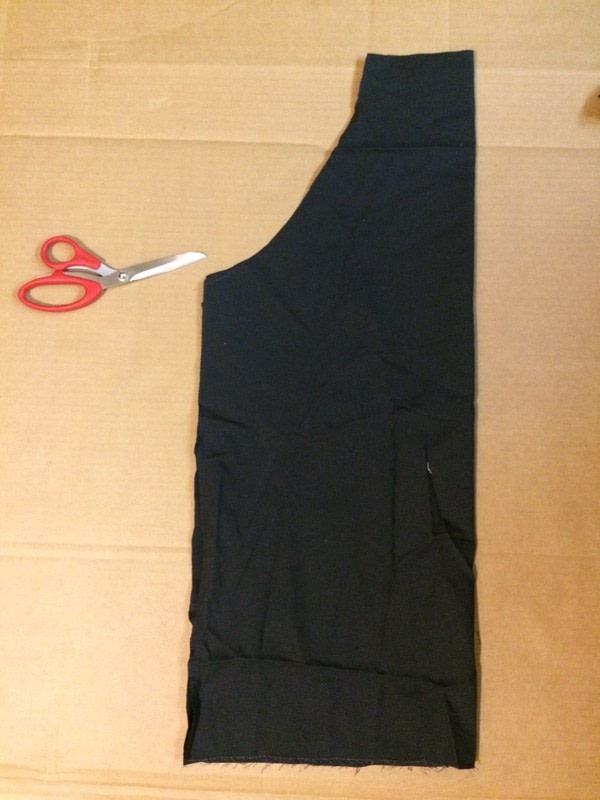
I folded and cut the shape out so that both sides would be even.
-
 Step 3
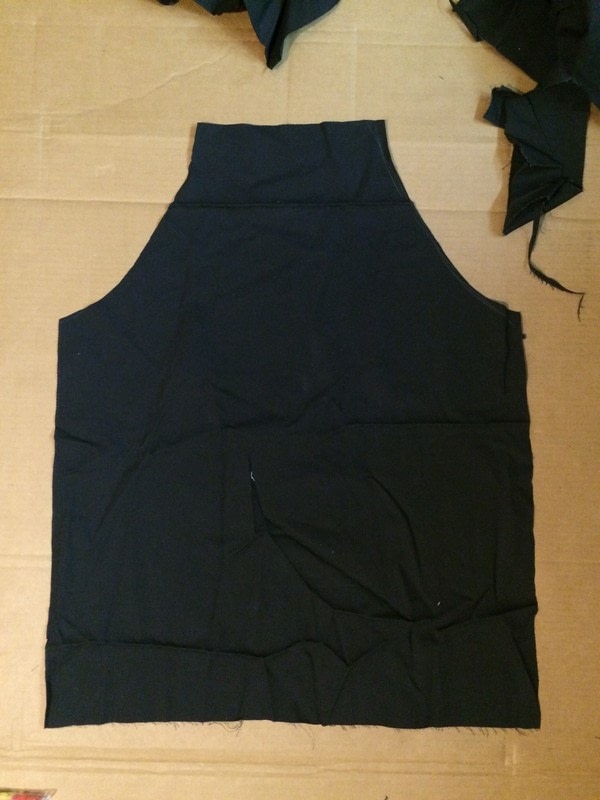
This is what you should have.
-
 Step 4
Now, cut out a narrow rectangular piece of the neck and two longer pieces of the string...you want the pieces to be long enough that they can wrap around your body and be tied.
Create a finished edge all the way around your apron by folding the edges in twice and sewing it down. I used a contrasting colour of thread to add to the look. Press and use pins to assist you.
-
 Step 5
Create the straps (neck and tie straps) by folding in the raw edges (press if necessary), pinning, and then sewing close to the edge. I chose to do two lines of stitching in a contrasting colour of thread to add to the design.
-
 Step 6
Attach your neck strap to one side of the top of the apron by sewing down a box with an X in it, being sure to go through both your apron and the neck strap. Or, if you're like me and want to make it even cuter, you can sew a heart shape to secure the one side of the strap in place instead. You may find it helpful to lightly draw a small heart in with chalk as a guideline for your stitching...sew slowly!
This is the fun part where we create the adjustable part of the apron! On the other side of the strap, poke a hole on the apron for where you want your first plastic snap to go. Repeat a couple centimeters below the first!
-
 Step 7
Now place the matching pieces of the snaps on either side of the fabric. You want one flat piece that has a sharp prong and one dipped piece with a hole in it so that they will fit together nicely.
-
 Step 8
Proceed to use your KAMsnap plier tool to flatten the snaps and secure them in place! Just place your two snap pieces with the fabric sandwiched in it in the tool and firmly press!
You may want to skip through this video for additional help on using the tool, I found it super helpful: https://www.youtube.com/watch?v=6ThHOltF5eE
-
Step 9
Repeat this process but on the strap. BE SURE that the spacing between your two snaps on your strap line up with the spacing between your two snaps on the apron! This is where you can make your neck strap adjustable by adding more than two buttons, again, making sure it's evenly spaced.
-
 Step 10
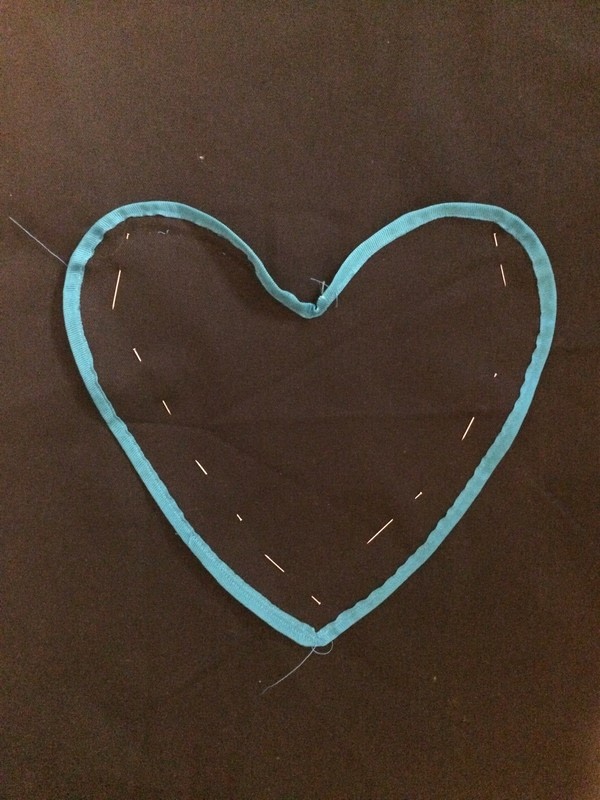
Cut out a heart shaped (or several) pocket(s) sized to your liking. I have carefully folded and sewn a blue ribbon that matches my thread around the heart shaped piece of fabric to finish up the raw edges and create a cute look.
-
 Step 11
After you have pinned and sewn your pockets in place, attach the strings to tie by stitching them down to the sides of your apron at the corners. Be sure to go over the stitching several times so it doesn't come apart.
-
 Step 12
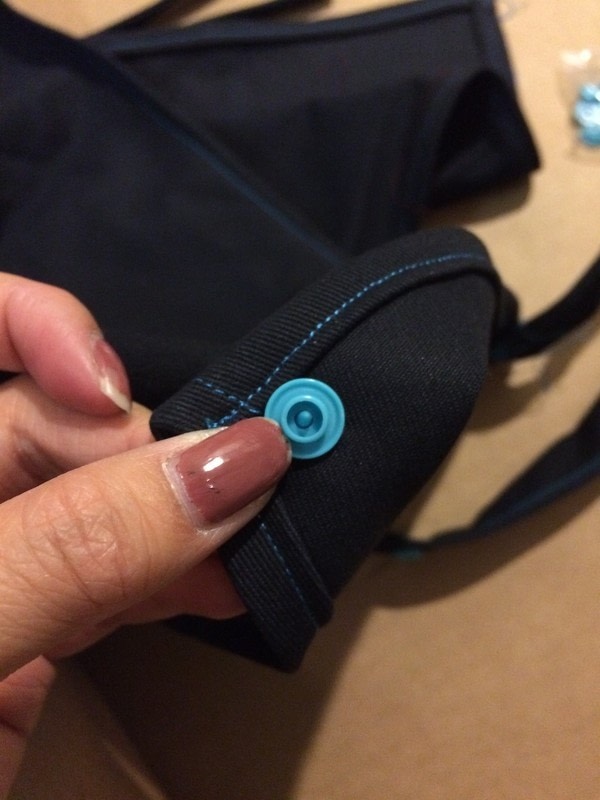
A close up of the heart stitching and the two buttons! Super cute!
-
 Step 13
And voila! Your finished apron! Try it on and show it off!