

Fox And Cubs
Extract from Super-Cute Felt Animals • By Laura Howard • Published by Ryland Peters & Small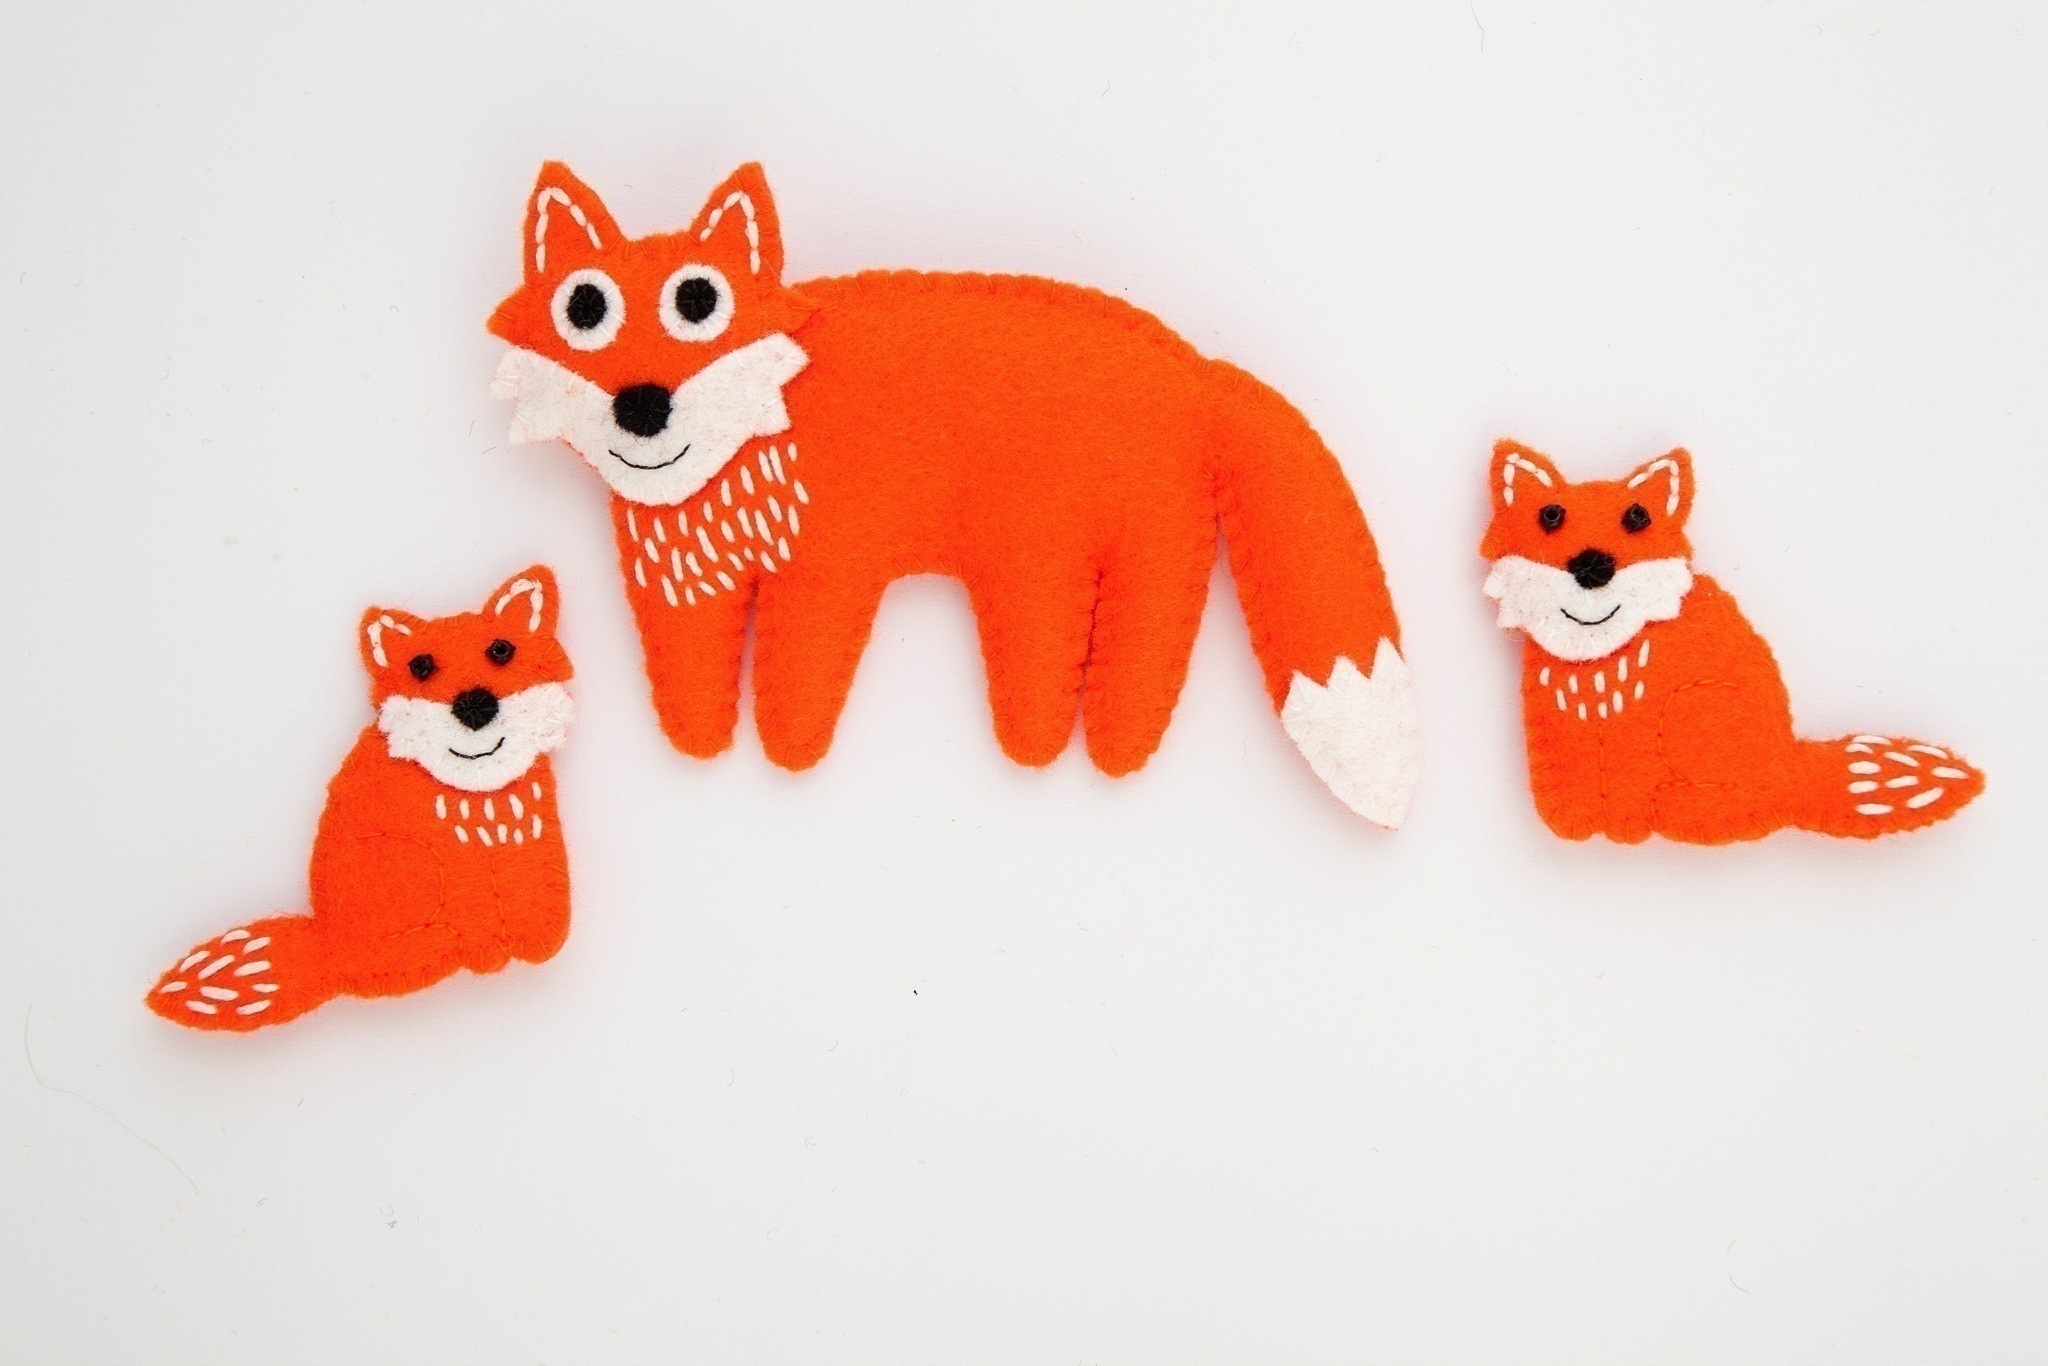

About
Super-Cute Felt Animals
Meet a family of friendly foxes: a mama fox and two baby
fox cubs. I used a bright orange felt for my foxes, but you
could use red felt if you prefer.
Tags
© 2024 Laura Howard / Ryland Peters & Small · Reproduced with permission.
-
 js-m crafts favorited Fox And Cubs
26 Jan 11:28
js-m crafts favorited Fox And Cubs
26 Jan 11:28
-
 Norma L. commented on Fox And Cubs
27 Aug 15:57
Norma L. commented on Fox And Cubs
27 Aug 15:57
-
Norma L. favorited Fox And Cubs
27 Aug 15:45
-
 Kristy B. favorited Fox And Cubs
24 Mar 10:26
Kristy B. favorited Fox And Cubs
24 Mar 10:26
-
 Yvonne R. favorited Fox And Cubs
24 Dec 04:22
Yvonne R. favorited Fox And Cubs
24 Dec 04:22
-
 MamaMindy added Fox And Cubs to Sewing Tutorials
11 Nov 19:16
MamaMindy added Fox And Cubs to Sewing Tutorials
11 Nov 19:16
-
 ivyrosemanning favorited Fox And Cubs
29 Oct 23:38
ivyrosemanning favorited Fox And Cubs
29 Oct 23:38
-
 Lisa added Fox And Cubs to Halloween / Autumn
03 Aug 17:09
Lisa added Fox And Cubs to Halloween / Autumn
03 Aug 17:09
-
Lisa added Fox And Cubs to Needlework
03 Aug 17:09
-
 Sarah C. favorited Fox And Cubs
28 Jul 00:43
Sarah C. favorited Fox And Cubs
28 Jul 00:43
-
Step 1
Ccut out one head, one
front body and one back body from orange felt,
and one tail, one face and two eyes from white
felt. Cut out two small circles for the pupils and
an oval for the nose from black felt.Cutting out small shapes
When cutting out very small shapes without a template, start by cutting out a small square of felt then cut out your shape out from the square. To cut small circles, cut into the felt in a spiral motion, turning the felt round slowly as you cut (using your thumb as a pivot) and gradually making the spiral smaller until you get the size of circle you want.I often cut two or three versions of a small shape before I get the one I’m happy with. Use leftover scraps of felt from other projects to practice cutting out the shape you want—fiddly jobs like this always get easier with practice!
If you’re having difficulty cutting your small shapes accurately freehand, try drawing the shape you want onto a piece of paper, cutting it out and then using a piece of clear tape to hold it onto the felt (as above). -
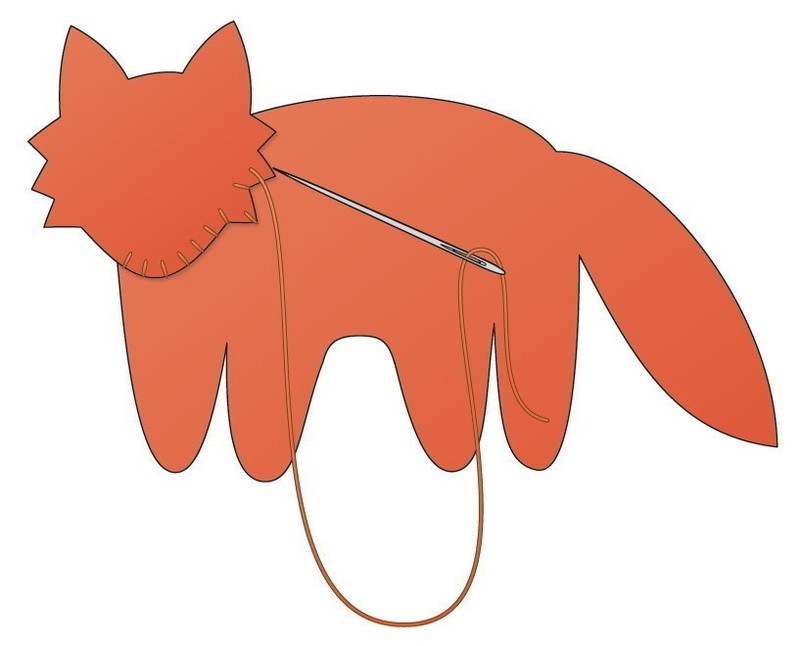
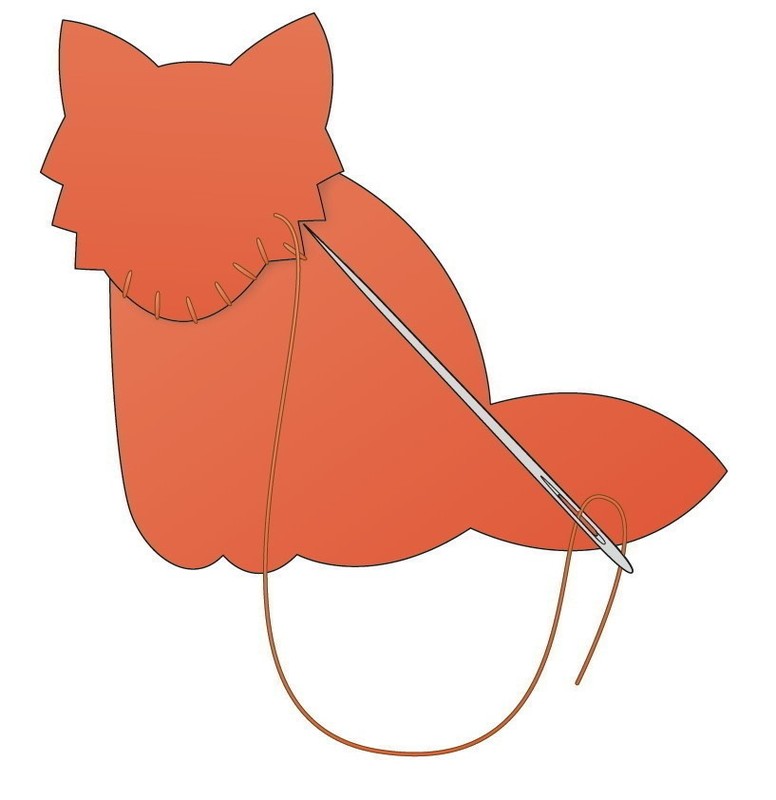
 Step 2
Position the head on the front body piece using the back body piece as a guide to ensure the front and back of the fox will line up neatly when sewn together. Whipstitch the head onto the front body using matching orange sewing thread.
Whipstitch
To sew two layers of felt together along their
edges, start stitching between the two layers, so
the knot is hidden, passing the needle through to
the front. Sew a stitch that overlaps the edge at a
slight diagonal angle, passing the needle through
the felt at the back, and sewing through both
layers of felt at another slight angle through to the
front, so the needle comes out a short distance
along from where you started. Repeat this to sew
up the whole edge. -
 Step 3
Whipstitch the tail and face in place using white sewing thread.
-
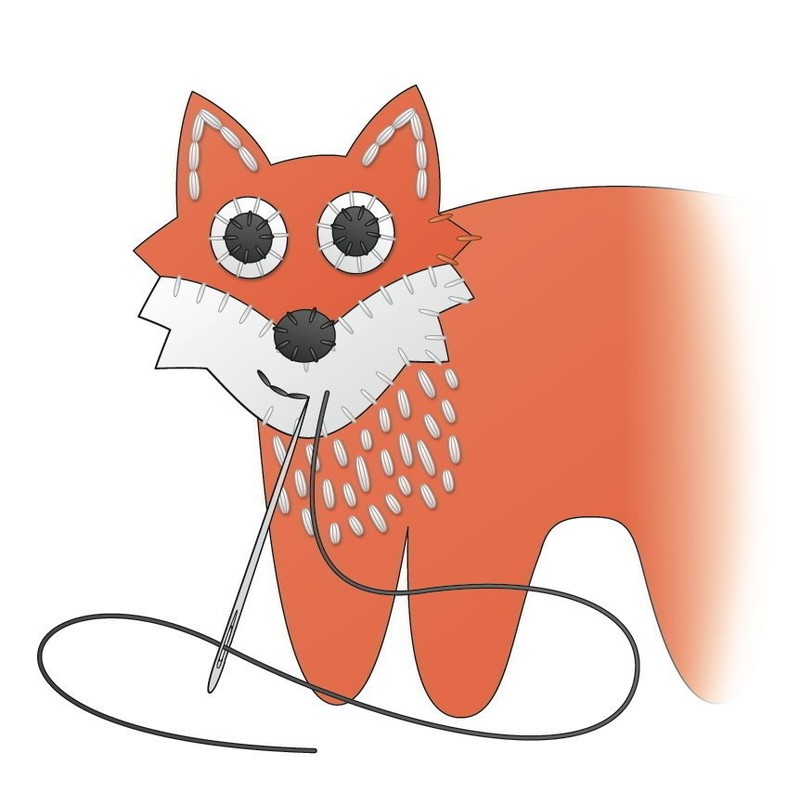
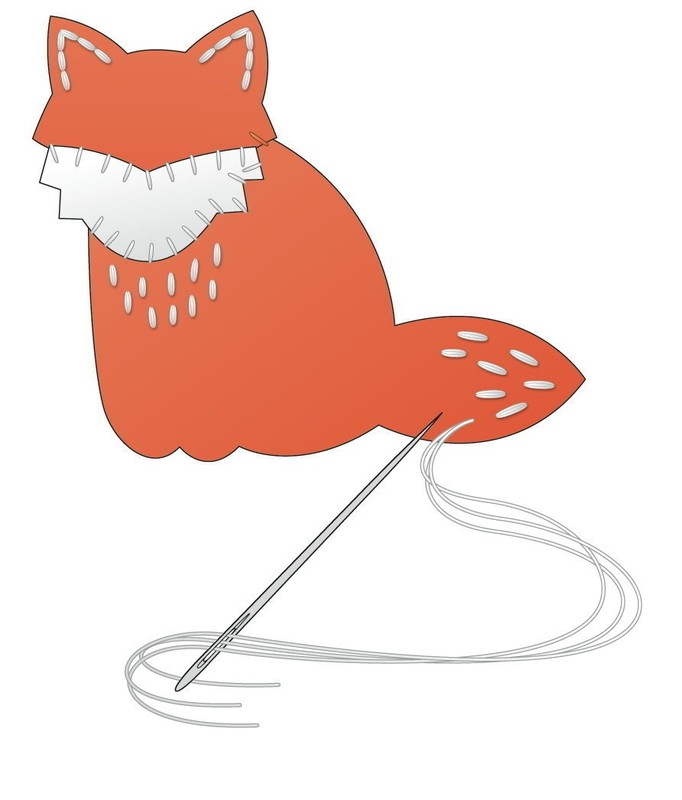
 Step 4
Cut a length of white embroidery floss and separate half the strands (so for six-stranded floss, use three strands). Switch to a larger needle if necessary and backstitch a line inside each of the fox’s ears, then sew a series of small single stitches on the fox’s chest.
Backstitch
Start with one straight stitch, then pass the needle through the felt a stitch length away from the end of the stitch, as if you’re starting a second straight stitch. Instead of moving “forward” along the line
you’re sewing, sew back towards the first stitch and pass the needle through the felt as close to the end of the first stitch as possible, so they form a continuous line. Repeat this, each time starting your stitches a stitch-length away from the previous stitch, and then sewing back to it. -
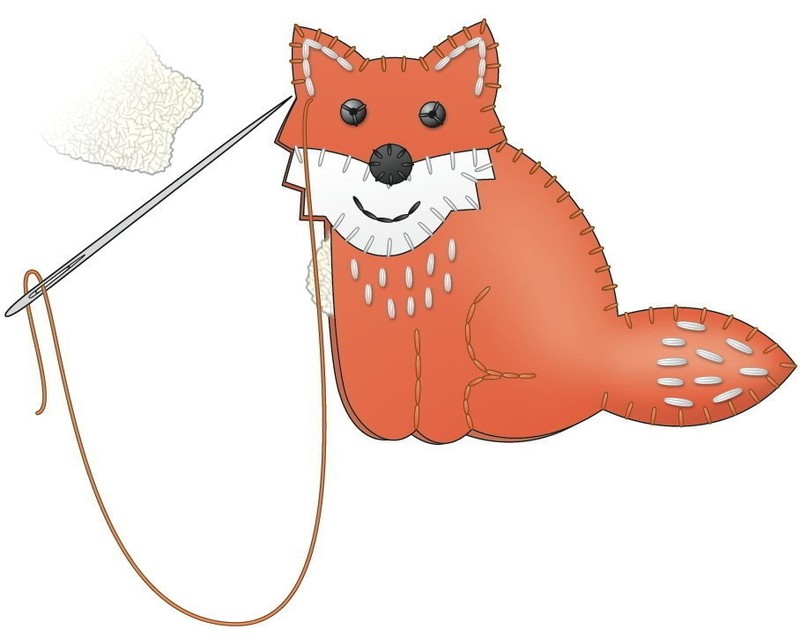
 Step 5
Whipstitch the eyes, pupils and nose to the head using matching
sewing threads, then backstitch the fox’s smile using black sewing thread. -
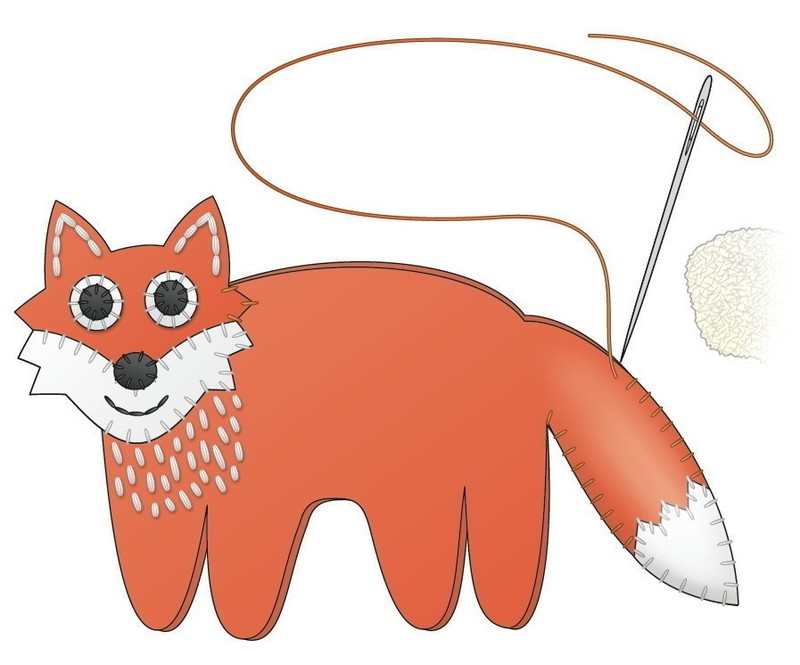
 Step 6
Sew the front and back body pieces together at the tail using whipstitch in matching sewing threads, starting from where the tail meets the body and sewing down the bottom edge and back up along the top edge. Switch between orange and white sewing
threads as required and stuff the tail gradually as you sew up the second side. -
 Step 7
Whipstitch around the legs using matching orange sewing thread, starting just below the fox’s head. Stuff the legs, then sew along the
back and around the head, stuffing the fox gradually as you sew and switching to white sewing thread as you sew around the white
section of the face.If liked, sew a line of running stitch flush around the edge of the fox’s head from bottom to top using orange sewing thread to improve the shape. Carefully sew through all the layers of felt and stuffing to pull the layers closer together. Turn the fox over and back again as you sew to ensure the stitching is neat on both
sides and finish neatly at the back. -
Step 8
The Cubs
Cut out one head, one front body and one back body from orange felt, and one face from white felt. Cut out a small oval for the nose from black felt.
-
 Step 9
Position the head on the front body piece using the back body piece as a guide to ensure the front and back of the cub will line up neatly when sewn together. Whipstitch the head onto the front body
using matching orange sewing thread. -
 Step 10
Whipstitch the face in place using white sewing thread.
-
 Step 11
Cut a length of white embroidery floss and separate half the strands (so for six-stranded floss, use three strands). Switch to a larger
needle if necessary and backstitch a line inside each ear, then sew
a series of small single stitches onto the cub’s chest and tail. -
 Step 12
Whipstitch the nose to the face using black sewing thread. Sew on two black seed beads for the eyes with three or four stitches of
black sewing thread, then backstitch the cub’s smile. -
 Step 13
Backstitch lines onto the cub’s body to mark out its legs, as pictured, using matching orange sewing thread.
-
 Step 14
Sew the front and back of the cub together using
whipstitch in matching orange sewing thread, starting by
sewing around the tail and then stuffing it. Sew up the body and around the head, switching to white sewing thread as necessary
and then back to orange for the final section.
Stuff the cub gradually as you sew, until the final gap
has been sewn up. -
Step 15
If liked, sew a line of running stitch around the bottom of
the cub’s head using matching orange sewing thread, finishing neatly at the back.


Comments

 1
Home Accessories »
Diy Jewelry Box
1
Home Accessories »
Diy Jewelry Box


