About
The Makeup Honey Foundation Application
A quick an easy step by step of foundation application!
-
 Lee Rose added Flawless Foundation to makeup
07 Feb 22:05
Lee Rose added Flawless Foundation to makeup
07 Feb 22:05
-
 WaterAngel added Flawless Foundation to Make Up
07 Oct 20:47
WaterAngel added Flawless Foundation to Make Up
07 Oct 20:47
-
 kris p. favorited Flawless Foundation
14 Jul 03:51
kris p. favorited Flawless Foundation
14 Jul 03:51
-
 dakshu favorited Flawless Foundation
07 Feb 13:57
dakshu favorited Flawless Foundation
07 Feb 13:57
-
 Esoteric Sorrow favorited Flawless Foundation
27 Jan 08:06
Esoteric Sorrow favorited Flawless Foundation
27 Jan 08:06
-
 Sarah S. favorited Flawless Foundation
22 Jan 04:30
Sarah S. favorited Flawless Foundation
22 Jan 04:30
-
 Raashi favorited Flawless Foundation
20 Jan 10:02
Raashi favorited Flawless Foundation
20 Jan 10:02
-
 DrArtGirl favorited Flawless Foundation
19 Jan 22:04
DrArtGirl favorited Flawless Foundation
19 Jan 22:04
-
 Sallaia added Flawless Foundation to Clothing
19 Jan 19:59
Sallaia added Flawless Foundation to Clothing
19 Jan 19:59
-
 Mary S. favorited Flawless Foundation
19 Jan 19:16
Mary S. favorited Flawless Foundation
19 Jan 19:16
You Will Need
-
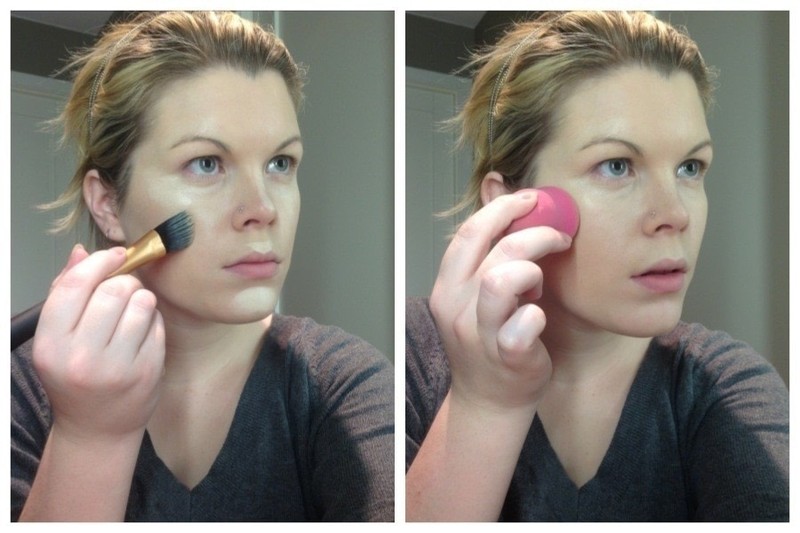
 Step 1
To start off I moisturised with Clarins Hydraquench and primed my face with Time Balm by The Balm. Using a foundation brush, I use the Real Techniques Foundation Brush I applied a layer of foundation. I didn’t worry about blending or being neat because I like to use a slightly damp sponge to blend the foundation into my skin. The sponge I use is Cosmo’s version of the Beauty Blender but only a fraction of the price.
-
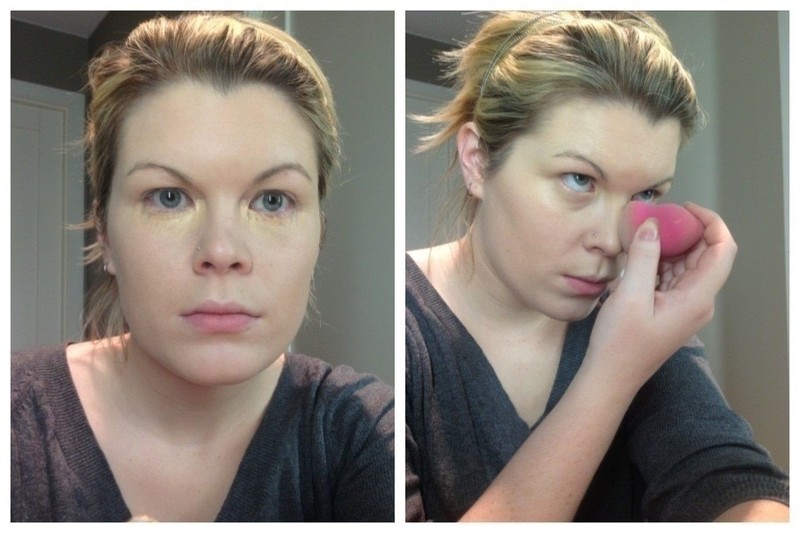
 Step 2
I then use a very light layer of Maybelline Dream Fresh BB Cream. I applied two layers to get the right match to my skin. Sometimes I mix them together but I find this works just as well and gives a better coverage for those bad skin days. I applied with a foundation brush and blended with the damp sponge.
-
 Step 3
Using the Wet’n'Wild Coverall Cincealer Palette I blended the yellow under my eyes. Yellow correctors even out purples and blues in your skin making them much less noticeable. Try not too apply too much under your eyes because creasing is a big issuein this area and can end up looking worse.
-
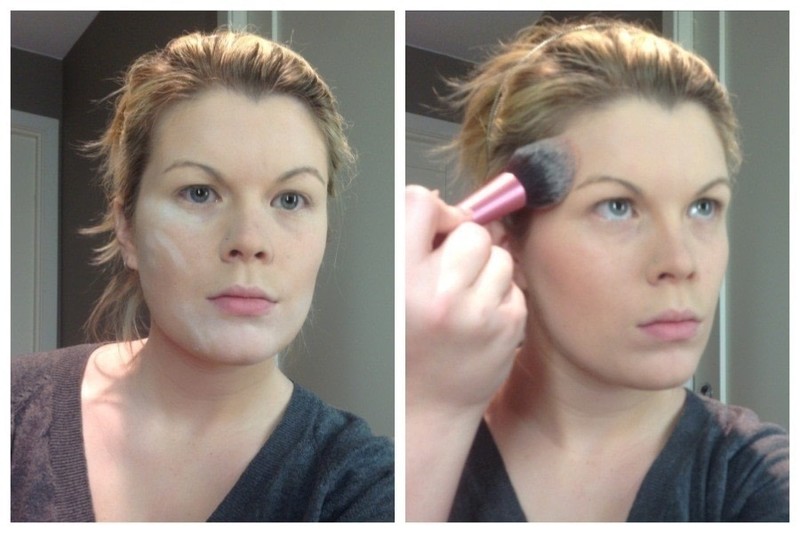
 Step 4
I like to contour my face with foundation rather than powder as I find it looks much softer and more natural. There is also the added benefit of if you add too much it doesn’t matter because when you set your foundation, the powder will take away some of the intensity of the colour. Some like to start with the shade and then the light, I personally like to start with the highlights. The Bly real reason I do this is so that I can continue to use the same brush without having messy contouring. On a shoot, I don’t always have time to spot clean my brush and wait while it dries. I again applied the highlight with the foundation brush and then blended it out with the damp sponge. I highlighted the top of my cheek bones, forehead, the bridge of my one, cuspids bow and chin. For really dramatic check bones you can also high light your jaw bone but I chose not to for this look.
Using quite a dark concealer I applied it to the underneath of my cheek bones, underneath my chin and jaw, the temples and just around the hairline. You might be wondering why I applied it under my chin and jawbone. This is a really simple and easy way to make sure you don’t get a double chin. Anywhere where you apply dark or shade you are essentially pushing that part of your face backwards and letting the light areas come forwards. This is how artists such as Promise Phan on YouTube can make themselves look like just about anyone. Surgery without the pain. Instead of blending with the sponge, this time is used a buffing brush and wishing circular motions I buffed it into my skin. I do this because I find it much easier to blend the product and if I feel there is too much product I can use a damp sponge after to remove some.
-
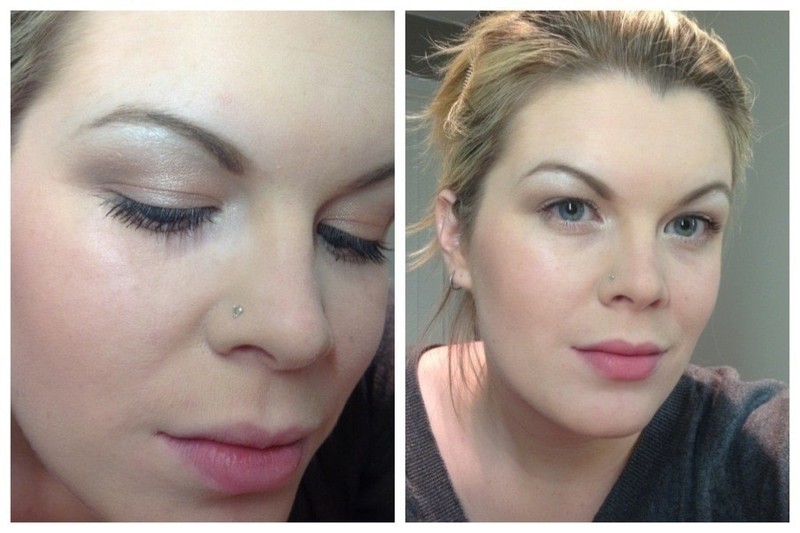
 Step 5
I then powdered my face with E.L.F High Definition Powder from the studio range and placed blusher in a ‘C’ shape from my temple around my eye and onto my cheeks.
-
 Step 6
I then used Soap and Glory’s Glow All Out highlighter to the bridge of my nose, the top of my cheek bones and just a touch along the top of my brows. For eye makeup I did a very simple and understated smokey eye using Bobbi Brown Metallic Eyeshadow in Champagne and Burnt Sugar.
-
 Step 7
I filled in my brows and used Pierre Réne single eyeshadow in Pearl to highlight my brow bone and inner corner of my eyes. The mascara I used was Too Faced Lash Gasm. Finally I used Korres Lip Butter with E.L.F Mineral Liptint over the top.