


About
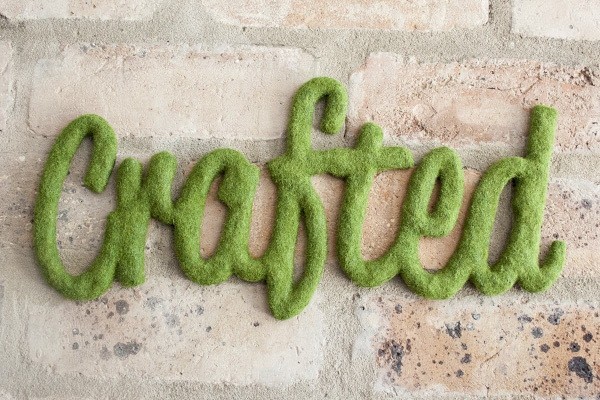
Create your own faux moss word with this easy to follow tutorial
This is one of the most popular projects I've ever created and a personal favourite of mine.
-
 Becky favorited Faux Moss Word
17 May 05:59
Becky favorited Faux Moss Word
17 May 05:59
-
 Esther favorited Faux Moss Word
28 Sep 10:03
Esther favorited Faux Moss Word
28 Sep 10:03
-
 hamster201 added Faux Moss Word to To-make list
29 Jun 06:17
hamster201 added Faux Moss Word to To-make list
29 Jun 06:17
-
hamster201 favorited Faux Moss Word
29 Jun 06:15
-
 Pimke added Faux Moss Word to Deko
27 Jan 11:11
Pimke added Faux Moss Word to Deko
27 Jan 11:11
-
Rachel F. favorited Faux Moss Word
28 Sep 22:39
-
 Kylie L. favorited Faux Moss Word
29 Jan 13:41
Kylie L. favorited Faux Moss Word
29 Jan 13:41
-
 Alex B. favorited Faux Moss Word
15 Jan 01:31
Alex B. favorited Faux Moss Word
15 Jan 01:31
-
 Noemi M. added Faux Moss Word to deco
06 Dec 13:40
Noemi M. added Faux Moss Word to deco
06 Dec 13:40
-
 KelliDroze added Faux Moss Word to Decorations
06 Dec 09:08
KelliDroze added Faux Moss Word to Decorations
06 Dec 09:08
You Will Need
-
 Step 1
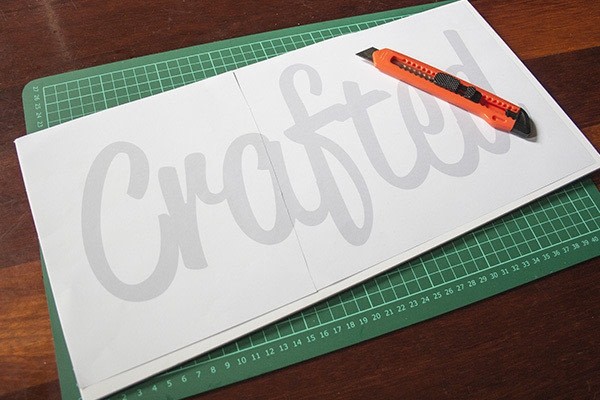
Print your word and stick it to a piece of foam core with double sided tape.
-
 Step 2
Using your knife cut around the letters.
This step does require some patience. Take it slow. If you are getting frustrated with it just put it down and do something else for a while. If you rush this stage you can very easily cut through a letter. If you do cut something off just use your masking tape to attach it again.
Once you have finished cutting out your word check for any weak parts and apply some masking tape to strengthen. For example, the join between my r and a was a little bit on the flimsy side. As you can see it does get quite thin in that spot. -
 Step 3
Scrunch up some newspaper strips and tape them onto the word.
Keep going until the whole word is covered.
By adding the newspaper and masking tape your letters will get a more natural shape. -
 Step 4
Papier-mâché time! I used tiger grip for this but a watered down PVA glue really is the best thing for Papier-mâché. I just didn't have any on hand.
Applying a cover of Papier-mâché just means you have a nice smooth surface to apply your moss to.
A plastic bag makes a perfect working surface for this project! It means less mess and the bag should just peel off the word when you are done! -
 Step 5
Paint your word green. This will help hide any bald patches when you're finished.
-
 Step 6
Apply your flocking. Flocking is actually a lot easier to work with than I thought. Simply apply your glue with a paintbrush, fairly generously and just stick the flocking on top.
Keep going until you have finished your whole word. Leave to dry for a few hours (check the lable of your glue to see how long it needs to set) Once it is dry give it a gentle bang on the back and shake off any excess flocking. If you have any bald spots simply apply some glue and add more flocking. -
 Step 7
Finished!
Now all you have to do is hang it!
There are a number of products out there designed to hang odd items like this one.
For a temporary display I would go for blu tack or 3M picture hanging strips.
If the strips are to wide to hide behind your letters simply cut them down the middle.
For a more permanent set up I would use a good double sided foam tape.


 1
Watercolor Art »
Watercolor Paints Made From Make Up
1
Watercolor Art »
Watercolor Paints Made From Make Up
