About
A fast and easy way to add a cute lil smile to your amigurumi.
It’s time to learn another technique for adding faces to your amigurumi. I think you’ll enjoy this one – it’s probably the easiest to do.
Whenever you are making a toy for a small child or pet or you’ve run out of safety eyes or you’re looking to try something different, a simple smiley face might be just the look you’re after. The following tutorial will show you how to use French knots for the eyes and a simple technique called a detached chain for the smile. There’s no reason to be intimidated by French knots. Just give them a try and remember that a little practice makes perfect. Well, actually, I don’t think my eyes are ever perfect, but I just tell myself that’s what gives an amigurumi its personality.
So grab your amigurumi, yarn needle, and yarn and let’s begin…
-
 Lorraine T. favorited Faces For Amigurumi Part 2: Simple Embroidery Techniques
25 Jun 21:20
Lorraine T. favorited Faces For Amigurumi Part 2: Simple Embroidery Techniques
25 Jun 21:20
-
 inescf added Faces For Amigurumi Part 2: Simple Embroidery Techniques to To do
28 Aug 00:09
inescf added Faces For Amigurumi Part 2: Simple Embroidery Techniques to To do
28 Aug 00:09
-
 Sheri P. favorited Faces For Amigurumi Part 2: Simple Embroidery Techniques
30 Mar 07:07
Sheri P. favorited Faces For Amigurumi Part 2: Simple Embroidery Techniques
30 Mar 07:07
-
 Jacqulene C. favorited Faces For Amigurumi Part 2: Simple Embroidery Techniques
11 Dec 10:42
Jacqulene C. favorited Faces For Amigurumi Part 2: Simple Embroidery Techniques
11 Dec 10:42
-
 Jennifer Olivarez published her project Faces For Amigurumi Part 2: Simple Embroidery Techniques
14 Nov 19:48
Jennifer Olivarez published her project Faces For Amigurumi Part 2: Simple Embroidery Techniques
14 Nov 19:48
You Will Need
-
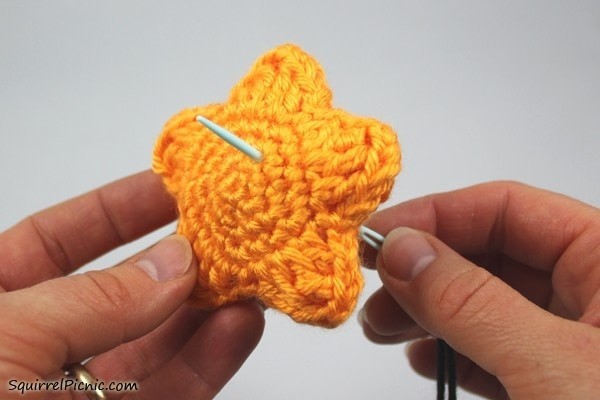
 Step 1
First, let’s start with the eyes.
Thread your yarn needle and insert it into your amigurumi from the back and out the front where you want your eye to be.
-
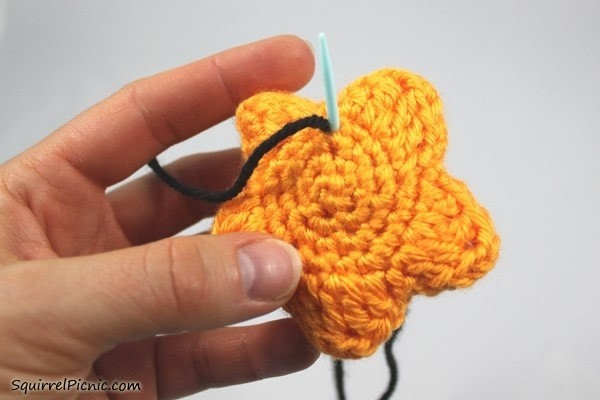
 Step 2
Leave a long tail at the back.
-
 Step 3
Wrap the yarn at the front around the needle 2-3 times. Generally the more wraps, the larger the knot will be, but if you really want to make the eyes bigger, it would be easier to use a thicker yarn.
-
 Step 4
Insert the needle back down through a hole nearby, pinching the wrapped yarn between your thumb and forefinger. It helps to hold the free yarn (the end closest to your wraps) taut in your other fingers.
-
 Step 5
Push the needle down through the wraps and out the back of the amigurumi. Pull the yarn through, continuing to pinch the wraps slightly to keep them together.
-
 Step 6
One eye is complete.
-
 Step 7
Insert your needle through the same hole you came out of in the back.
-
 Step 8
Come up in the front through the hole where you want your next eye to be.
-
 Step 9
Repeat steps 3-5 for the next eye.
-
 Step 10
For the smile, come back up through the same hole you just came out of to the front just below an eye.
-
 Step 11
Go back down just below the other eye, leaving the yarn on the front loose.
-
 Step 12
Ah, how cute.
-
 Step 13
To hold the smile in place, come back up through the same hole you just came out of to the front where you want the bottom of your smile to be.
-
 Step 14
From above the smile, go back down through the same hole.
-
 Step 15
Come out through the hole in the back where you started.
-
 Step 16
I like to tie these two ends together and push them into the amigurumi to hide them.
-
 Step 17
Smile. You did a good job!
To make this little starfish and all his ocean friends, check out my island play set free crochet pattern here on Cut Out + Keep!