


About
Button Wine Glass Charms using Scrapbook Embellishments
I like to make holiday wine glass charms for family and friends, however I could never find any really cute charms to hang on the stemware hoops. So I decided to make my own!
These are for Valentine's Day, but you can find scrapbook embellishments for every occasion!
-
 Alexandria M. favorited Embellished Button Wine Glass Charms
23 Mar 12:28
Alexandria M. favorited Embellished Button Wine Glass Charms
23 Mar 12:28
-
 Claudia C. entered their project Embellished Button Wine Glass Charms to Glue Contest
02 May 12:59
Claudia C. entered their project Embellished Button Wine Glass Charms to Glue Contest
02 May 12:59
-
 Step 1
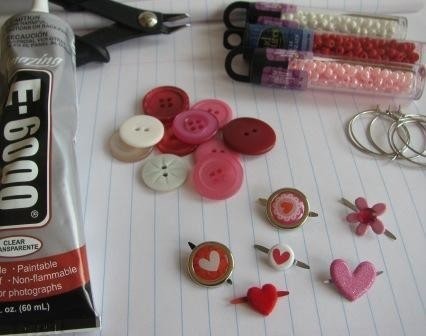
SUPPLIES NEEDED:
1. Most importantly: your imagination!! (if you do not have this in stock, your wine charms may not be as cute as they could be)
2. Buttons in multi colors
3. Matching Seed Beads
4. Stemware hoops
5. Craft glue (I love my E6000)
6. Cute scrapbook brads in your theme
7. Bails to attach to the back of button (not pictured)
8. Wire cutters & Flat nose pliers
-
 Step 2
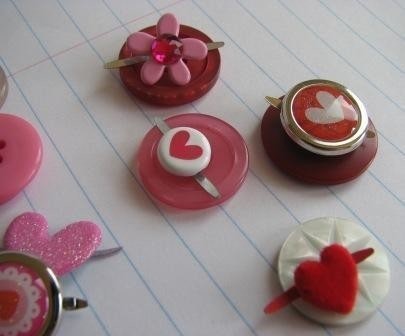
COORDINATE YOUR GAME PLAN:
Take a look at your buttons and see which scrapbook brads will look cute with them. Be creative! I like to make each one different.
-
 Step 3
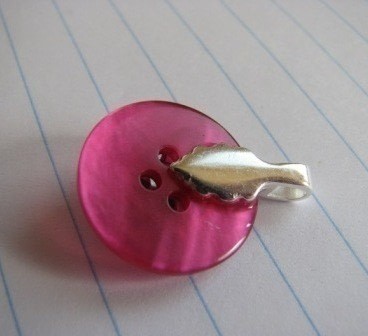
REMOVING THE BRADS:
Using your wire cutters, remove the “brads” carefully from each embellishment. Just snip from the center where they start to bend outwards. You want to keep some of the brads to help adhere them to the button, that’s why we don’t snip them entirely off.
-
 Step 4
Your finished brad should look like this.
-
 Step 5
LET THE GLUING BEGIN:
Dab a little glob of glue behind each brad and carefully set them on each button. Press gently to make sure it’s on there good.
-
 Step 6
THE PAINFUL WAITING:
This is my very least part of the process… waiting for everything to dry! I prefer to wait at least 4 hours to make sure it’s completely adhered. But if you’re impatient like me, you may barely make it past the 2 hour mark, and that’s okay too.
-
 Step 7
ATTACHING BAILS:
Ok, I normally wouldn’t use Aanraku bails for this project (since they’re a little pricey), but it’s all I had in stock. You might instead try anything with a drop pad and a loop to string onto the stemware hoop. I have been known to just glue a large silver jump ring to the back of the button. As long as you have strong glue, it will stay put.
-
 Step 8
PAINFUL WAITING, PART 2:
Another dreadful couple of hours of waiting for bails to dry.... ughhh. But on the bright side, you can sit and admire your cute buttons while you wait!
-
 Step 9
ADDING SEED BEADS:
Make way... fun part coming through! Here is where that genius imagination of yours comes in, you can add the seed beads in any color or combination that you think is cute. You can also use any type of glass beads to spice up your wine charms.
-
 Step 10
OPEN STEMWARE HOOP:
However, before you start the seed beads, you need to bend the stemware hoops – so you can slide on the beads. First, use your flat nose pliers to gently straighten out the wire.
-
 Step 11
ADD BEADS:
Now you can slide on your beads and that lovely little button of yours, followed by more seed beads.
-
 Step 12
CLOSE STEMWARE HOOP:
Last step is to close that baby up by using your flat nose pliers again to bend the wire in its original position. Do this for all of your button charms.
-
 Step 13
DONE!
Voila! You have completed your masterpieces! Now you can just add them to your wine glasses, show them off to family and friends, and get your drink on! (That last part is optional – actual drunkenness is not required to enjoy these beautiful little creations). These are great as gifts too!


Comments

 1
Home Accessories »
Diy Jewelry Box
1
Home Accessories »
Diy Jewelry Box
