
About
Create a Hanging Planter for Your Outdoor Spaces This Summer
I saw a really cute macramé hanging planter while out shopping the other day, but it was around $25! I wasn’t about to pay that much for some string and a pot. After doing some research, I figured out that these planters are actually a lot easier to make than they seem. You can create a basic macramé hanging planter design in less than 15 minutes. The only skill you need is basic knot tying.
-
 Jeanne M. added Easy Macramé Hanging Planter to Home and away
18 Jul 08:32
Jeanne M. added Easy Macramé Hanging Planter to Home and away
18 Jul 08:32
-
 Beth Ann E. favorited Easy Macramé Hanging Planter
17 Jul 05:58
Beth Ann E. favorited Easy Macramé Hanging Planter
17 Jul 05:58
-
 Christene A Holder published her project Easy Macramé Hanging Planter
22 May 09:00
Christene A Holder published her project Easy Macramé Hanging Planter
22 May 09:00
You Will Need
-
 Step 1
First, you need to determine how long you want your hanging planter to be. I wanted mine to be about 36” long, but you can change this for any length you want. Measure out the macramé cord for the length of your hanging planter.
-
 Step 2
Then, double this length. For me, this was 72” of cord. Don’t cut it yet! We still have some other measurements to add on.
-
 Step 3
Next, take your plant pot and lay the cord across the diameter. Give yourself some extra on each side. Mine ended up being about 12” total for the pot diameter plus some extra.
-
 Step 4
Finally, add an additional 24” of cord. At this point, you can cut your macramé.
So the total length of this cord is
Total Length = (Length desired for Hanging Planter x 2) + (Diameter of Plant Pot + a few inches extra) + 24”
-
 Step 5
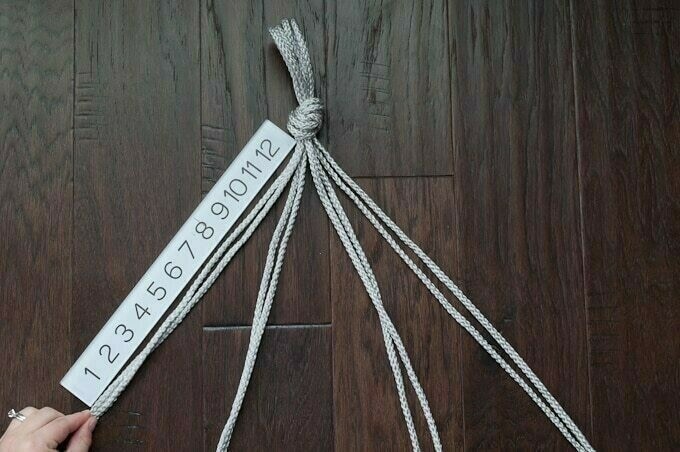
Take this piece of macramé cord and cut 3 more pieces of the same length so you end up with 4 strands total.
-
 Step 6
Top Knot
Line up all of the cords as evenly as possible, then fold them in half. You should have two equal lengths of 4 strands on either side of the fold.
-
 Step 7
Make a knot in the cords at this middle point and leave a small loop of cord at the top. This will be the “hook” that you hang your planter from. Tug on each of the strands as needed to make your knot look neat.
-
 Step 8
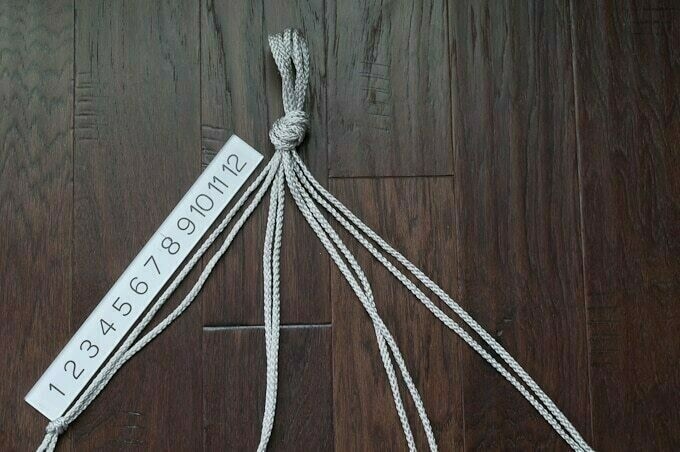
Spread out the 8 strands of cord and create 4 groups of 2 strands. Try to group together strands that are naturally close to each other based on how you tied your knot.
-
 Step 9
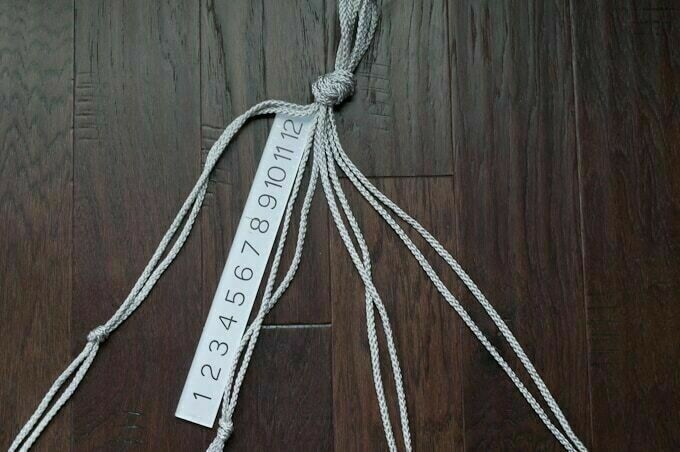
Middle Knots
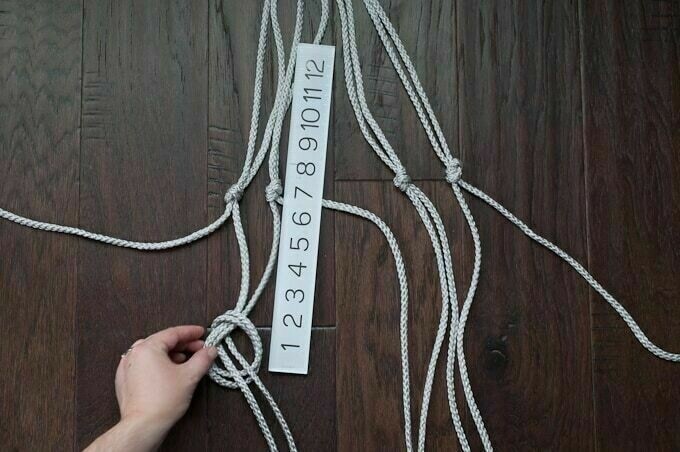
On your first set of 2 cords, measure down from the top knot about 12”.
-
 Step 10
Tie a small knot in the 2 cords at the 12” mark.
-
 Step 11
Repeat this process for the remaining 3 pairs. Each time, make sure your knot is about the same length from the top knot as the rest of the pairs.
-
 Step 12
Once you have tied all 4 knots, bring the strands together and make sure they are all about even. Adjust the knots as needed to make them as close as possible.
These are the middle knots.
-
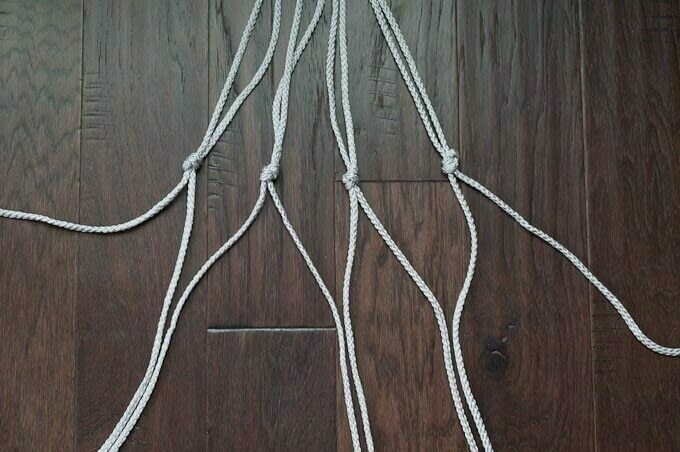
 Step 13
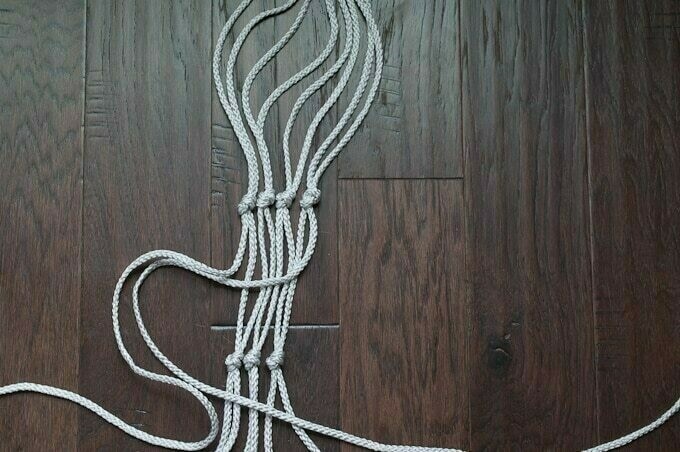
Spread out the strands from the middle knots. Group together 1 strand from a middle knot with 1 strand from the adjacent middle knot. You will end up with 3 groups of 2 strands with an extra single strand on either end.
-
 Step 14
Bottom Knots
Measure the height of the plant pot. Mine was about 7”.
-
 Step 15
This is the length that you should tie your next row of knots down from the middle knots.
-
 Step 16
Here's the first bottom knot when it was tied
-
 Step 17
Repeat with the remaining pairs, making sure the bottom knots are all equal to each other.
-
 Step 18
Once you have 3 bottom knots, take the 2 stands on either end and group them together. Make a knot with these 2 strands at the same length as the other 3 knots.
-
 Step 19
Now you have 1 top know, 4 middle knots, and 4 bottom knots.
-
 Step 20
Base Knot
Place your plant pot inside. This is easier to do if you hang your macramé from a doorknob or some sort of hook. Gather the remaining cords together at the bottom of the plant pot. Adjust the cords as needed until everything looks even and your pot is centered.
-
 Step 21
Make a final knot with all 8 strands at the center of the bottom of the pot.
-
 Step 22
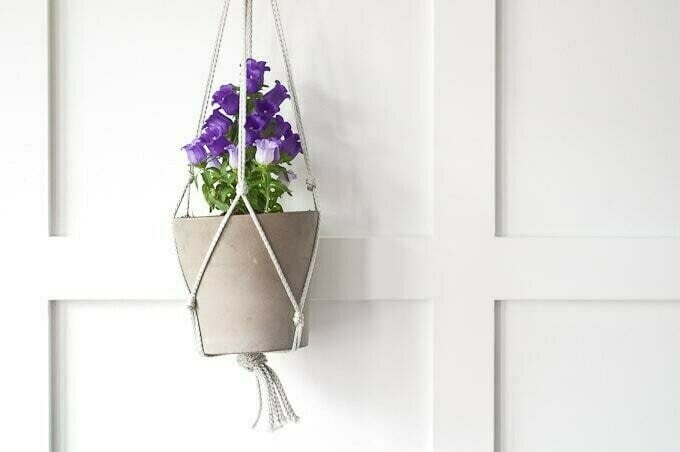
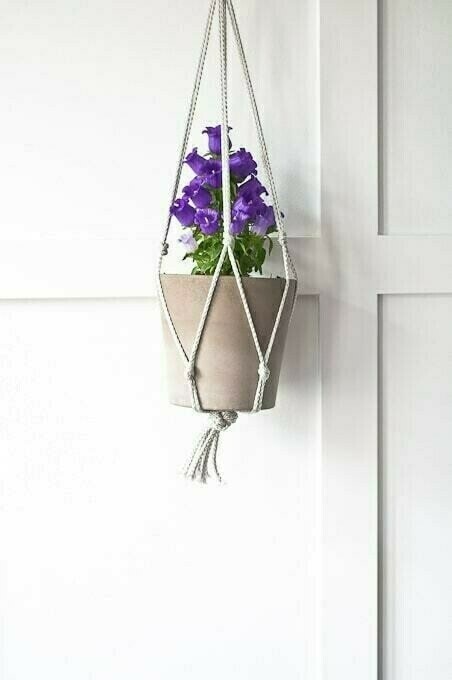
You should now have a tassel underneath the pot. You can leave it as is or cut it to any length. I chose to cut mine slightly shorter.
-
 Step 23
Here's how the pot will look in the hanging planter.
-
 Step 24
All you have to do is put a pretty plant inside and your hanging planter is ready to go outside!