


About
Check out our easy DIY on how to make your own Braided Rope Dog Leash just like this one for your bestie. Soft and colorful, he will stand out from the crowd with your custom creation.
I am so in love with this easy dog leash project. Seriously, I am going to make more, one for all of our family dogs. Originally, I wanted to make a soft rope dog leash that is perfect for a small breed dog like our Benny. (He’s a Shitzhu – Bichon mix.)
This rope leash is the perfect weight and length for our little Ben. With four strands of 3/16″ inch cotton rope, it is also strong enough for a larger dog.
Tags
-
 Rebecca favorited Dyed + Braided Rope Dog Leash Diy
15 May 06:34
Rebecca favorited Dyed + Braided Rope Dog Leash Diy
15 May 06:34
-
 LaAlex added Dyed + Braided Rope Dog Leash Diy to Agende e Blocknotes
05 Sep 00:58
LaAlex added Dyed + Braided Rope Dog Leash Diy to Agende e Blocknotes
05 Sep 00:58
-
LaAlex added Dyed + Braided Rope Dog Leash Diy to Pets
05 Sep 00:58
-
LaAlex favorited Dyed + Braided Rope Dog Leash Diy
05 Sep 00:54
-
 Deb E. favorited Dyed + Braided Rope Dog Leash Diy
10 Aug 20:59
Deb E. favorited Dyed + Braided Rope Dog Leash Diy
10 Aug 20:59
-
 Key West Witch favorited Dyed + Braided Rope Dog Leash Diy
07 May 07:29
Key West Witch favorited Dyed + Braided Rope Dog Leash Diy
07 May 07:29
-
 Buy This Cook That published her project Dyed + Braided Rope Dog Leash Diy
25 Sep 09:00
Buy This Cook That published her project Dyed + Braided Rope Dog Leash Diy
25 Sep 09:00
-
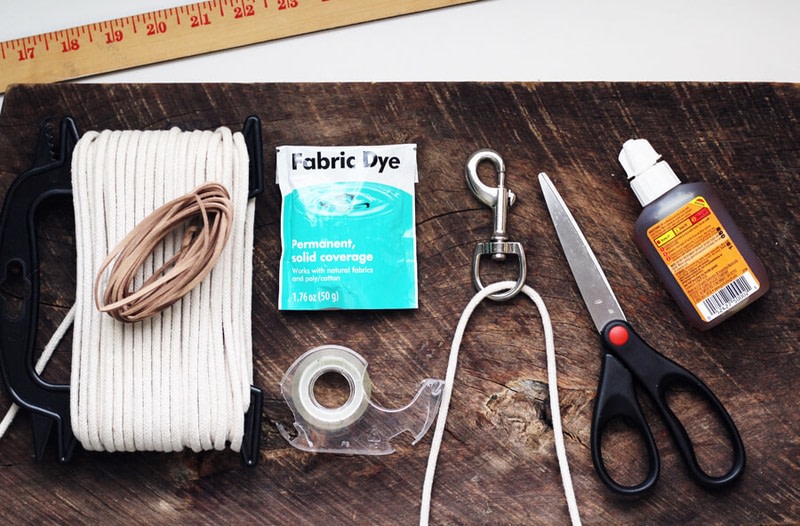
 Step 1
Assemble all supplies needed for this project.
For a 6 foot dog leash with a hand loop, you will need a total of 35 feet of clotheline. Cut that length into two equal pieces.
Secure the bolt to an immovable object (nail, drawer pull, etc) to keep the dog leash steady while braiding.
-
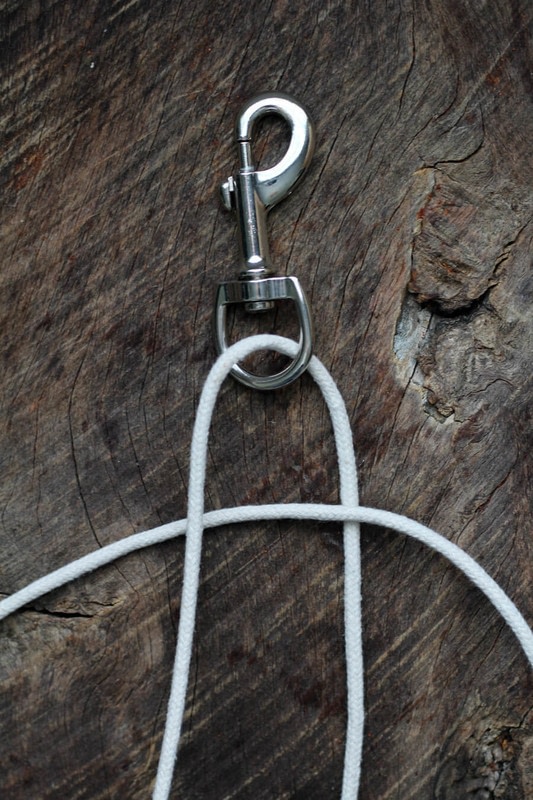
 Step 2
Loop one of the ropes through the swivel eye. Adjust it so there is an even length of rope on both sides.
Place the second rope evenly with the left side UNDER the 2nd strand and the right side OVER the 3rd strand as shown.
-
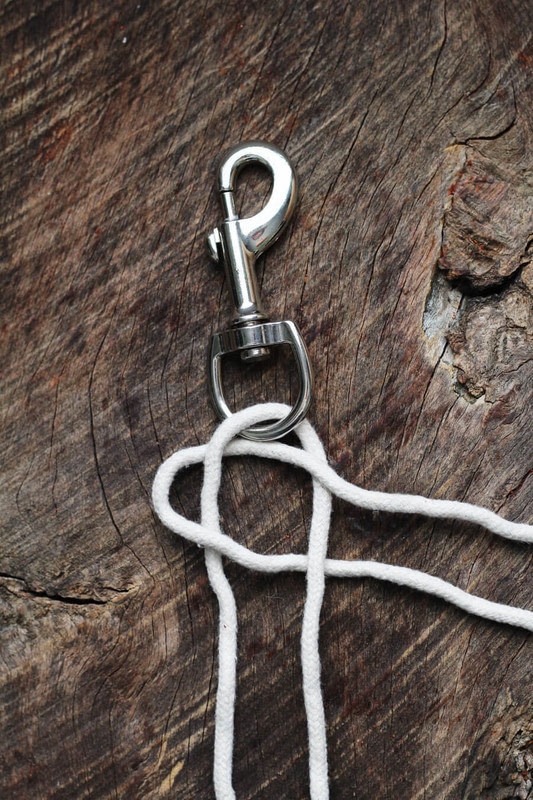
 Step 3
Take Strand 1 (far left) and weave it OVER strand 2, UNDER strand 3.
-
 Step 4
Bring the Strand OVER strand 4 and tuck it down.
-
 Step 5
Repeat this process. Tighten the braid slightly after each pass. Once every foot or so, gently stretch out the leash to straighten it. It will have a tendency to twist, but that’s ok, our later steps will fix that.
If you get mixed up, don’t panic. Just loosen your work and back up to the last spot in the leash where it was right and start again.
Every few passes, straighten out your rope.
-
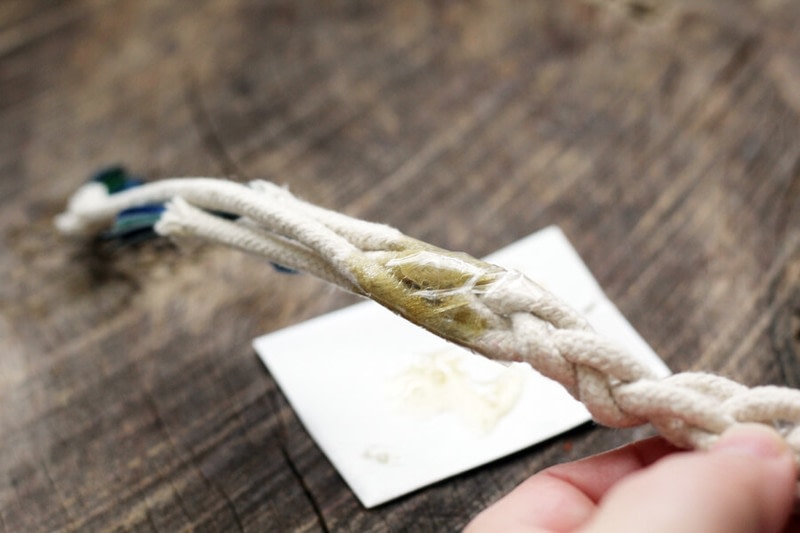
 Step 6
To keep the end of the rope from coming undone, place the braid on a flat surface and give it a good amount of waterproof glue.
-
 Step 7
Wrap the glued end in tape to hold the bond. Let dry completely before moving on to the next step.
-
 Step 8
Pick your favorite color of fabric dye. Follow the dye package instructions to get the best results. We used a dye that called for table salt and boiling water.
Dye your braided rope dog leash to directions. Once dyed, rinse in cold water, wash on delicate cycle, and let AIR DRY completely before moving on.
-
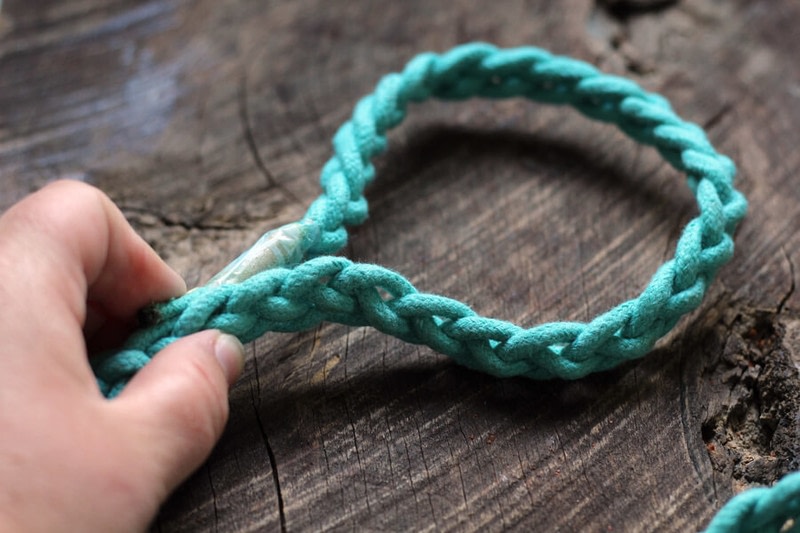
 Step 9
Once the rope has dried completely, create a simple hand loop by bringing the secured rope end back to the main rope.
-
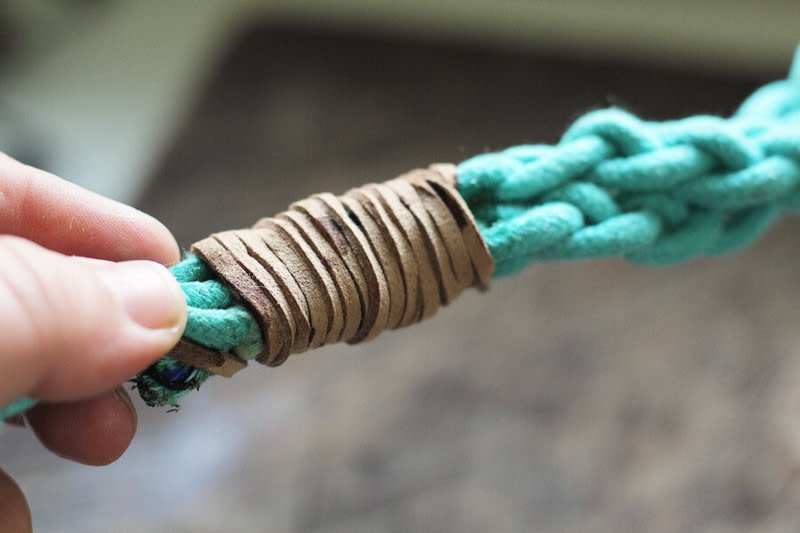
 Step 10
Apply more waterproof glue all between the two sections of rope, and wrap the bond with two feet of leather cord.
Tuck the ends of the leather cord into the rope so it is secured by itself and the glue.
Let dry completely!
-
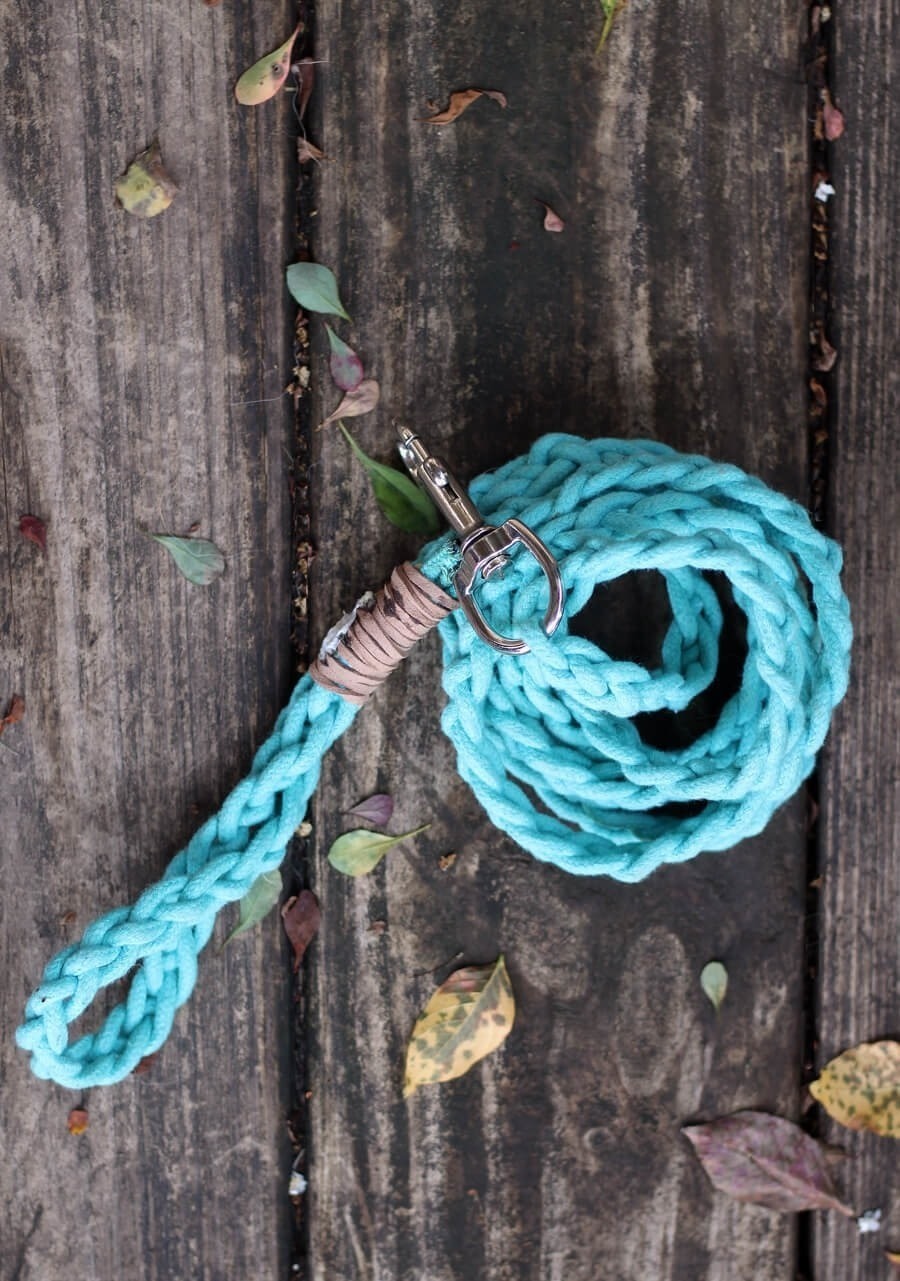
 Step 11
Enjoy your braided dog leash. When it gets dirty, hand wash or on the delicate cycle with warm water.