


About
Always find a pencil when you need one!
A simple DIY jar to hold pencils and pens or anything else you find lying around! I'm really into mason jar decorating right now so hopefully there will be more decorating/organizing ideas soon!
Some tips:
If the label of the jar is stuck right on with the sticker substance then hold the jar under hot water for 2-3 minutes until the label starts of peel off, and just rub GENTLY at the sticker residue with a sponge until it's all gone (while the jar is still under the hot water)
-
 priti.bolpat favorited Diy Pencil Jar
01 Aug 02:52
priti.bolpat favorited Diy Pencil Jar
01 Aug 02:52
-
 catmaplover55 favorited Diy Pencil Jar
27 Jun 06:41
catmaplover55 favorited Diy Pencil Jar
27 Jun 06:41
-
 xoxo- Brook favorited Diy Pencil Jar
27 Jun 02:56
xoxo- Brook favorited Diy Pencil Jar
27 Jun 02:56
You Will Need
-
 Step 1
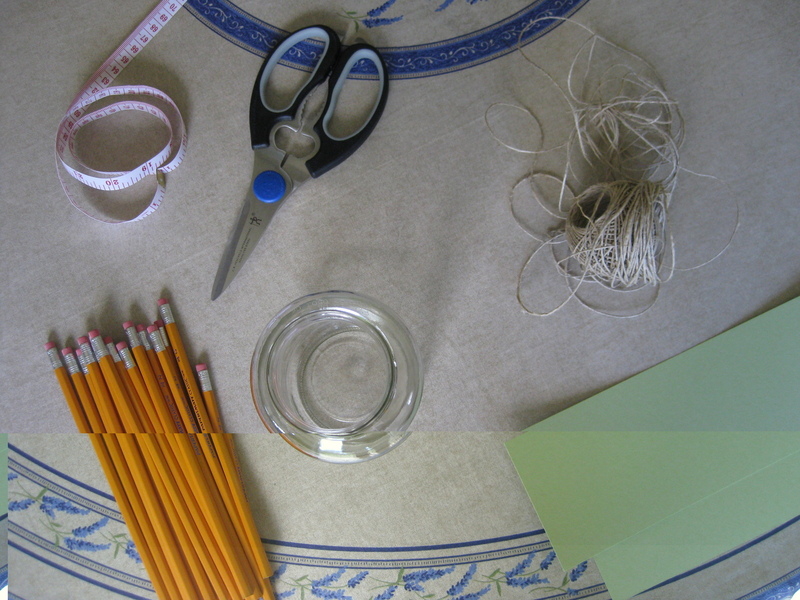
Gather together all your supplies
-Scissors
-Measuring tape
-Pencils
-Jar
-Twine
-Paper
-Hot glue gun (not pictured) -
 Step 2
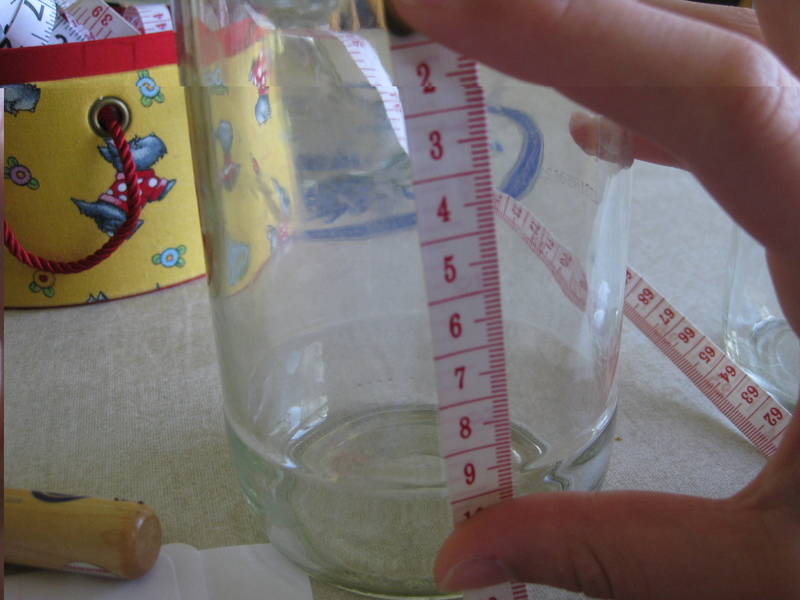
Measure the circumference of your jar using the measuring tape (mine was 28 cm)
-
 Step 3
Then measure how long you want the paper to be on your jar (on the jar I used, there were little indents from where the label used to be so i just made the paper as big as the label would've been [9.5 cm])
-
Step 4
Next mark the dimensions on your piece of paper and cut!
-
 Step 5
Take the twine and wrap it a couple times around the mouth of the jar (it doesn't have to be a couple times... if you like it wrapped only once or wrapped more it's totally personal preference).
-
 Step 6
Tie the twine into a knot, and BEFORE cutting the piece, tie a bow and DOUBLE knot it
-
 Step 7
Heat up the glue gun, and beware your fingers! glue a straight line down one side of the jar how ever long you want your paper to be.
TIP: it would look nicer and 'cleaner' if the twine bow was on the opposite side of the glue line
-
 Step 8
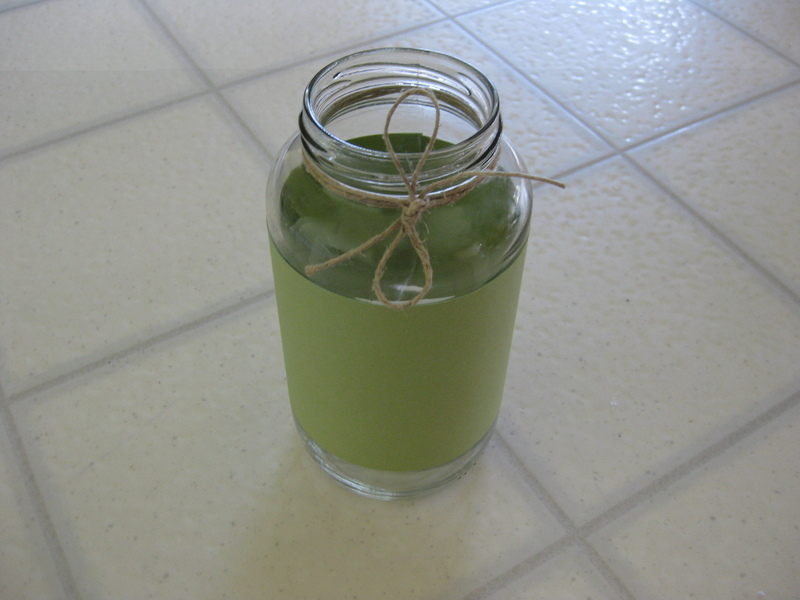
carefully stick one of the ends of the paper on the glued line and let it dry so you should have something like the picture.
TIP: let the glue cool for about 10 secs before you put the paper on top of it (it keeps for less of the hot glue strings catching onto your fingers)
-
 Step 9
Add another glue line right next to the one you did in step 7 (almost on top of the first one)
-
 Step 10
Carefully pull the paper around the jar and stick it on the glue line.
AND YAY you know have a simply decorated jar! These work really well in groups of 3 or 4 (or 1 or 2) with flowers or something! let the creativity from within flow out into your projects! happy recycling :)


Comments

 1
Home Accessories »
Diy Jewelry Box
1
Home Accessories »
Diy Jewelry Box

