

About
Easy and cute way to personalise your own tissue box cover!
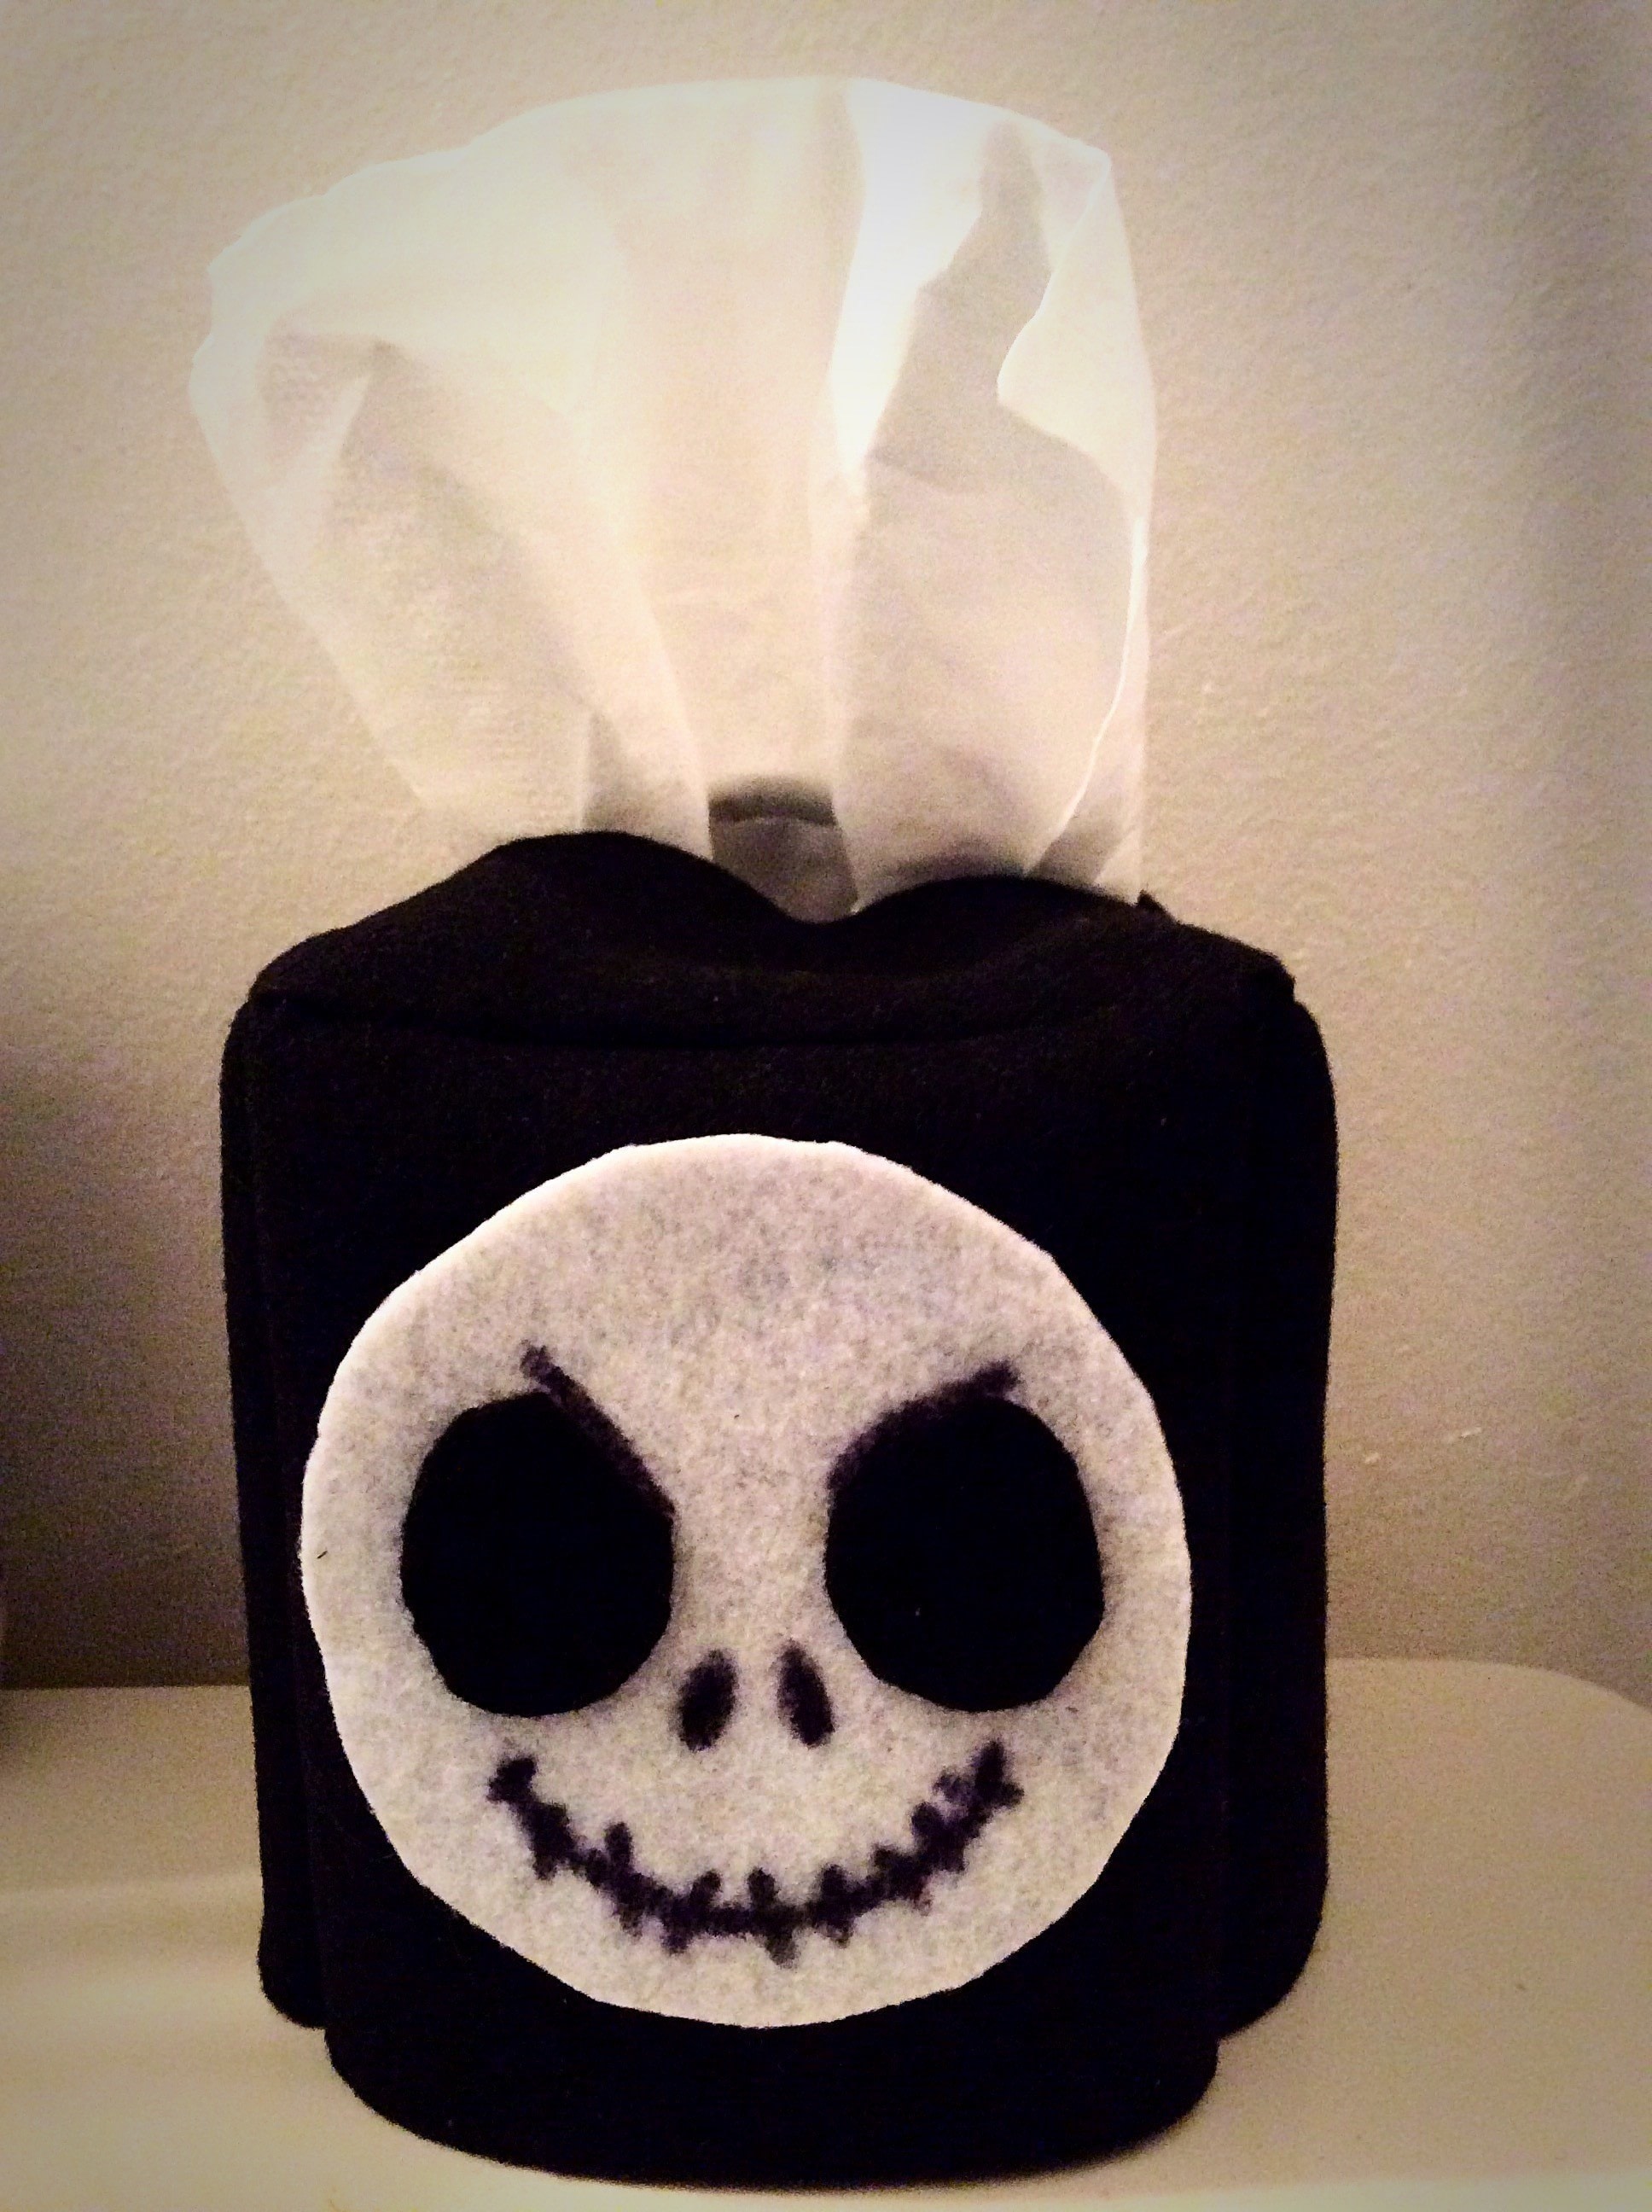
Here's a fun way and easy method to show off your love Nightmare before Christmas. I made the cover with felt and drew the details with black sharpie. The felt was purchased at Michaels arts and crafts store. The tissue box I used is from ralphs and it is a size 8.2 x 8.4 in measurements.
Tags
-
 Key West Witch favorited Diy Jack Skellington Tissue Box Cover
07 May 12:08
Key West Witch favorited Diy Jack Skellington Tissue Box Cover
07 May 12:08
-
 Amanda C. added Diy Jack Skellington Tissue Box Cover to Home
13 Apr 03:43
Amanda C. added Diy Jack Skellington Tissue Box Cover to Home
13 Apr 03:43
-
 RandomActsOfCreations published her project Diy Jack Skellington Tissue Box Cover
14 Jun 18:49
RandomActsOfCreations published her project Diy Jack Skellington Tissue Box Cover
14 Jun 18:49
-
 Step 1
Measure one of the sides of the box and the bottom of the box over your felt fabric with some chalk and cut out the shapes. You should have 4 long square shapes cut out for the sides and one short square shape for the top of the box.
-
 Step 2
Face two of the long squares together and sew them by hand or with a sewing machine seen here. A straight stitch should be fine.
Then take another square and face it on the same square you started with only this time you will sew on the opposite side. You will repeat this process with the rest of the long squares until you have formed a box shape. -
 Step 3
This is how it should look so far after sewing all the long squares together. Keep it inside out though. Don't flip it right side out just yet!
-
 Step 4
Now you'll pin the smaller square on top of your box shape and sew the edges and corners together. I recommend hand stitch for for this step as it's easier to sew around the corners.
Once that is done. Flip it right side out and set the felt box aside. -
 Step 5
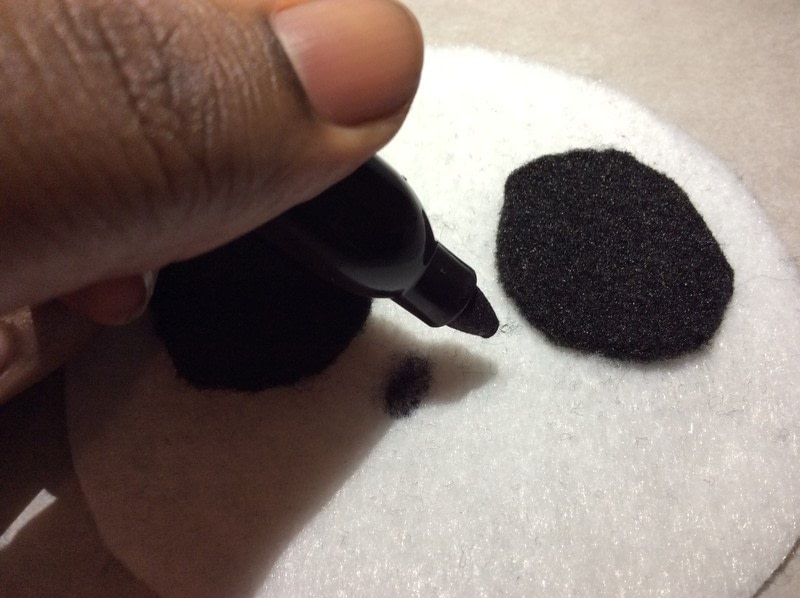
Now get your white felt, trace and cut out a circle for Jack's head. I used a Red solo cup to get the perfect sized circle for the box so either that or something close to a cup would be a good size to cut.
Then cut out two small black circles for the eyes. This all depends on which Jack facial expression you wish to use. For now, we'll just the regular happy expression. I used a small rounded tealight to get the small circle shapes.
-
 Step 6
Hot Glue the eyes as close to Jack's forehead as you can but leave some space between the eyes. You'll also need enough space to create the smile and nose
-
 Step 7
Now draw on his nose and his mouth with a sharpie.
For the nose, you can just draw two small tilted oval shapes in the middle of his face.
For the mouth, you will draw a deep curve from left to right where the bottom of his eyes meet. Then draw tiny vertical lines across the curve line to create the stitches for his mouth. -
 Step 8
Now get your felt box, cut a slit through the top square and slide it over the original tissue box while feeding the tissue through the slit.
Glue Jack's face on one of the sides of the felt box cover and you're done! I made Jack's eyes into a frown with the sharpie as a finishing tough but you can experiment yourself and see which expression you like best :)


 1
Home Accessories »
Diy Jewelry Box
1
Home Accessories »
Diy Jewelry Box

