


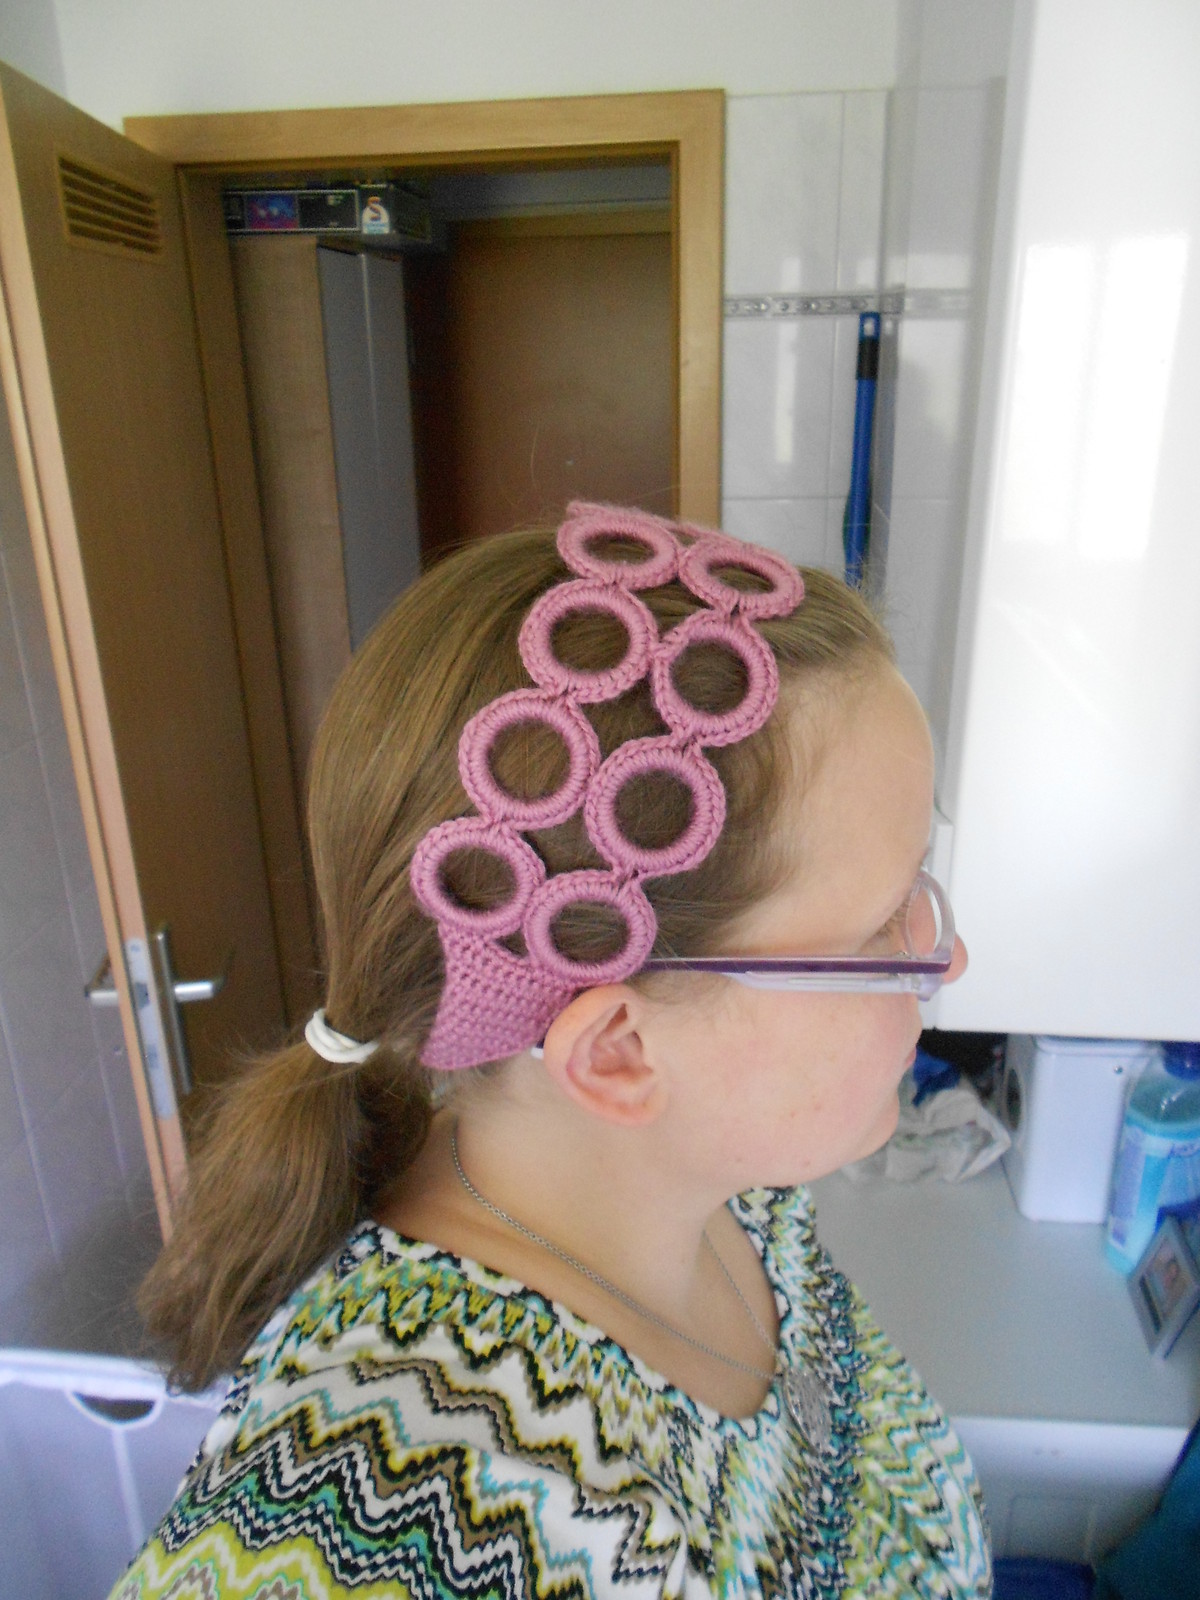


About
Very simple hair-band made of curtain rings.
Here I show you a principle of preparing rings to a headband. Actually it is not necessary to have rings with the same measure as mine. You just need to try some things out...like I did.
I don´t remember where I first saw this hairband, but unfortunalety it was not my idea. I just copied it...
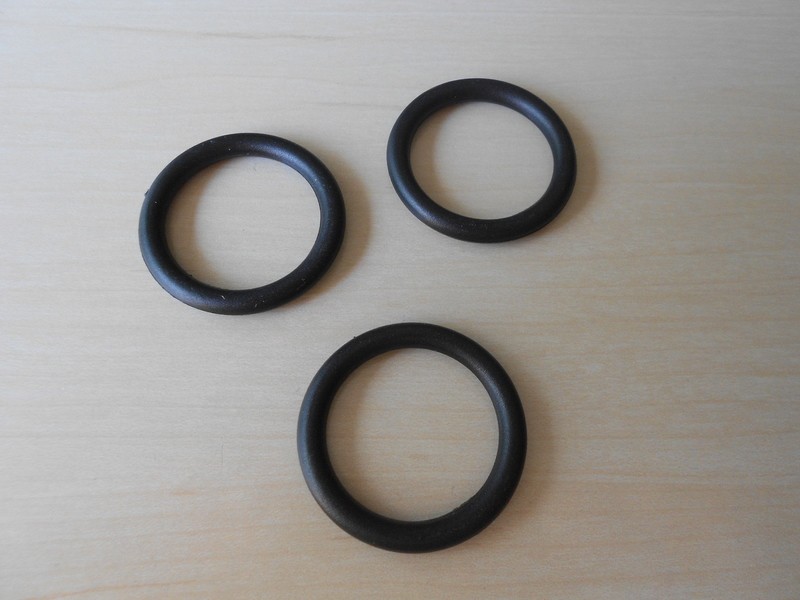
For doing exactly mine, you'll need
- 14 curtain rings in size 3,8cm or 1,5",
- any colour of wool or yarn,
- a crochet hook,
- scissors and
- an embroidery needle to hide the ends of the yarn.
Im sorry, I actually have problems with the 'You will need'-List...
Tags
-
 valeria p. favorited Diy Hair Band
20 May 11:10
valeria p. favorited Diy Hair Band
20 May 11:10
-
 eFenuska added Diy Hair Band to Head-dress
09 May 17:01
eFenuska added Diy Hair Band to Head-dress
09 May 17:01
-
 androinerd added Diy Hair Band to Craft Bucket List
03 May 17:28
androinerd added Diy Hair Band to Craft Bucket List
03 May 17:28
-
 thisisnisa favorited Diy Hair Band
01 Mar 15:26
thisisnisa favorited Diy Hair Band
01 Mar 15:26
-
Serenity added Diy Hair Band to hair accessories
28 Feb 22:09
-
 Chudames added Diy Hair Band to Crochet
05 Feb 19:28
Chudames added Diy Hair Band to Crochet
05 Feb 19:28
-
Chudames favorited Diy Hair Band
05 Feb 19:28
-
 Sheri O. favorited Diy Hair Band
28 Jan 13:43
Sheri O. favorited Diy Hair Band
28 Jan 13:43
-
Cynthia W. favorited Diy Hair Band
05 Jan 23:40
-
 dkapling added Diy Hair Band to hair band
27 Dec 23:47
dkapling added Diy Hair Band to hair band
27 Dec 23:47
You Will Need
-
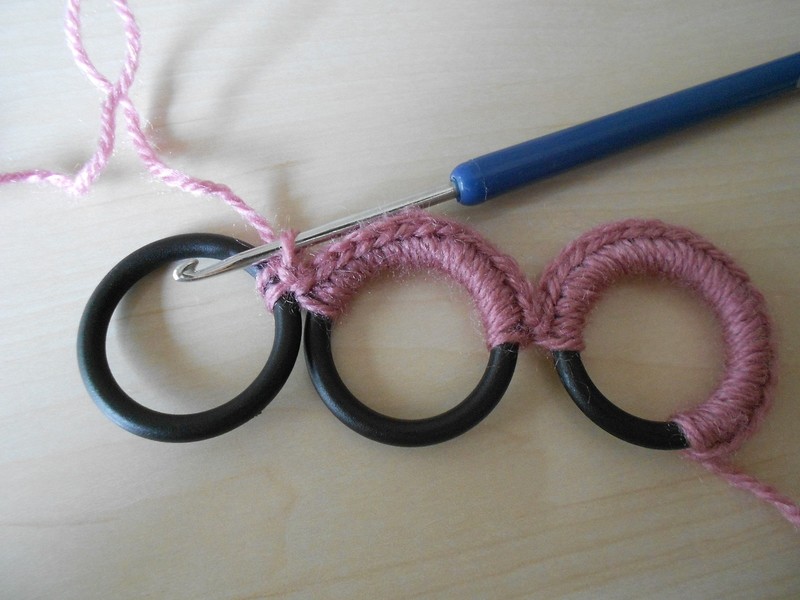
 Step 1
You start with one of these curtain rings. In my case, I found out that 28 single crochets fit well on the ring. And they can be devided in 4 parts of 7 single crochets, which is important for binding the rings together. I will show it to you in a drawing...
-
 Step 2
Fill the ring with 21 Single Crochets. Every single cross on the drawing stands for one single crochet.
-
 Step 3
Go on with 14 single crochets into the next ring...
-
 Step 4
...
-
 Step 5
...and the next and so on...
-
 Step 6
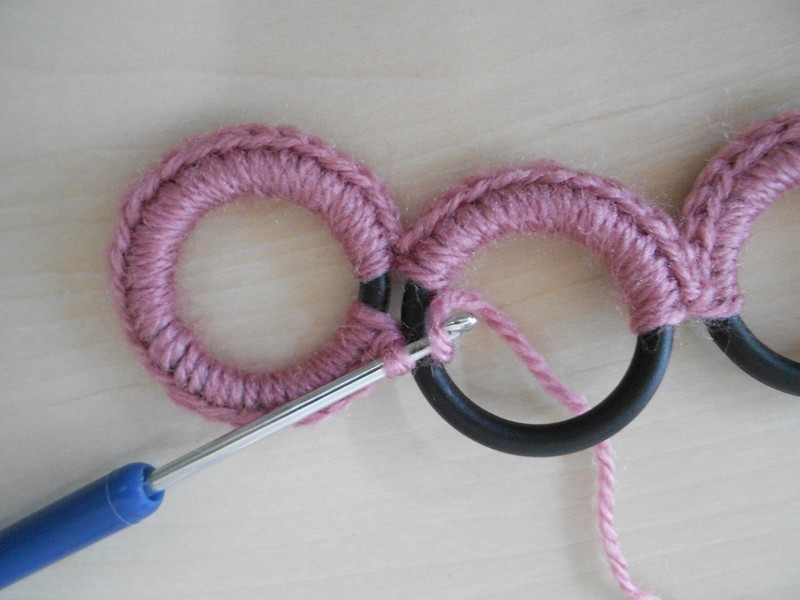
...until you reached the last one in the row, the seventh ring. This ring has to be filled completely with 28 single crochets.
-
 Step 7
Then you go all the way back, so that the seven rings are completely filled with single crochets.
-
 Step 8
As you can see here...
-
 Step 9
Then we start with the second row of rings. Therefore you have to start with 7 single crochets on the first ring of the second row and then do 7 single crochets in the second ring of the second row. After that you have to do a slip stitch into the second ring of the first row. The drawing might help you to understand what I mean. Every line stands for a slip stitch except the first one. This shall only show the beginning on the right side.
Yes, we start on the right side... -
 Step 10
..as you can see on this picture.
-
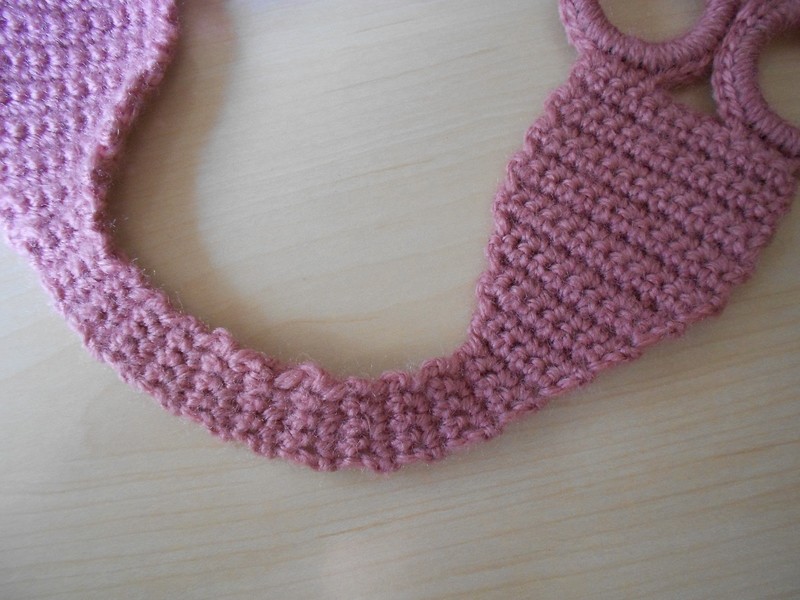
 Step 11
After you've done the rows of rings, you start with the band. I made mine 12 stitches wide at the end of the rings and 4 wide at the backside of the head.
Start with crocheting 4 slip stitches into one ring, then do 4 chain stiches and again 4 slip stitches in the next ring. -
 Step 12
Do 10 rows of 12 single crochets and then go thinner by crocheting the first and last two stitches of every second row together until you reach the amount of 4 stitches.
Because every head has another size, I advise you to just try. I often held the band on my head and took my sense as leader. After a while of doing 4 stitch-rows you need to go thicker again, so that you get the same thick end on the other side again. Therefore you need to do two single stitches in the first and last stitch of the fore-round until you have 12 stitches again. You can crochet this 12 stitches together with the end of the rings by slip stitches or sew with the embroidery needle.


 1
Watercolor Art »
Watercolor Paints Made From Make Up
1
Watercolor Art »
Watercolor Paints Made From Make Up
