


About
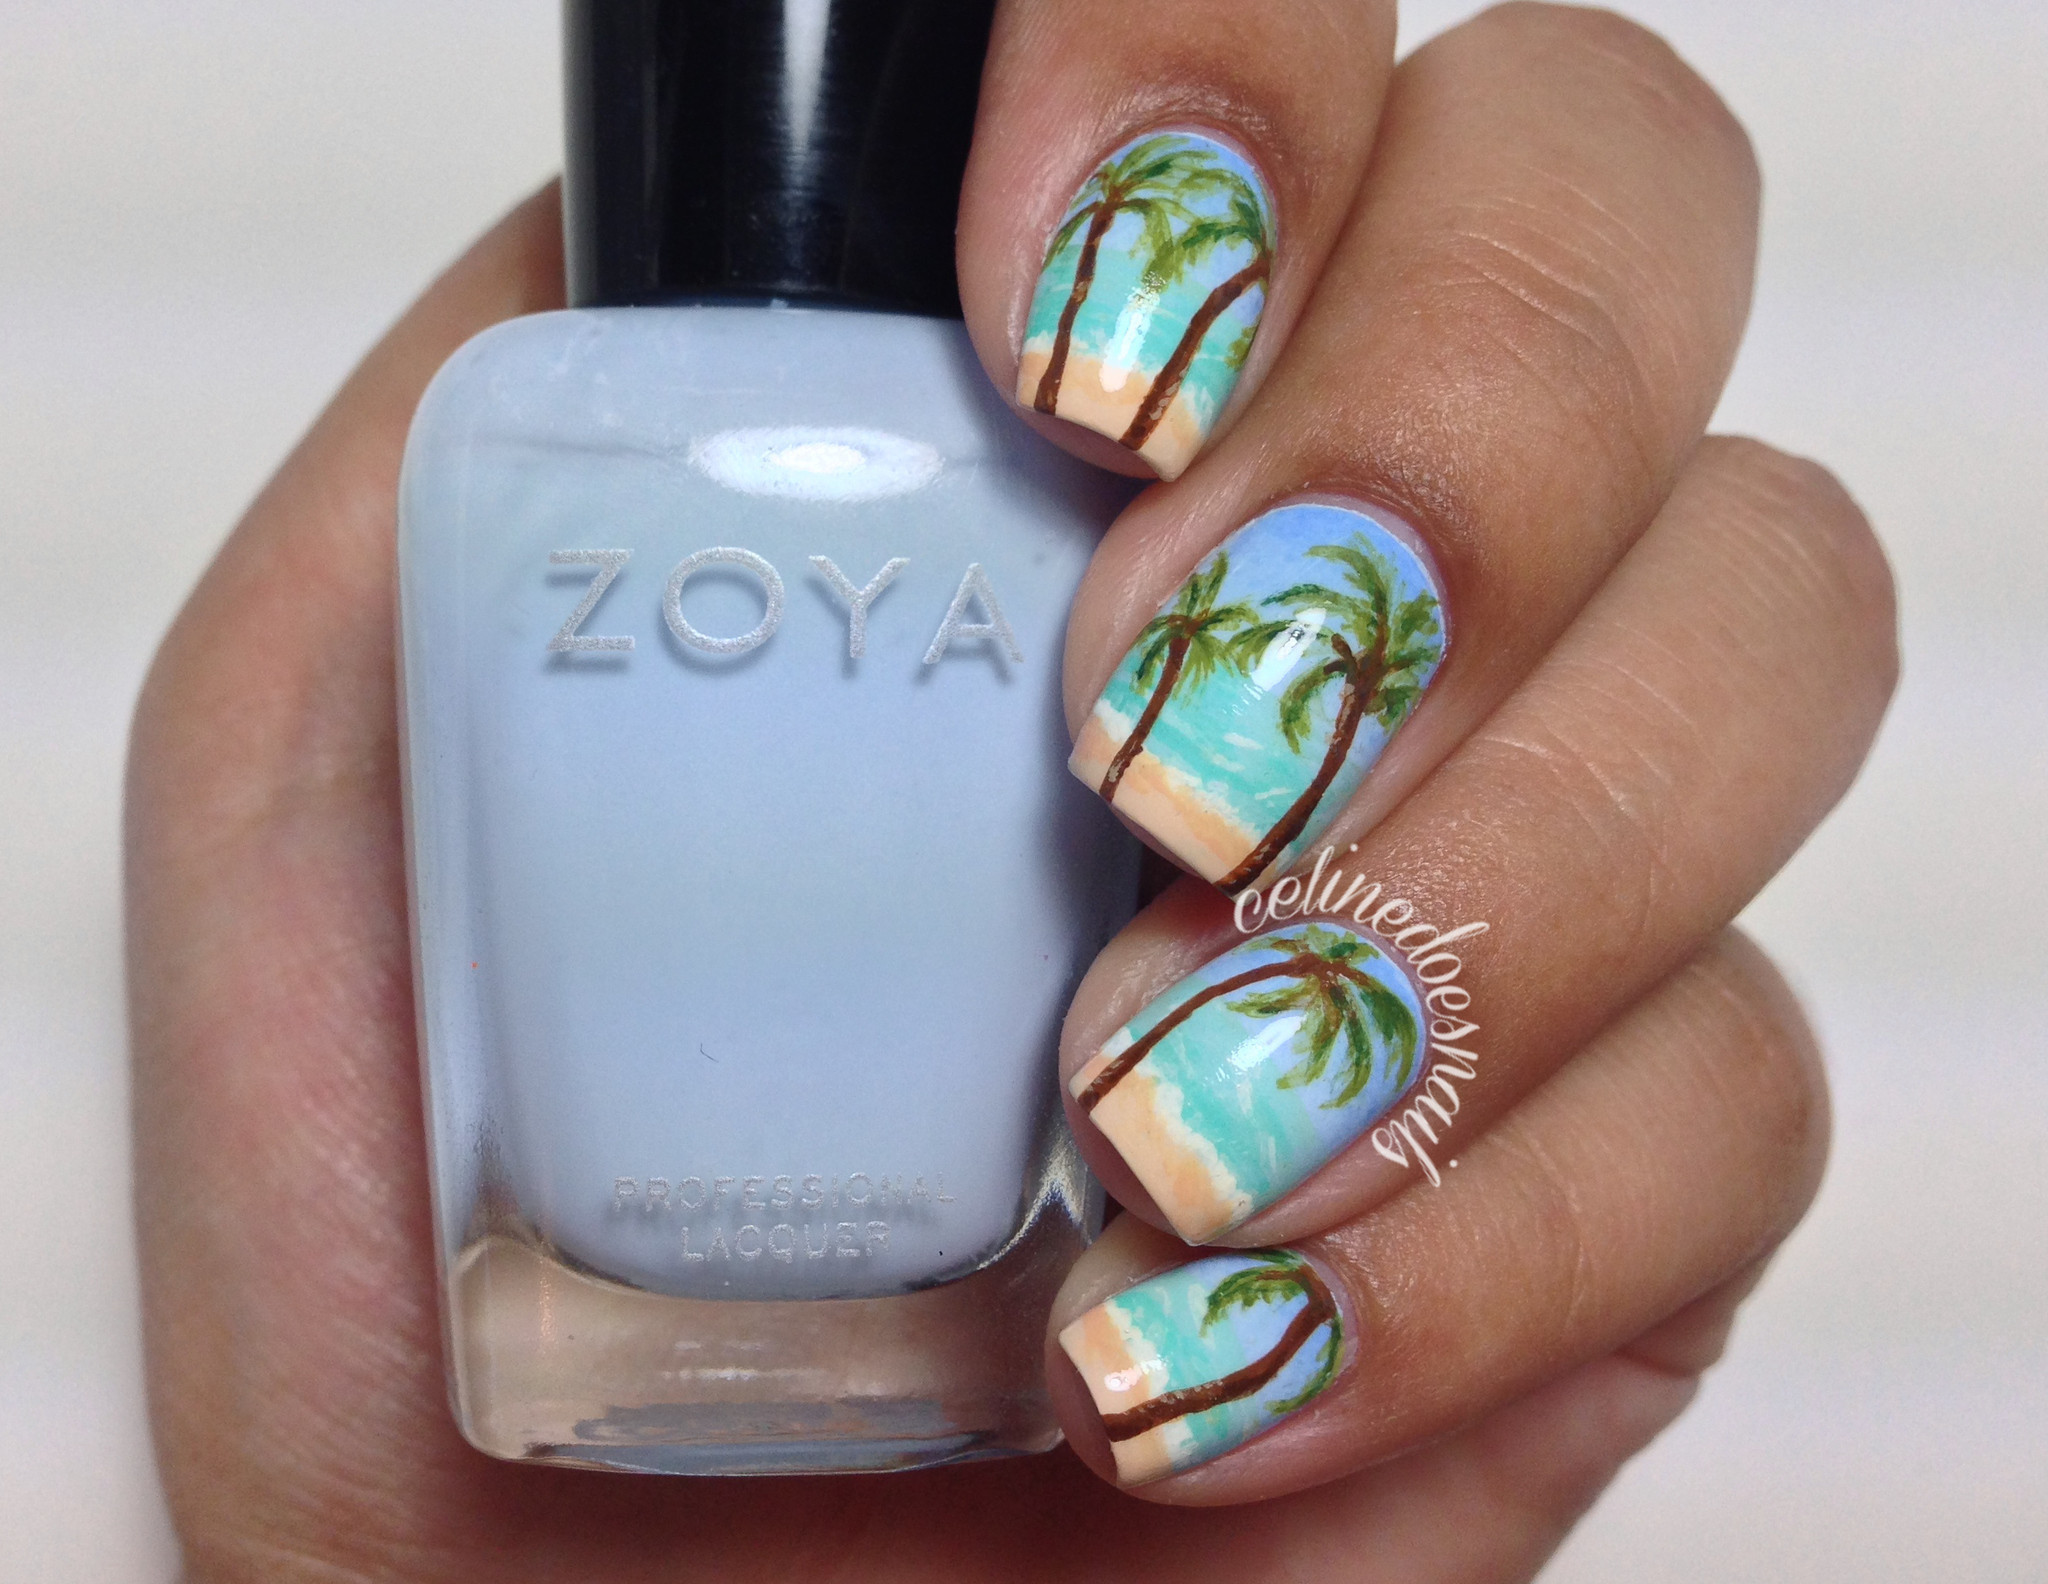
A how-to for the perfect summer design!
These are the basic steps I took to paint the nail design seen in the last photo. You truly can use any colors of paint or polish you have, but here's just what I used.
-
 BH3 added DIY Beach Nail Art to summer pool looks
27 Jul 16:56
BH3 added DIY Beach Nail Art to summer pool looks
27 Jul 16:56
-
 RareJewel favorited DIY Beach Nail Art
08 May 23:37
RareJewel favorited DIY Beach Nail Art
08 May 23:37
-
 Rachel W. added DIY Beach Nail Art to Beach Party
10 Apr 13:40
Rachel W. added DIY Beach Nail Art to Beach Party
10 Apr 13:40
-
 Isaura favorited DIY Beach Nail Art
21 Oct 10:01
Isaura favorited DIY Beach Nail Art
21 Oct 10:01
-
 larosesands favorited DIY Beach Nail Art
23 May 07:05
larosesands favorited DIY Beach Nail Art
23 May 07:05
-
 Patricis O. favorited DIY Beach Nail Art
26 Apr 18:03
Patricis O. favorited DIY Beach Nail Art
26 Apr 18:03
-
 Toxic Cupcake Killjoy favorited DIY Beach Nail Art
18 Nov 16:42
Toxic Cupcake Killjoy favorited DIY Beach Nail Art
18 Nov 16:42
-
 Celine Does Nails published her project DIY Beach Nail Art
18 Apr 05:14
Celine Does Nails published her project DIY Beach Nail Art
18 Apr 05:14
-
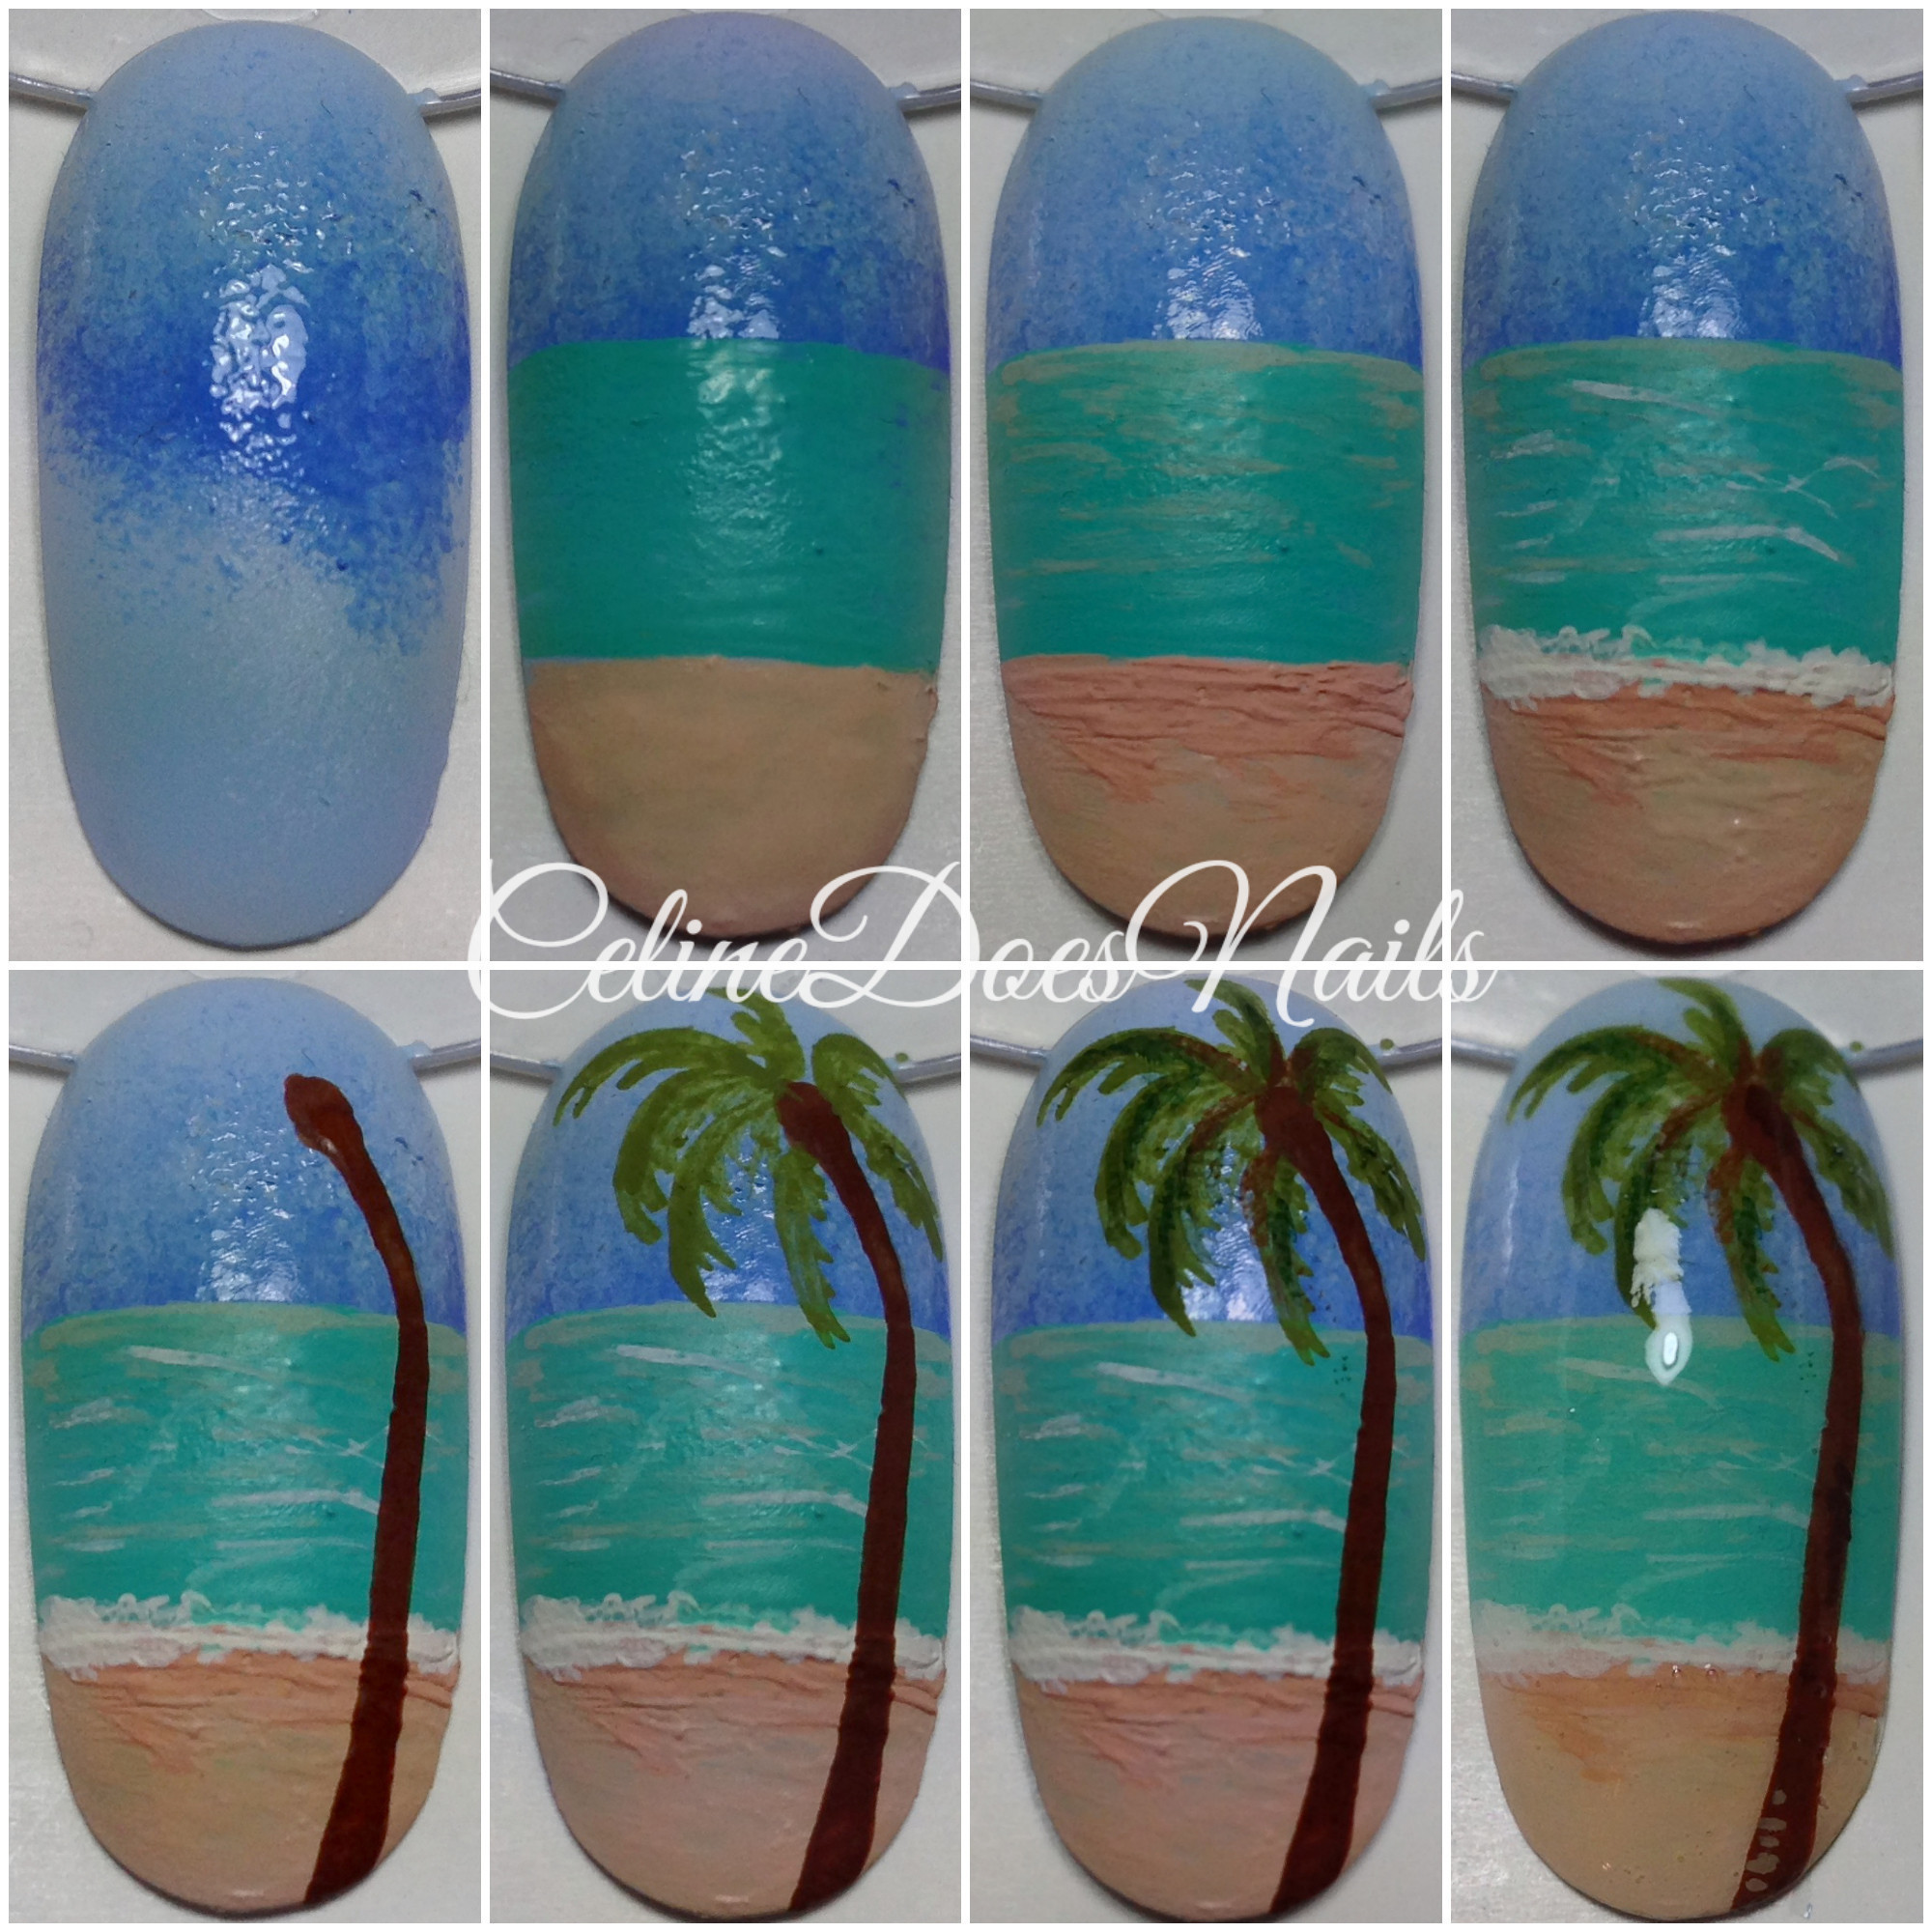
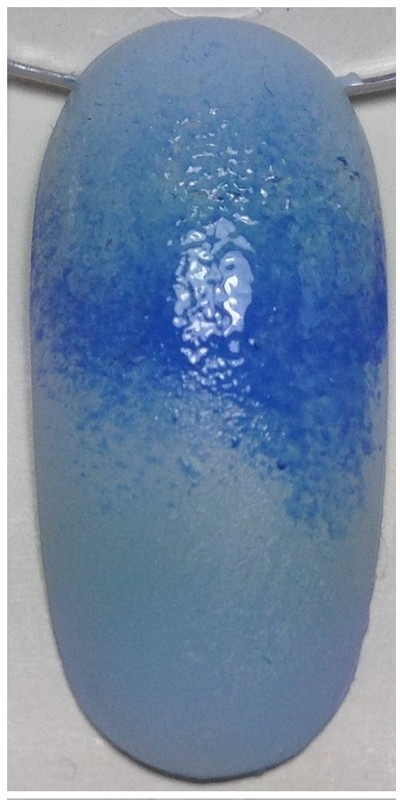
 Step 1
The first step is the sky. For this I used a makeup sponge to create a light to dark blue gradient. Go about half way down your nail.
-
 Step 2
Next step is to paint the water and sand. This is where I started to use acrylic paint. As you can see, about 1/3 of the nail is dedicated to each section.
-
 Step 3
Next you are going to add a lighter shade of blue to the water. Gently move the paintbrush back and forth. For the sand I added a darker shade of acrylic paint.
-
 Step 4
Step four is to add white acrylic paint. Use a dabbing motion with your paintbrush to create a foamy look where the water meets the sand. Use very gentle strokes to add highlights to the water as well.
-
 Step 5
Next paint the base of the palm tree. I used a brown acrylic paint for this step.
-
 Step 6
Next is to paint the leaves of the palm tree. This can be kind of tricky but try to look at a picture of a real palm tree to get it right. I used a lighter, olive green for this step.
-
 Step 7
Almost done! Next I used both a darker green and brown acrylic paints to add shadows to the palm tree leaves.
-
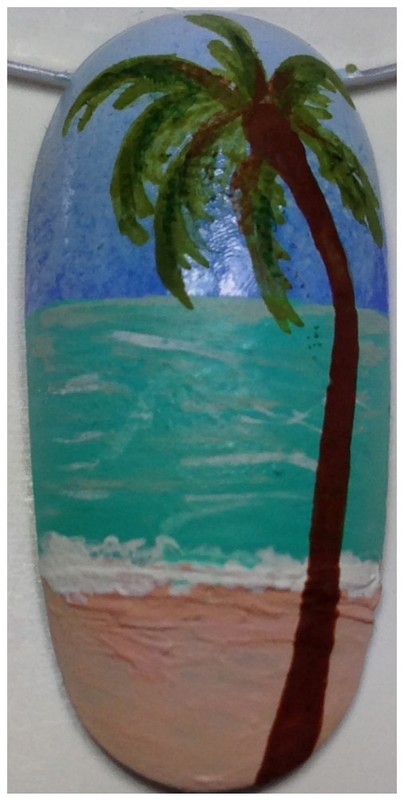
 Step 8
Last step is to add top coat! Make sure to let your design dry completely before you do so. (Oh and I guess I added some highlights to the palm tree trunk in this step too.)


 1
Books & Journals »
Locking Box And Journal
1
Books & Journals »
Locking Box And Journal
 2
Babies & Kids »
A Toy Kitchen For A Child
2
Babies & Kids »
A Toy Kitchen For A Child
 3
Origami Flowers »
Origami Orchid
3
Origami Flowers »
Origami Orchid
 4
Office »
Pretty Sketchbooks
4
Office »
Pretty Sketchbooks
 5
Charms & Keyrings »
Shugo Chara Inspired Pop It
5
Charms & Keyrings »
Shugo Chara Inspired Pop It


