About
Decoupage a gift box with Trimcraft
This is my first tutorial, and I'm afraid I didn't take enough photos. I'll know better next time!
I spent my Sunday afternoon last week testing the decoupage papers and brushes available from Trimcraft. I started off with a grand old haul of four different Deco Mache paper designs and a pair of brushes specially designed for decoupage, plus a cardboard gift box I've been planning to "do something creative with" and, in the absence of any specialist decoupage glue, a huuuuge bottle of PVA (white glue).
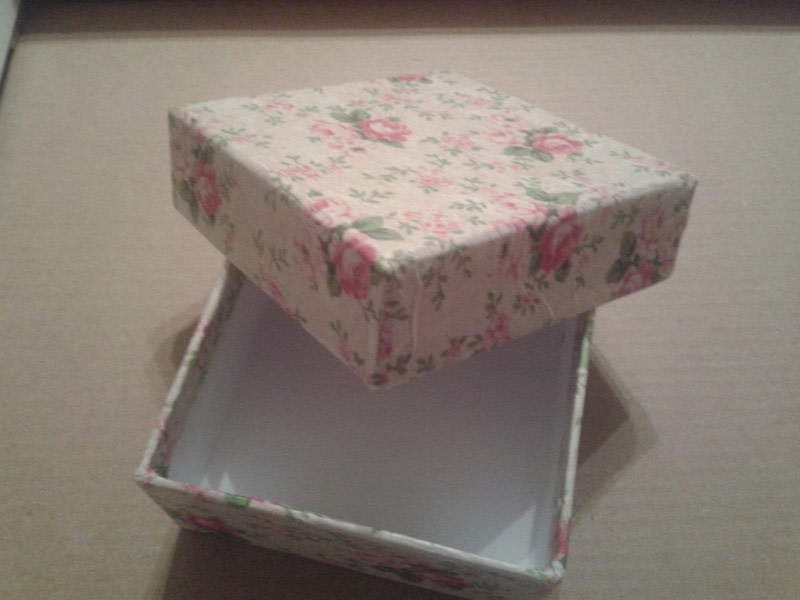
I decided to go with the small floral design and, since I wanted to keep a vintage vibe, I didn't paint the box white before adding the paper so I was left with a nice aged look. For the same reason, I decided not to varnish the finished product, preferring to leave it matte.
I found the papers relatively easy to use, although getting it perfectly smooth in all the nooks and crannies of the box was a challenge. I did end up with some wrinkles, but thankfully these work with the 'vintage' look I was going for. The flowers also hide some of the imperfections, so for novices I would definitely recommend LOTS AND LOTS of pattern! The special decoupage brushes definitely help; the stiff brush is really useful for pushing the paper right into the corners of the box.
Anyway, enough chit chat! Here's what I did:
-
 Susan J. favorited Deco Mache Gift Box
25 Jun 21:32
Susan J. favorited Deco Mache Gift Box
25 Jun 21:32
-
 laura_southpaw entered her project Deco Mache Gift Box to Noisemakers Club
11 Jun 16:39
laura_southpaw entered her project Deco Mache Gift Box to Noisemakers Club
11 Jun 16:39
-
laura_southpaw entered her project Deco Mache Gift Box to meowbox
11 Jun 16:39
-
laura_southpaw published her project Deco Mache Gift Box
28 Feb 09:00
-
 Step 1
Cut the paper to size: 4 side pieces and one base piece; plus the same for the lid. Make sure each side piece is taller than the side: tall enough to fold a little over the inner rim, and also to fold under the base. This helps to get a neat finish. You could alternatively rip the paper instead of cutting it with scissors - this is supposed to help the edges blend and mask joins (something to do with the fibres melding, I guess... but alas, my precision-loving brain wouldn't allow me to go wild and ruler-free with this one! Maybe next time...)
Ensuring the glue is mixed well, apply a thin coat with a brush to one side of the box at a time, plus a little on the inside rim and a few millimetres of the base so you can fold any excess paper underneath the box.
-
Step 2
Position your paper on the box and press down gently, folding a little over the rim. Use the plastic handled brush to coax the paper into the corners.
-
Step 3
Now sweep the brush over the surface, from the centre out, to get rid of any wrinkles. Don't press too hard or you'll rip the paper! (Yes, I did this... but I had a few seconds to reposition the paper so it actually looks kinda intentional. Phew!)
-
 Step 4
Repeat this process for the other three sides, then glue a square of paper onto the base, covering the ends of the four side pieces. Smooth down in the same way. Repeat the whole process for the lid - I actually decided to try using one complete piece for the lid, cut out as a net, but it was quite difficult to line up the whole thing at once properly and I ended up with a few wrinkles. On the plus side, there are no overlapping pieces of paper so it all looks an even colour, unlike the base (this wouldn't be a problem if I'd painted the box white beforehand). So, swings and roundabouts.
-
Step 5
Brush a layer of glue over the whole decoupaged area of the box to protect the paper. Leave to dry. I left mine propped up on a glass so none of the glued areas were touching my work surface, and put some newspaper down to catch any rogue drips.
-
 Step 6
Put something pretty inside your box and gift it to someone you love. Or keep it for yourself and gaze upon it lovingly whilst patting yourself on the back with one hand and shoving a well earned cake in the vague direction of your face with the other.