


About
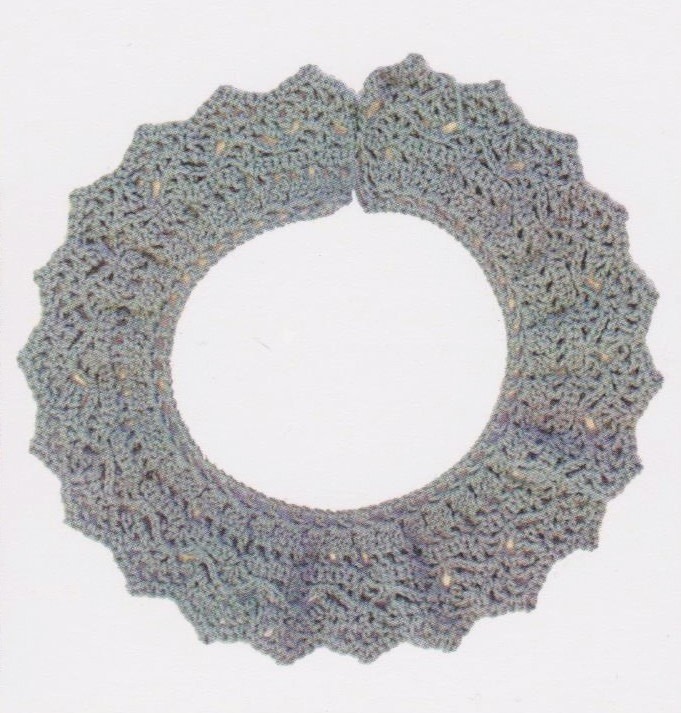
Learn how to make a stylish crochet collar for the winter (or the summer!)
This fab detachable crochet collar is perfect for wearing in all seasons - team it with a nice summery dress or your favourite winter woolly.
They also make great presents for that festive time of year!
We’re using these special abbreviations to make the instructions clearer:
dc2tog – insert the hook into the next stitch, wrap the yarn around the hook and draw a loop through. Repeat this step into the next indicated stitch (this will mean there are now three loops on the hook). Wrap the yarn and draw through ALL the loops to complete the stitch.
tr2tog – wrap the yarn around the hook, insert the hook into the next stitch, wrap the yarn, draw a loop, wrap the yarn and draw through two of the loops on the hook (there are now two loops left on the hook). Repeat this step into the next indicated stitch (there are now three loops left on the hook).Wrap the yarn and draw through ALL the loops to complete the stitch.
-
 Key West Witch added Crochet Collar to Jewelry
30 Jun 01:45
Key West Witch added Crochet Collar to Jewelry
30 Jun 01:45
-
 Kimya J. favorited Crochet Collar
29 Oct 22:15
Kimya J. favorited Crochet Collar
29 Oct 22:15
-
 Tierra T. favorited Crochet Collar
14 Oct 17:06
Tierra T. favorited Crochet Collar
14 Oct 17:06
-
 VeeMaris favorited Crochet Collar
23 Mar 14:42
VeeMaris favorited Crochet Collar
23 Mar 14:42
-
 jennfer c. favorited Crochet Collar
04 Mar 07:57
jennfer c. favorited Crochet Collar
04 Mar 07:57
-
 Cat Morley added Crochet Collar to Wardrobe
07 Feb 11:54
Cat Morley added Crochet Collar to Wardrobe
07 Feb 11:54
-
Cat Morley favorited Crochet Collar
07 Feb 11:54
-
 Suzi T. favorited Crochet Collar
06 Feb 12:30
Suzi T. favorited Crochet Collar
06 Feb 12:30
-
 Jolanda favorited Crochet Collar
15 Jan 23:18
Jolanda favorited Crochet Collar
15 Jan 23:18
-
Lisa C. published her project Crochet Collar
09 Oct 15:29
-
 Step 1
Using a 4mm hook make a 96 ch. Leave a tail of about 15cm for sewing the button on later.
Row 1: 1tr into 6th ch from hook, *1ch miss one ch, 1 tr into next ch; repeat from * to end. 45 ch sps, with button loop at beginning of row.
Row 2: 3 ch (counts as 1 tr), miss 1ch, 3 tr into top of next tr, *1 ch, 3 tr into top of next tr; repeat from * 42 times more, 1 tr into last tr. 44 fans made of groups of 3 trs.
Row 3: 4 ch (counts as 1 tr and 1 ch), *1 tr into centre tr of 3-tr group of previous row, 1 ch, 1 tr into next 1-ch sp, 1 ch; repeat from * 42 times more; finish row with 1 tr into cetre tr of 3-tr group of previous row, 1 ch, 1 tr into top of 3 ch at beginning of previous row.
Row 4: 1 ch (NOT counted as a st), 1 cd into each tr and 1-ch sp of previous row, ending with 1 cd into 3rd of 4 ch at beginning of previous row. 177 sts.
-
 Step 2
Row 5: 1 ch (NOT counted as a st), 1 cd into same st, *1 ch, miss ext 3 sts, (1tr, 1 ch) 3 times into next st, 1 tr into same st – 1 shell made, 1 ch, miss next 3 sts, 1 dc into next st; repeat from * to end. 22 shells made
Row 6: 5 ch (counts as 1 tr and 2 ch), (1 tr, 1 ch, 1 tr, 1 ch, 1 tr) into centre 1-ch sp of shell of previous row, 2 ch, 1 tr into next dc; repeat from * to end.
Row 7: 2 ch (counts as first part of tr2tog), 1 tr into next 2-ch sp, *(11 ch, 1 tr into next tr, 1 ch, 1 tr into next 1-ch sp) 2 times, 1 ch, 1 tr into next tr, 1 ch, tr2tog into next two 2-ch sps; repeat from * to end, working last tr2tog into last 2-ch sp and top of 3 ch at beginning of row.
Row 8: 1 ch (NOT counted as a st), 1 dc into same st, 1 dc into next st, *1 dc into next 1-ch sp, 1 dc into next st, 1 cdc into next 1-ch sp, (1 dc, 3ch, 1 dc) into next 1-ch sp, 1 dc into next st, 1 dc into next 1-ch sp, dc2tog into next st and first st adter ’1ch, tr2tog, 1ch’ of previous row, repeat from * to end, working last dc2tog into final 2 tr of previous row.
Fasten off and sew in ends securely.
-
 Step 3
Then attach the button and you’re all done!!


 1
Books & Journals »
Locking Box And Journal
1
Books & Journals »
Locking Box And Journal
 2
Babies & Kids »
A Toy Kitchen For A Child
2
Babies & Kids »
A Toy Kitchen For A Child
 3
Origami Flowers »
Origami Orchid
3
Origami Flowers »
Origami Orchid
 4
Office »
Pretty Sketchbooks
4
Office »
Pretty Sketchbooks
 5
Charms & Keyrings »
Shugo Chara Inspired Pop It
5
Charms & Keyrings »
Shugo Chara Inspired Pop It


