About
Mystical Stitches
For the chain stitch, you’ll insert the needle back into the same spot the thread came out of. This can feel unnatural after learning the previous stitches, but you’ll love it once you get the hang of it!
-
 Bonnie P. favorited Chain Stitch
10 Jun 07:26
Bonnie P. favorited Chain Stitch
10 Jun 07:26
-
 Storey Publishing published her project Chain Stitch
09 Jun 09:00
Storey Publishing published her project Chain Stitch
09 Jun 09:00
You Will Need
-
 Step 1
Bring the needle out at the end of the stitch line, then insert the needle into the fabric at this same point, but don’t pull through yet!
-
 Step 2
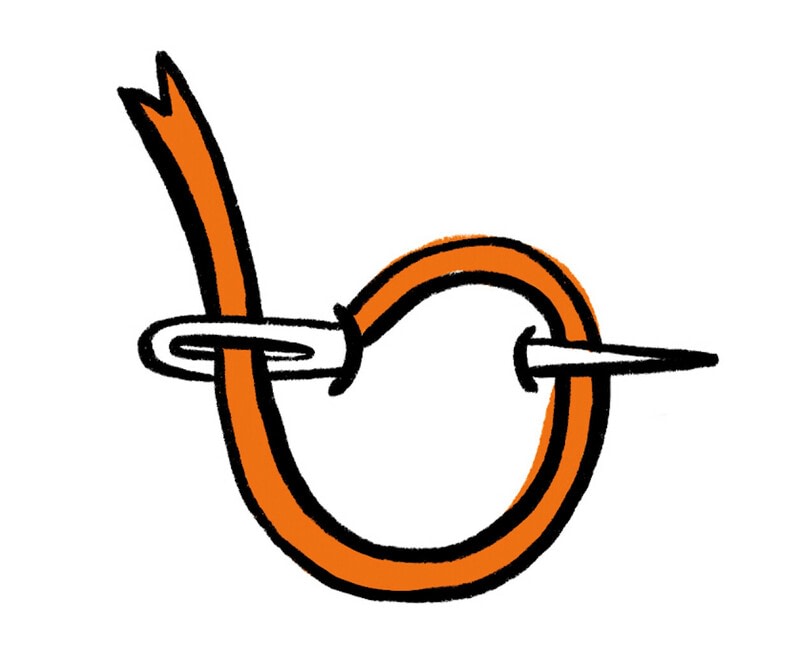
Position the tip of the needle to come out ¼ inch away from where it went in.
-
 Step 3
At this point, when you’ve got the needle coming out of the fabric, before you pull it through, tuck the thread behind the needle so that the next stitch catches this stitch.
-
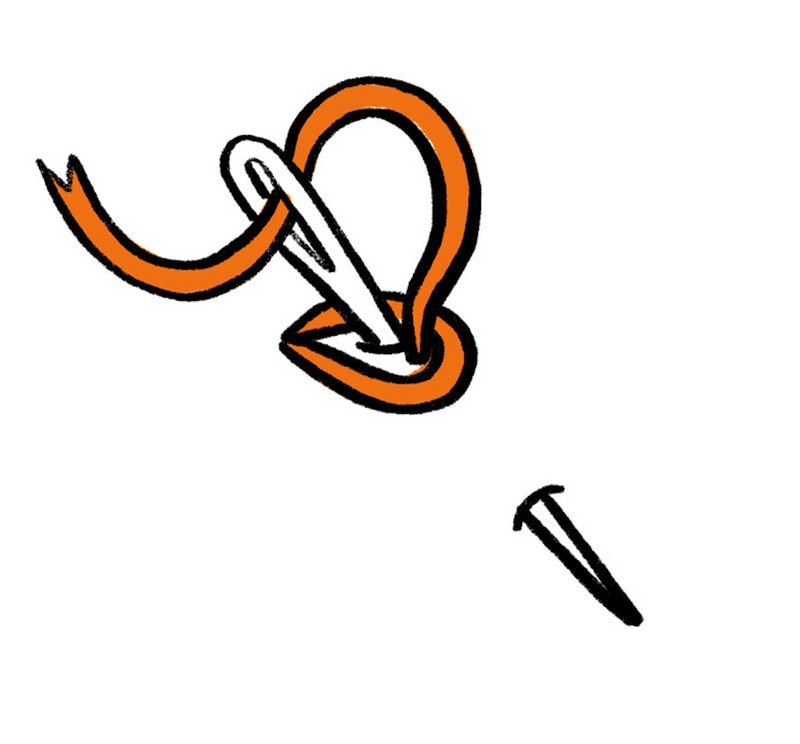
 Step 4
Pull the needle through until the loop is gently secured against where the thread comes out, but not so tight that the loop pulls on the loose thread. Now insert the needle back inside this loop, right where the thread just came out.
-
 Step 5
Bring the tip of the needle out ¼ inch down the stitch line, but don’t pull through yet.
-
 Step 6
Tuck the thread behind the needle, then pull through until the stitch creates a gentle loop nestled into the previous loop.
TIP: If you do not catch the thread behind the needle on each stitch, it will not create the stitch and you are left with a loose loop that can quickly unravel.
-
 Step 7
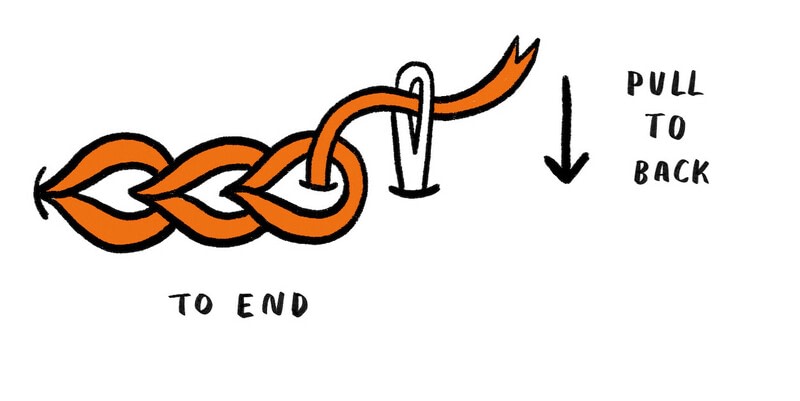
To end the chain stitch, insert the needle into the fabric on the outside of this loop to tack down this last stitch and prevent all the stitches from coming undone. This can be done with a tiny stitch to create a blunt end, or a long stitch to taper the end of the chain stitch
-
 Step 8
Points and Turns with Chain Stitch
When turning corners with a chain stitch, it’s best to end the stitch and begin a new chain stitch at the corner, slightly overlapping the end stitch so there is no gap in the line where the new stitch begins (A).
To create tapered points with a chain stitch, stagger the threads at the beginning of the stitch so the loop is a little narrower (B). Then continue normally. To end the stitch with a taper, create an elongated end stitch ¼ to ½ inch depending on how tapered you want the end (C). On sharp corners where two lines meet, slightly stagger the ends so that one line is shorter to create a more gentle tapered effect (D).Turning corners
Beginning stitch with tapered end
Finishing stitch with tapered end
D. Staggered ends to create tapered point