

About
quick and easy mobile phone bag DIY
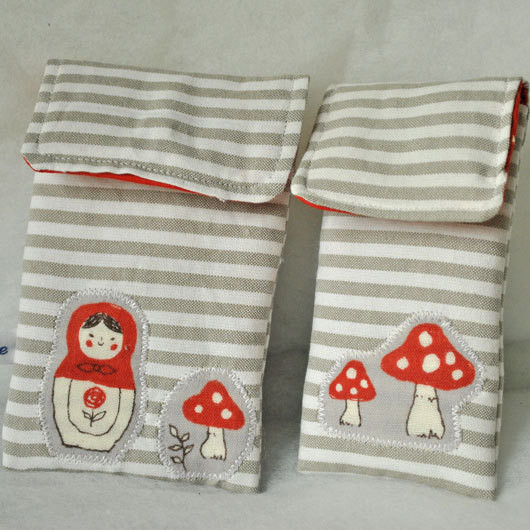
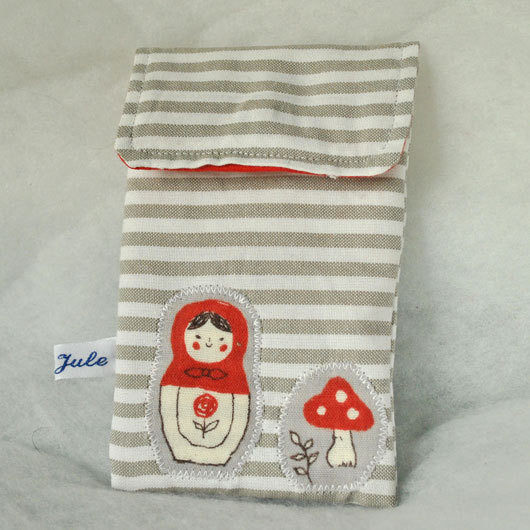
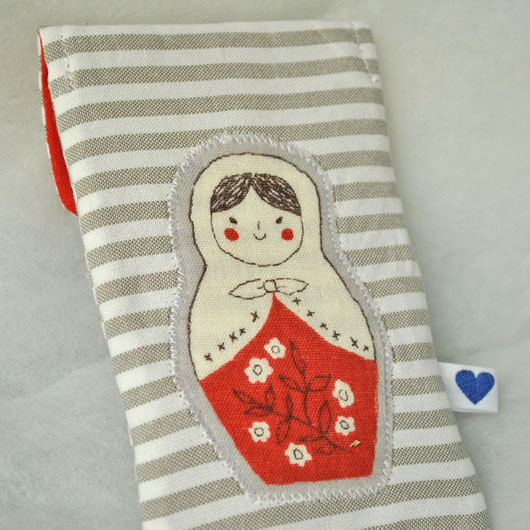
This is an easy tutorial for a very quick cellphone bag. Perfect for when you need a present.
-
 Sarah Sylvia S. favorited Cellphone Bag
22 Jul 05:14
Sarah Sylvia S. favorited Cellphone Bag
22 Jul 05:14
-
 Mary J. favorited Cellphone Bag
24 Mar 02:48
Mary J. favorited Cellphone Bag
24 Mar 02:48
-
Aurelie L. added Cellphone Bag to Sacs
14 Mar 20:07
-
 bemeself favorited Cellphone Bag
24 Aug 22:05
bemeself favorited Cellphone Bag
24 Aug 22:05
-
Alina M. favorited Cellphone Bag
09 Aug 16:31
-
 Billie F. favorited Cellphone Bag
13 Jun 03:59
Billie F. favorited Cellphone Bag
13 Jun 03:59
-
 iscrafte added Cellphone Bag to Inspiration
19 May 08:52
iscrafte added Cellphone Bag to Inspiration
19 May 08:52
-
iscrafte favorited Cellphone Bag
19 May 08:52
-
 Alezita G. favorited Cellphone Bag
07 Feb 06:16
Alezita G. favorited Cellphone Bag
07 Feb 06:16
- Sayape favorited Cellphone Bag 12 Jan 12:10
-
 Step 1
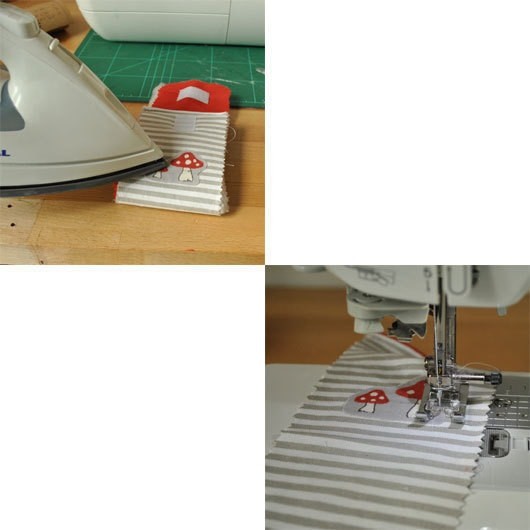
First you need meassure your cellphone and draw your pattern: Length=(hight x3)+(depth x2)+4cm, Width=width+(depth x2)+4cm. Meassure your cellphone, draw and cut the pattern. You can round the edges on one side with the help of a yarn spool. Cut your fabrics according to the pattern
-
 Step 2
Lay the fabrics right sides facing. Lay them on the fleece with the main fabric on the fleece. Sew a straight line on the end without the rounded edges. Flip the lining fabric backwards and sew a straight line again.
-
 Step 3
If you want to use Velcro you should sew that on now. Otherwise you can later add a button or a press button. If you want any other applications also add them now.
-
 Step 4
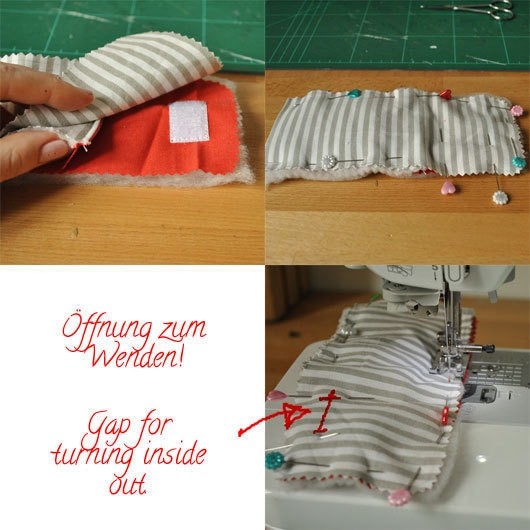
Lay your cellphone onto the lining fabric. Fold the bag the way you want the proportions to be when finished. Take the mobile out again and fold the fabric that is in the back right now over. Now the fleece is the buttom fabric again (see picture1). Pin, sew - but leave an opening for turning the bag!
-
 Step 5
Cut the edges, turn the bag, pin the opening and sew around the flap. If you didn´t use velcro sew a buttonhole now or use a press button. And you´re done!


Comments

 1
Home Accessories »
Diy Jewelry Box
1
Home Accessories »
Diy Jewelry Box
