

About
Carve
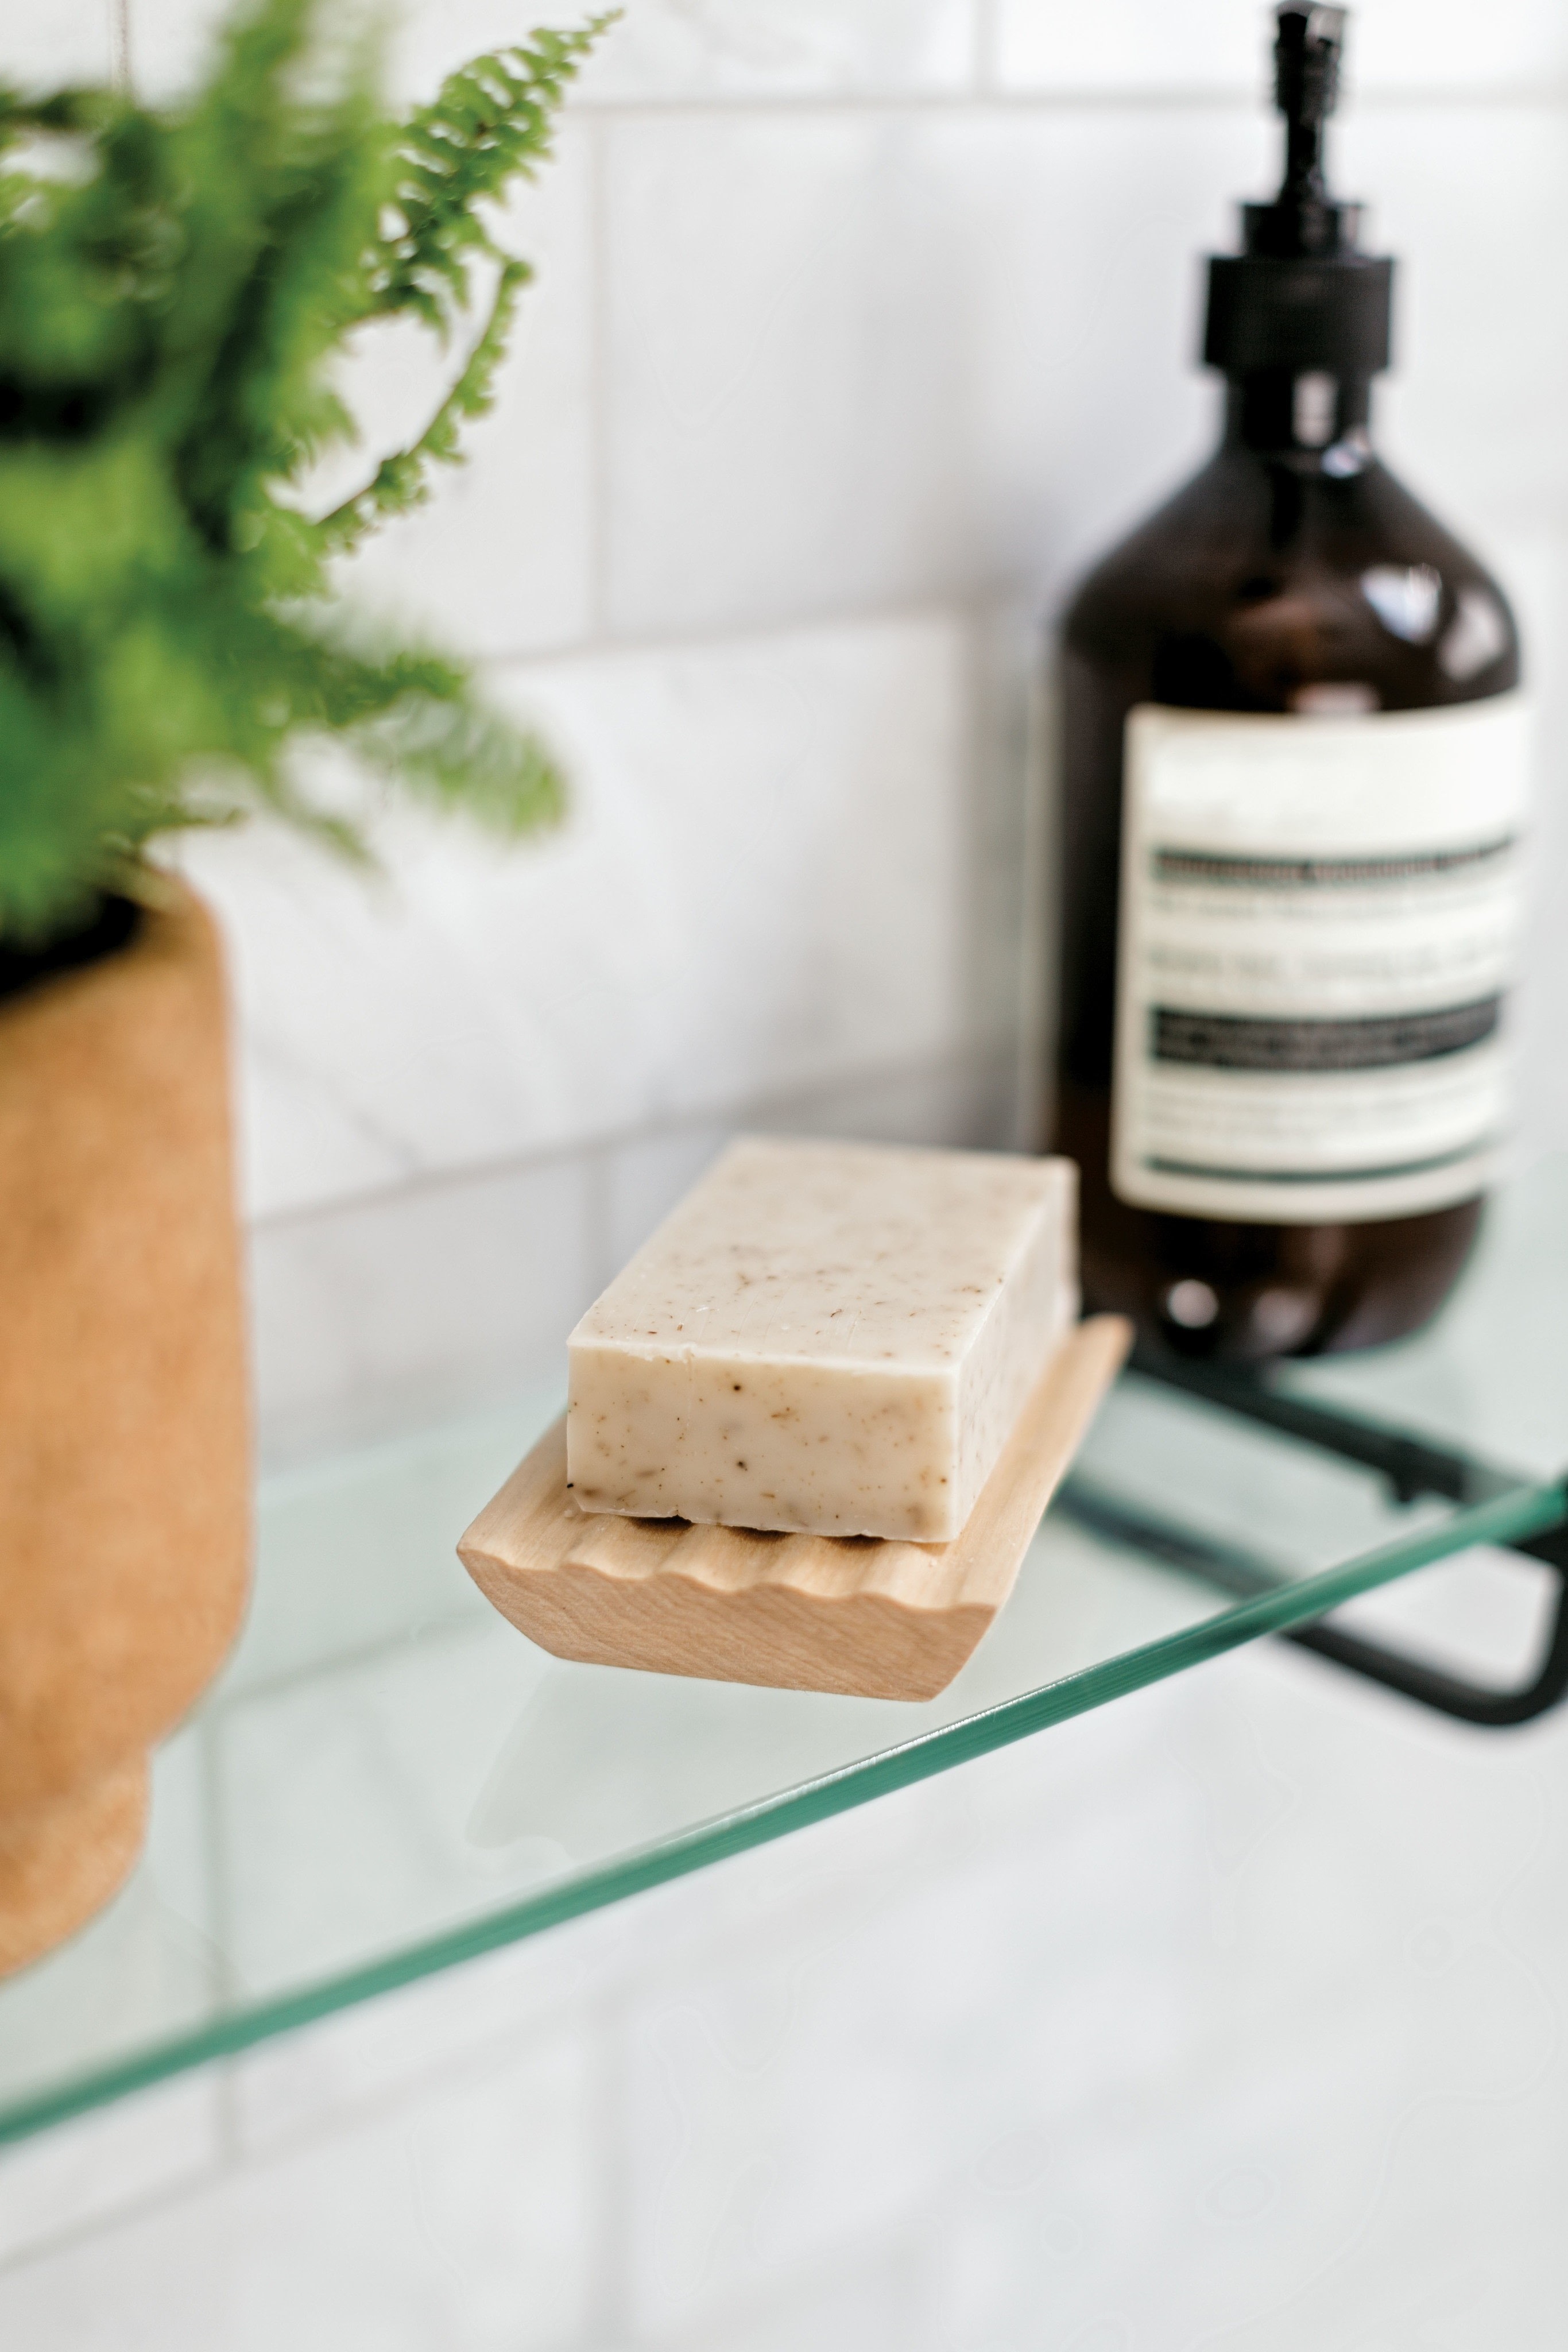
Add a little style to your home spa with a minimalist cradle for your bar of soap—or use it elsewhere as a platform for something pretty. For more stability, add cork or felt dots to the bottom. If your vanity space is tight, adjust the final size accordingly. Because this dish may see lots of moisture, I chose cypress, which is naturally water-repellent; another option is to seal pine or basswood with a water-resistant polyurethane coating.
Downloads
- 2018-03-19-105328-902_Abra_9780451498960_art_r1.jpg 714 KB [ Download ]
-
 Leonor R. favorited Carved Soap Dish
08 Oct 15:08
Leonor R. favorited Carved Soap Dish
08 Oct 15:08
-
 Sheila R. added Carved Soap Dish to My taste decor/house
03 Sep 22:23
Sheila R. added Carved Soap Dish to My taste decor/house
03 Sep 22:23
-
 Crafterella featured Carved Soap Dish
04 Apr 23:00
Crafterella featured Carved Soap Dish
04 Apr 23:00
-
 Spanky H. favorited Carved Soap Dish
03 Apr 08:17
Spanky H. favorited Carved Soap Dish
03 Apr 08:17
-
 GMC Group published her project Carved Soap Dish
21 Mar 09:00
GMC Group published her project Carved Soap Dish
21 Mar 09:00
-
 Step 1
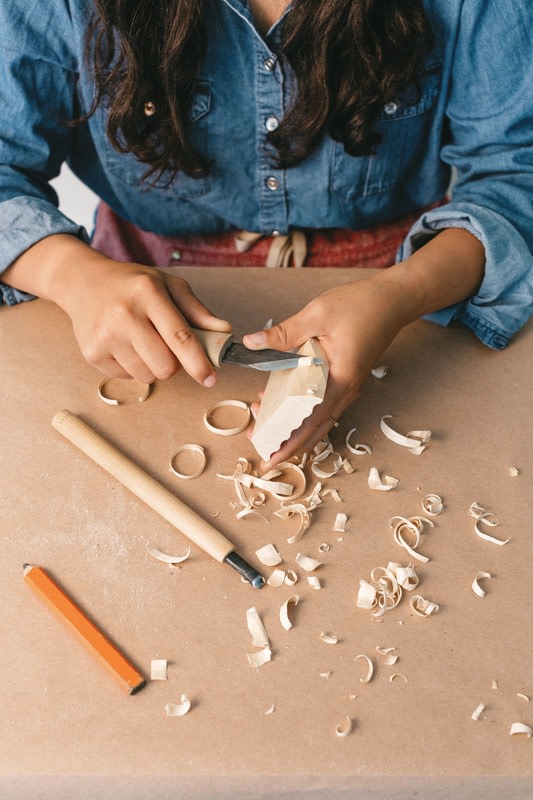
Using the template, draw the top, bottom, and sides of the soap dish onto the wood. Use the ruler to mark 10 dots every ¼ inch across the width of the wood. Repeat on the other short side and then connect the dots to make 10 straight lines across the width of the wood.
-
 Step 2
Position the wood on the bench hook with a short side facing you. Use the gouge to slowly cut a groove between the first two lines; try to make only one cut to get the cleanest results. (If you don’t have a gouge, use the V cut to get the same results.) Cut a groove between the next two lines and repeat until you have dug out 5 stripes.
-
 Step 3
Turn the soap dish over. Using the whittling knife, push-cut to whittle the wood to the pencil lines you marked on the bottom in step 1. Repeat for the remaining three sides.
-
 Step 4
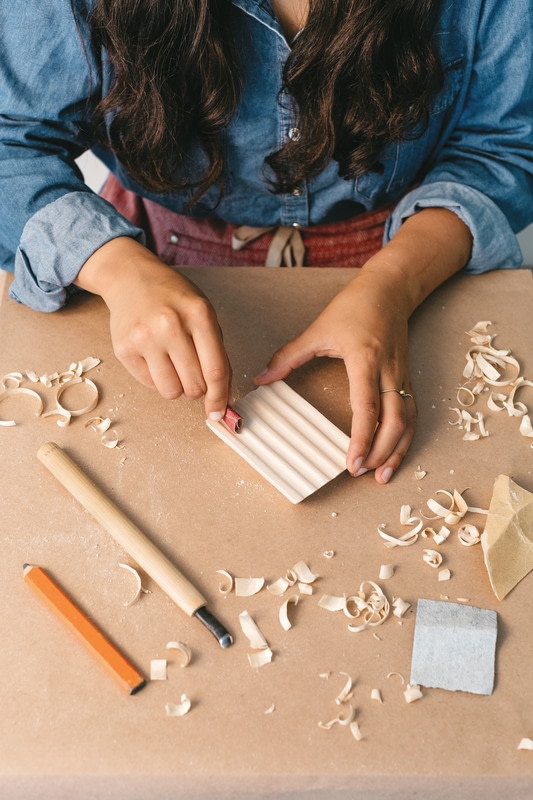
Sand the soap dish with the grain until the wood is smooth and no knife marks remain. Begin sanding with the 100 grit and work your way up to the 220 grit as each sandpaper dulls. Be sure to round each groove for an even finish.
-
 Step 5
Apply a water-resistant polyurethane coating to the soap dish if desired.
COATING
A water-resistant polyurethane coating is a good choice for items that will see heavy use, especially in the bathroom or the kitchen. Some brands offer one-step poly and stain coatings, so you can change the color of the wood and give it the protection that it needs at the same time (some are even available in a convenient spray can!). I recommend applying two coats for a rock-hard finish.