
About
Recycle a cardboard shelf
When Freja needed a new trinket shelf we took the opportunity to make one yourselves. Since the shelves will be used for small and light things only, and we wanted to get started right away, we made one in cardboard.
-
 Sarah Sylvia S. favorited Cardboard Shelf
19 Jul 01:47
Sarah Sylvia S. favorited Cardboard Shelf
19 Jul 01:47
-
 Pamela M. favorited Cardboard Shelf
17 May 22:25
Pamela M. favorited Cardboard Shelf
17 May 22:25
-
 Kinhime Dragon favorited Cardboard Shelf
25 Jul 16:55
Kinhime Dragon favorited Cardboard Shelf
25 Jul 16:55
-
 Pysselbolaget entered their project Cardboard Shelf to Ladies Of Letterpress
20 Jun 08:56
Pysselbolaget entered their project Cardboard Shelf to Ladies Of Letterpress
20 Jun 08:56
- Carrie B. favorited Cardboard Shelf 12 May 02:38
-
 dippydiscoball added Cardboard Shelf to maybe one day
10 May 18:47
dippydiscoball added Cardboard Shelf to maybe one day
10 May 18:47
-
Pysselbolaget published their project Cardboard Shelf
26 Apr 06:00
You Will Need
-
 Step 1
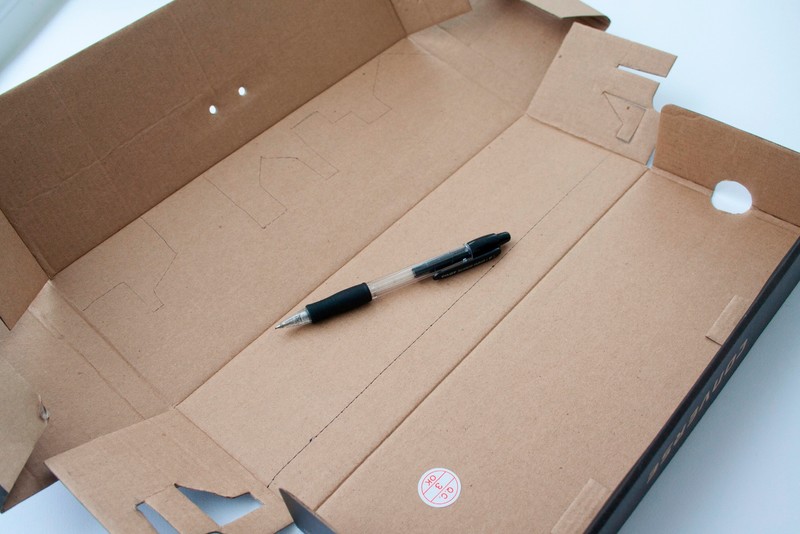
Draw out a design on the back panel of the shelf. Cut out your design but save the side panels and the bottom panel.
-
 Step 2
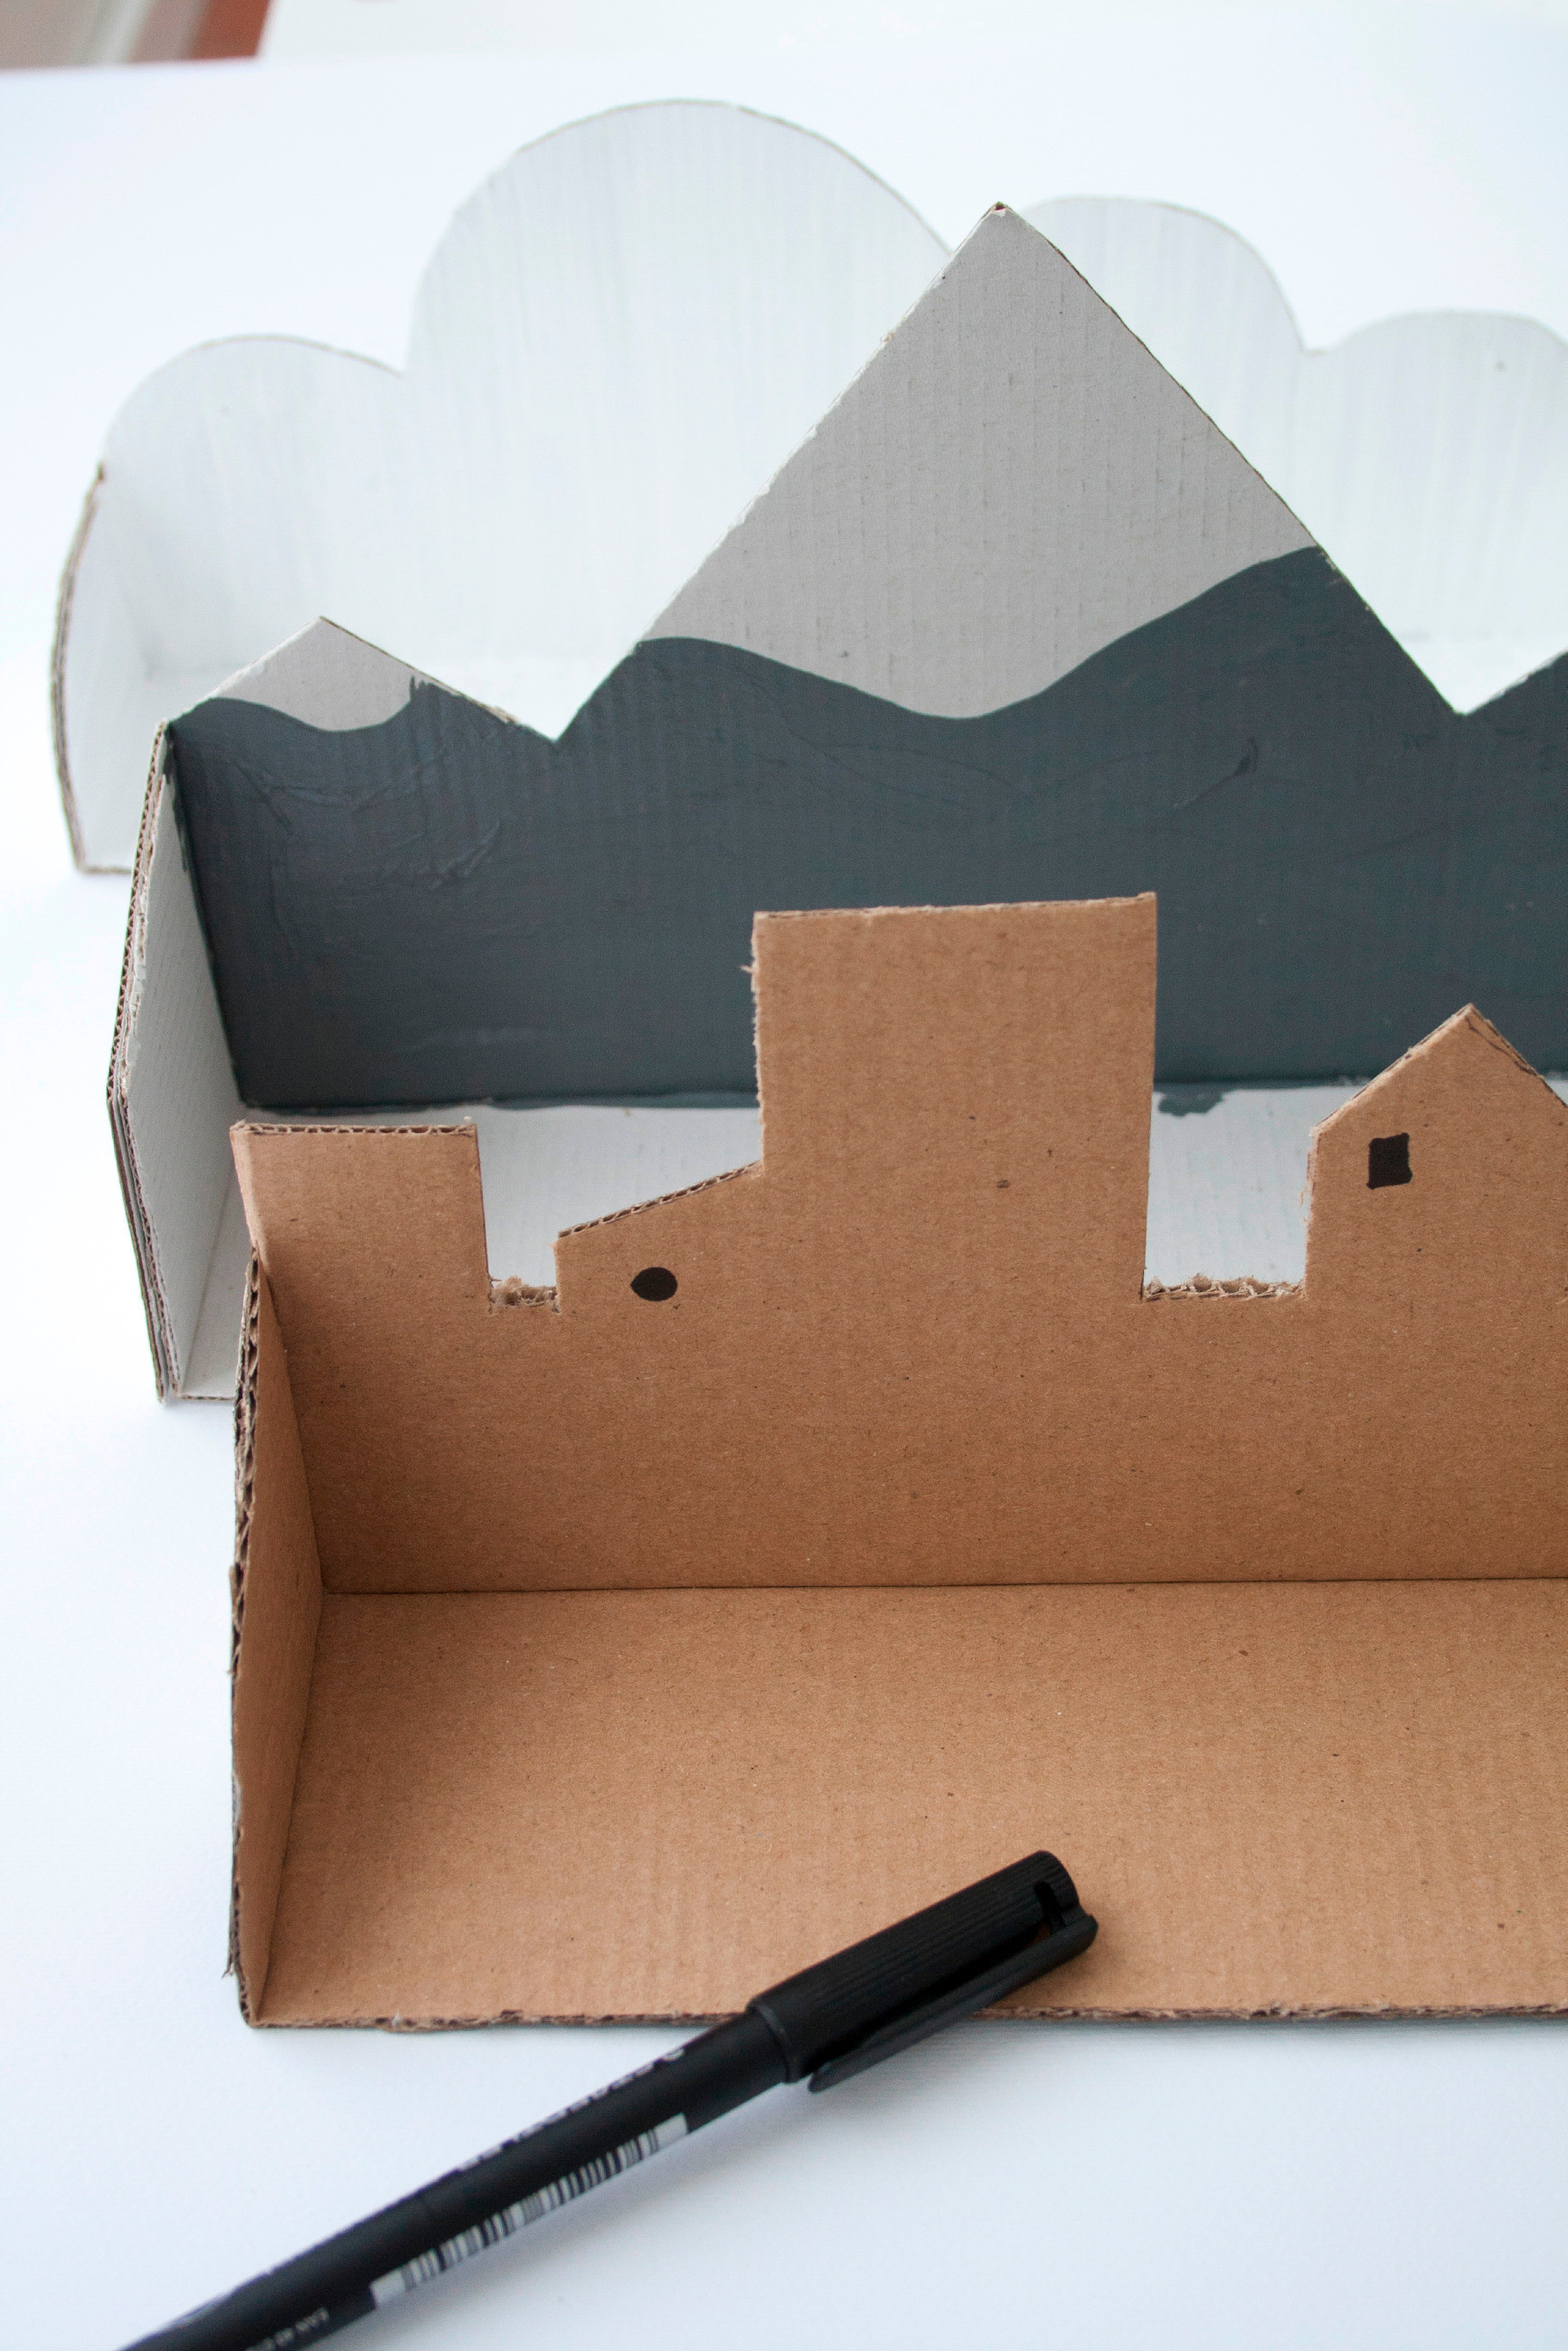
Cut the side panels to a shape of your choise and paste them together. You should now have a shelf with a designed back. The shelves should not be too wide, ours is 7 cm. If you’re doing them wider they might sag.
-
 Step 3
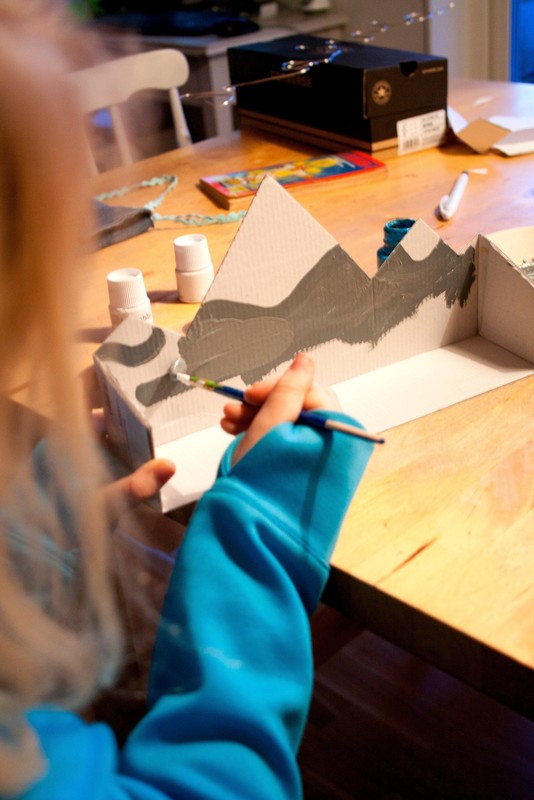
Now is the time to decorate. Freja chose to make a mountain scene.
-
 Step 4
I made a skyline and a cloud. I painted the entire cloud and because of that my shelf became a bit skewed. The best thing is probably to just paint parts of the shelf, as Freja did, or use paper or washitejp to decorate with.
-
 Step 5
Done!