


About
Not the edible kind :(
You know how you see those big, floppy birthday cake hats all over the place? (I've seen them at mini-golf places, at dollar stores, at school, at parties...) Well, when my birthday came along, I decided that I wanted to make myself a cake hat, but more fashionable! Making it out of paper and felt instead of the usual styrofoam saves you the trouble of finding good styrofoam pieces, of course, but I also found it ultimately easier and lighter to work with for what I wanted to do.
Sorry in advance for the long descriptions, but it got kind of difficult at some points and I want to describe it well to make it as easily as possible for everyone else. I'm not entirely sure how long it took me, because I made a lot of mistakes and re-did a lot of stuff. Expect to spend a good chunk of time on this.
To make a single-layer cake, just ignore the instructions specifically about the second layer.
*Note: This is not a hat. It goes on a headband and/or hair pins/clips. Or you could wear it like a party hat, I guess.
Tags
-
 Sedia H. commented on Cake On Your Head
04 Sep 02:25
Sedia H. commented on Cake On Your Head
04 Sep 02:25
-
Sedia H. favorited Cake On Your Head
04 Sep 02:25
-
 Kat McAllen favorited Cake On Your Head
23 Jun 08:59
Kat McAllen favorited Cake On Your Head
23 Jun 08:59
- JaydeyLikesMac&Cheese favorited Cake On Your Head 11 Jun 00:40
-
 Avalai entered her project Cake On Your Head to Hats On Heads
07 Jun 17:18
Avalai entered her project Cake On Your Head to Hats On Heads
07 Jun 17:18
-
 Step 1
I'm sure I took a picture of my materials, but since then I seem to have lost it, along with my camera. Luckily I had given up on the bad quality of my camera in favor of my phone before I actually go into building the hat.
Things not in the official list:
If not a headband, then you'll need some way to hold it on your head, at the end.
Optional: You can decorate this with whatever you want, as long as you make sure it balances on your head.
Unless you're not putting it on your head. :(
-
Step 2
Decide how tall you want your cake hat. Draw it out or look at a ruler, it's easier to visualize that way. Now cut it in half. Each half will be a tier of the cake. Single-layer cakes shouldn't cut their height in half, of course, because it's all the same piece of cardboard. Look at how high each layer will be, and adjust your measurements to personal opinion. Maybe you want the top layer to be taller or shorter? It might be a cool effect :)
-
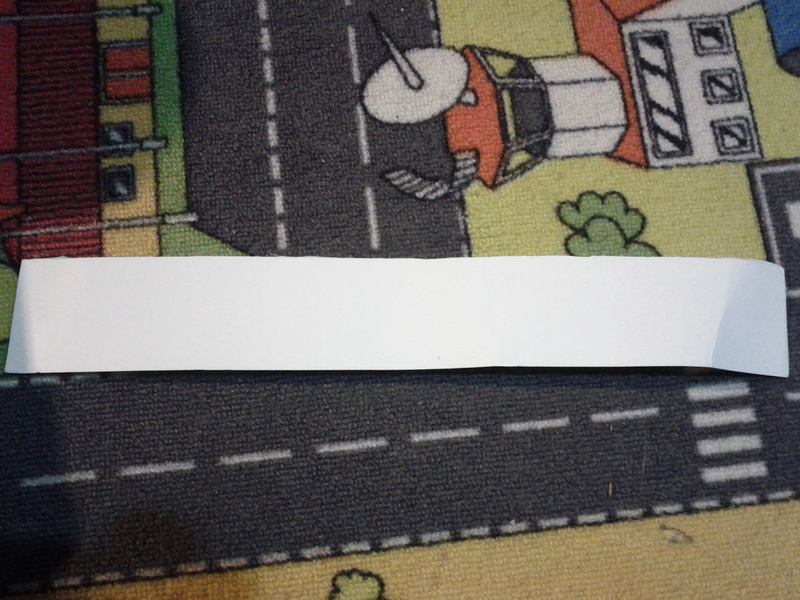
 Step 3
Grab your posterboard and take that measurement of height for the bottom layer of your cake. Using the longest ruler or straight stick you can find, carefully draw a line along one edge of your paper. I recommend the shorter side, because you'll waste less paper like that and spend less time cutting. Measure from the bottom of the paper several times to make sure you're line is still straight.
Straightness is very important here!
Now carefully cut along that line. Keep this as straight as possible too! -
 Step 4
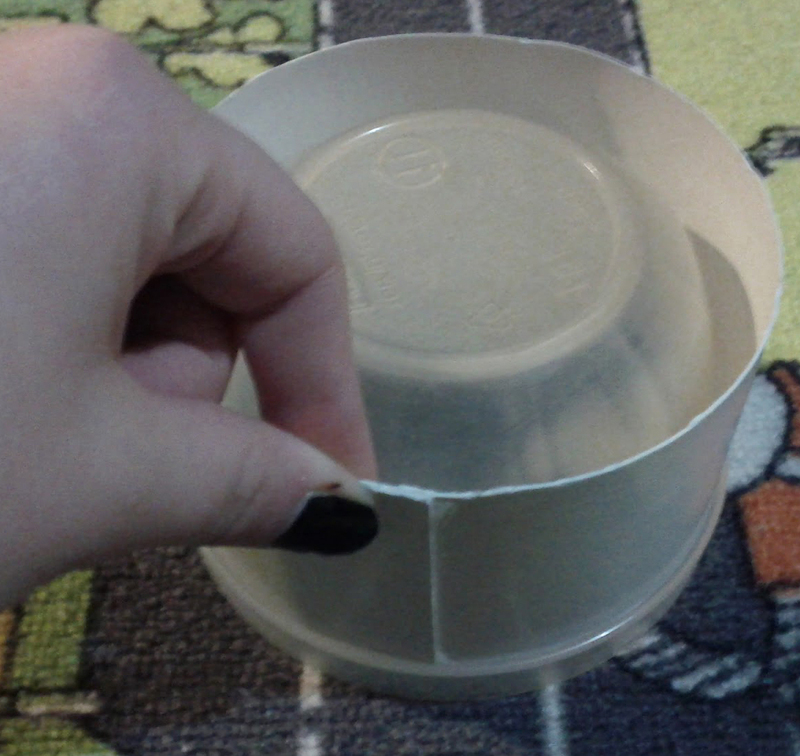
Now go find a container, can, bottle or other cylindrical object that is the same width (has the same circumference/diameter) as what you want on your head.
Using a pencil, mark where you're going to cut the board. Let the edges of the paper overlap a little (I left 1cm). You don't want them to overlap too much or there will be an odd bump on the side of your cake. Now take the posterboard off, draw a very straight line where you marked, and carefully cut it again!
(This line should be really short. I hope this is obvious, but you're cutting the height of your layer, not the circumference.) -
 Step 5
If your cake has multiple layers, make the other layers the same way, but using smaller measurements that you decided on earlier and smaller cylindrical objects.
(I used a small-ish lunch container for my bottom layer and a flavoured water bottle for the top one.)
-
 Step 6
Glue gun time! Carefully glue the edges together and hold them tightly until they cool down and dry.
Don't glue them freehand. Rewrap them tightly around their cylinder and glue them that way. They hold their shape, and you can't mess up as badly.
As always, be veeeeery careful. Don't burn yourself or let the paper slip. Make sure the bottom edges line up properly. -
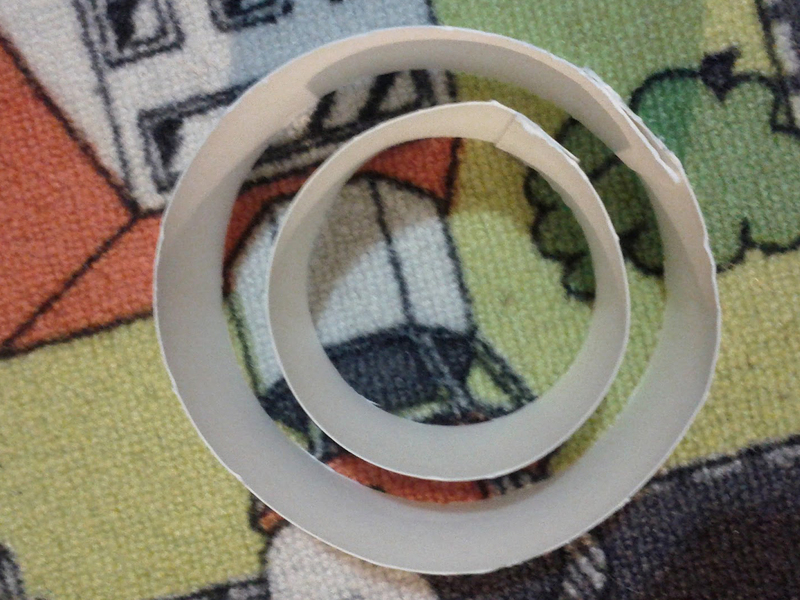
 Step 7
Let's make the tops now! Take your cylindrical objects and trace their bottoms onto more posterboard. I made two of each circles, one for the bottom and one for the top of each layer, but actually the top layer doesn't need a bottom, and I didn't give the bottom layer a bottom because of the way I was attaching it to my headband.
Cut out these circles carefully. -
 Step 8
These pictures are so small you can't see it, but I attached the tops like this. I went centimeter by centimeter all the way around the top of each layer, putting hot glue on the inside seam of the two pieces and constantly making sure they lined up properly. We're getting to the difficult parts of this tutorial. There's no real way I can tell you how to do this, except to constantly pay attention to what you're doing and take your time.
-
 Step 9
Get your felt out! I used white felt, because I liked the look and feel of it. It also blends easily together, so it was easier to hide the seams. You can use a different material for this, but make sure you know how it acts so that you don't get blotchy hot glue stains or uncomfortable wrinkles. Spray glue is one way to do this, but I don't have the ventilation for it, and it was cold and dark outside.
Trace the top or bottom of your layer onto your felt. Then carefully draw another circle around it, either by finding a slightly bigger cylindrical object or measuring 1cm or so out from your existing circle. You can also freehand this part if you WANT, but I hope you're confident in your circle-cutting abilities. -
 Step 10
I guess you can't see the detail very well again. I glued on the top by putting glue, hot glue or something else, around the circle traced on the felt. Then I carefully placed the cake layer onto it, making sure the cake and the drawn circle lined up perfectly.
*Note: The felt is not a replacement cover for your layer. It goes on top of the posterboard circle you glued on before.To glue the edges down, whenever you seem to need to fold the fabric to make it stay flat on the cylinder, cut a little v in the fabric. Don't make it too big, but after you cut it the two edges of the v should line up vertically together. Go around the circle slowly and patiently. Sewing scissors are a huge asset here, because they cut fabric really smoothly.
-
 Step 11
Measure out a piece of felt the same way you did the posterboard for this cylinder. Except that this time, don't leave any overlapping space, and make it about 1cm taller so you can wrap it under the bottom edge. (You wouldn't do that if you were putting a bottom on your cake, though.) When the two ends of the felt meet, they need to line up perfectly. After it's measured and cut, glue it to the cylinder over the edge of the circular fabric on top. Try to make the edges as invisible as possible.
Make sure that the bottom edge of the felt lines up with the bottom edge of the cylinder. Check that constantly as you glue, because it would be REALLY inconvenient to have a slant when you finish gluing the felt all the way around. -
 Step 12
This step can be done last. In fact, I recommend doing it last. It's only up here because it's part of the steps for cake, and if you're making a plain cake then this is the last step:
I'm afraid you're going to have to do this step on your own. This is the step where you spend forever trying to make sure your top layer matches up well with your bottom layer. I think I spent a good half hour figuring out the radii(plural of radius) of both circles and figuring out how to align the centers of both circles.
I think I ended up figuring out the diameter of the top circle, and then the diameter of the bottom circle, and then putting the middle of the diameter of the top circle on the middle of the diameter of the bottom circle (so that I knew where it should fit measurement-wise). Then I measured out a circle in the precise middle of my bottom circle and glued the top circle onto it.Or, you know, you could just do a couple of measurements and wing it. Good luck.
-
 Step 13
I made a candle! I didn't like the candle I made, it would have been much better with light watercolour paints. But the structure for a candle is always the same, and possible the most difficult part of this process.
Step 1: Choose how tall you want your candle to be, then cut a strip of posterboard that size. Pretty much the same thing as the first step for making the cake, except that it doesn't need to be as long since you're only wrapping it around a pencil.
-
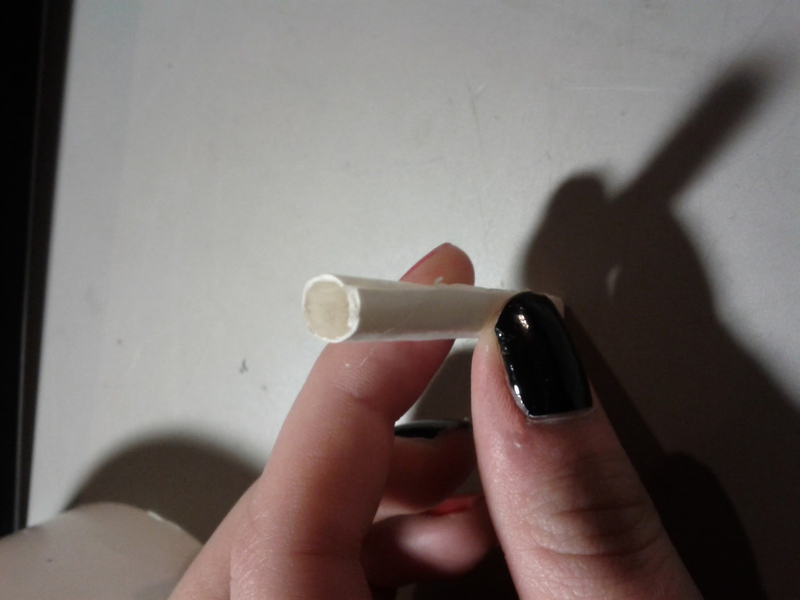
 Step 14
Step 2: Wrap it tightly around the pencil as best you can. It probably won't be perfectly round, but do your best. Mine turned out okay, see? Mark where the two ends meet and cut about .4 cm after that. Then put it back on the pencil and glue it together!
-
 Step 15
Step 3: Decorate it. After it dried, I wrapped with normal paper before painting (school glue: then it had to dry again), because my posterboard was shiny and didn't take paint well. As I mentioned before, it would have been nicer if I had painted it with watercolour paints instead of acrylic. I think my biggest problem here was that I didn't actually have all the colours of the rainbow while trying to make a rainbow candle. :( And I foolishly didn't bother mixing colours, hoping that they would mix on the candle. I have more experience with painting now, and that obviously never would have worked.
-
 Step 16
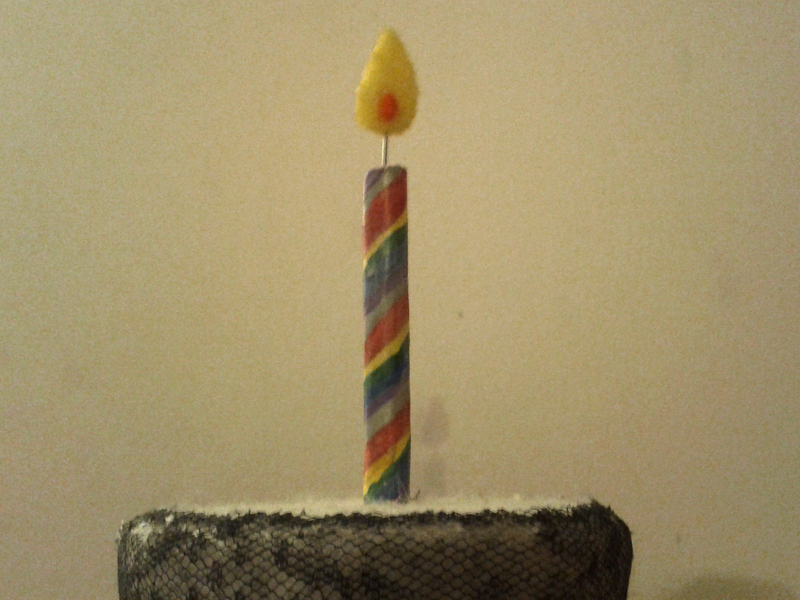
For the flame, I didn't take any pictures of making it, but here's what it looks like out of the candle.
It's just a long, straight wire with a felt flame at the end. I hot glued it all together. The flame is two pieces of yellow felt with a little scrap of felt inside to fill it out, glued shut with hot glue. Then the orange is just glued on the outside. It doesn't look too bad, though I really would have rather sewed that part, it was good because I was running out of time. The wire goes all the way through the candle and the top layer of the cake, and it rests on the top of the bottom layer. (I had already found the center of the top circle, I just had to poke the hole.) That keeps it pretty securely stuck in there, but I can still take it out if I want. In fact, I found that it was falling out too much at first, so I put a bit of hot glue on the top and pushed the stick back and forth through it until there was a little hole. Because of the texture of hot glue, it keeps the flame stuck in there, but I can still pull it out. -
 Step 17
The lace! I wish all the pictures had turned out as pretty as this one. I painted the lace with water colour paints, I think, which I'll explain in another tutorial. It curls over the top of the cake too, even though it's swoopy and the bottom, and it hides the seams very nicely as long as you line up the lace's seams well. There's a thin line of hot glue all the way around the top of each piece, and lining the border at the very bottom. I put the lace on before I glued the two layers of cake together, otherwise it would have been rather difficult.
-
 Step 18
This is looking into the cake from underneath. The headband is grey(not my preferred choice, but all I had on hand at the time), and the way that it connects to the cake is by attaching cardboard flaps with hot glue. I was worried about the hot glue not sticking well to the plastic headband, but actually it was the felt I had to look out for. Make sure the paper flaps make contacts with the paper inside the cake, and then they'll stick perfectly well.
-
 Step 19
1: PUT IT ON YOUR HEAD!
2: Smile~
3: Take pictures.
4: Post them as versions of this so we can all be cakes together!I should put a disclaimer here about not taking these and selling them, but honestly you really shouldn't be selling something made out of cardboard and cheap felt anyways. Putting this together mostly just takes common sense, so I can't really patent the system. But still, please don't copy me or my designs for money. These are my own pictures and my own creation, no other tutorials used, and if you would like to borrow this idea and sell something based on it, then just ask me! But please don't blatantly steal my stuff. Or anyone's stuff. It's just not cool.


Comments

 1
Books & Journals »
Locking Box And Journal
1
Books & Journals »
Locking Box And Journal
 2
Babies & Kids »
A Toy Kitchen For A Child
2
Babies & Kids »
A Toy Kitchen For A Child
 3
Origami Flowers »
Origami Orchid
3
Origami Flowers »
Origami Orchid
 4
Office »
Pretty Sketchbooks
4
Office »
Pretty Sketchbooks
 5
Charms & Keyrings »
Shugo Chara Inspired Pop It
5
Charms & Keyrings »
Shugo Chara Inspired Pop It

