


About
This project is perfect for using up some thrift store staples: buttons and skinny bangles.
My button obsession started when my mother gave me my great-grandmother’s tin full of buttons. Since then, I’ve bought them at yard sales, thrift stores, antique stores, as well as been gifted other people’s collections. As such, I’ve found many ways to work them into my jewelry and other crafts. Though, I admit that I can’t bring myself to use the ones from my great-grandmother’s tin. In addition, the base bangle for this project is a basic thrifted bangle. I’ve seen them in almost every thrift store I’ve ever visited. This is the perfect project to help relieve me of some of my stash. It’s also super quick and easy!
-
 Diane H. favorited Button Bangle
08 Dec 01:47
Diane H. favorited Button Bangle
08 Dec 01:47
-
 Key West Witch favorited Button Bangle
05 May 05:27
Key West Witch favorited Button Bangle
05 May 05:27
-
 Kathy C. favorited Button Bangle
10 Apr 11:37
Kathy C. favorited Button Bangle
10 Apr 11:37
-
 Sarah Sylvia S. favorited Button Bangle
18 Jul 02:17
Sarah Sylvia S. favorited Button Bangle
18 Jul 02:17
-
 Rachel Y. favorited Button Bangle
08 May 19:41
Rachel Y. favorited Button Bangle
08 May 19:41
-
PH W. favorited Button Bangle
11 Apr 15:43
-
 Laura R. favorited Button Bangle
28 Mar 11:16
Laura R. favorited Button Bangle
28 Mar 11:16
-
Hollie P. added Button Bangle to saving for later
05 Jan 17:22
-
 Emma H. favorited Button Bangle
01 Nov 21:30
Emma H. favorited Button Bangle
01 Nov 21:30
-
 CraftyHope published her project Button Bangle
24 Oct 09:00
CraftyHope published her project Button Bangle
24 Oct 09:00
-
 Step 1
Gather supplies (I have more buttons pictured than used, just in case.)
-
 Step 2
Wrap the tail of one end of the wire around the bangle several times. Use the flat-nose pliers to secure the end against the bangle. (I recommend trying to get the tail end on the outside of the bangle so there are no sharp edges to brush against the skin.)
-
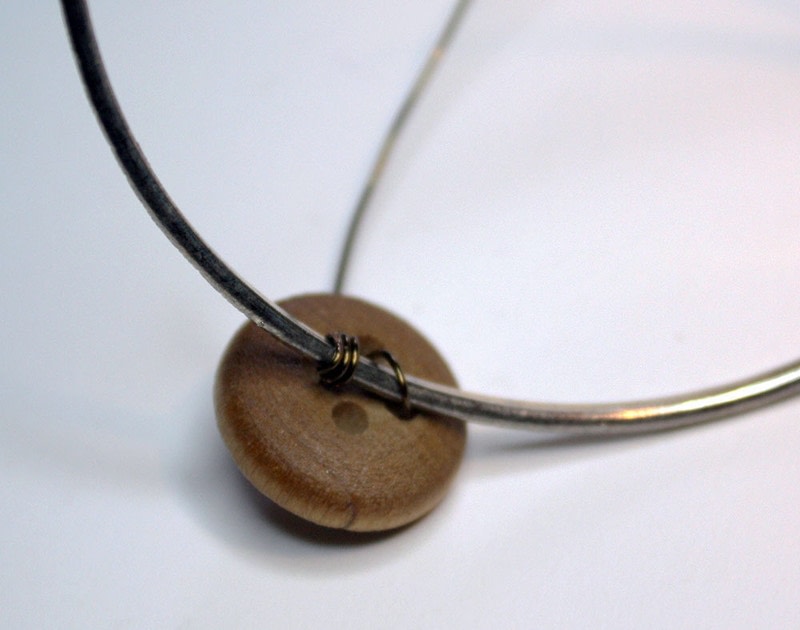
 Step 3
Insert the loose end of the wire through the back of a hole of your first button. Pull the button flush against the top of the bangle. Weave the wire into the hole across from the first hole, making sure that the wire ends up on the other side of the bangle from where it started. Pull tight, ensuring the wire doesn't tangle or crimp.
-
 Step 4
Pull the wire across the inside of the bangle and insert the end through the back of the hole on that side. (This will be an empty hole on a 4-hole button and your first hole on a 2-hole button.) Pull tight.
-
 Step 5
For a 4-HOLE BUTTON
Cross the wire across the top of the button. Insert wire into the last empty hole (making an X) and pull tight. -
 Step 6
For 2-HOLE BUTTON
Thread the wire into the other hole once again and pull tight. -
 Step 7
Wrap the wire around the bangle several times. (This helps secure the buttons as well as make room for the next one.)
-
 Step 8
Thread your next button on the wire. As you pull it flush against the bangle, make sure it's sitting next to the previous button and not on top of it. Repeat the above steps to secure the button.
-
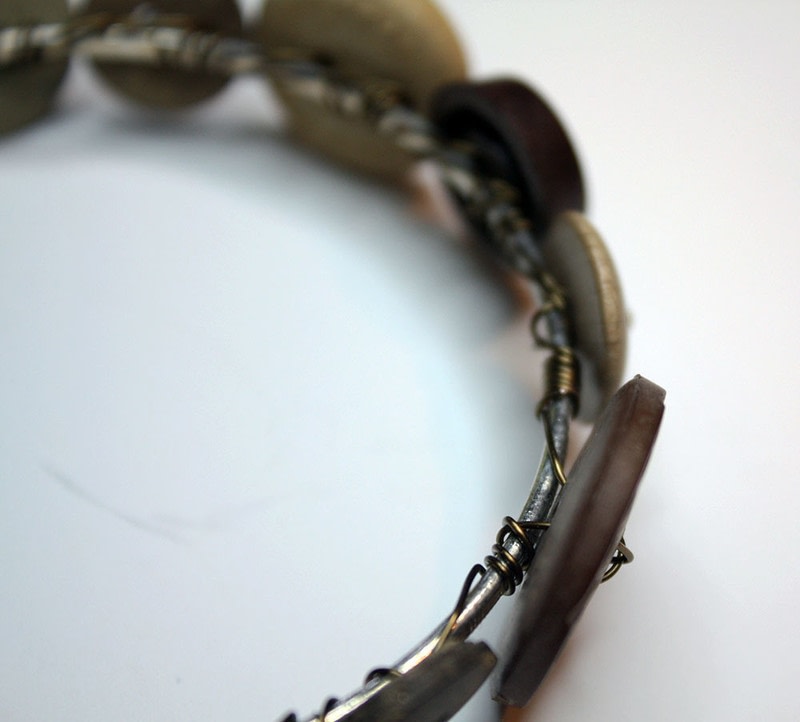
 Step 9
Continue attaching your buttons in the above manner until you cannot fit anymore buttons on the bangle.
-
 Step 10
Wrap around the bangle next to the last button several times as before, then use your hands to pull the buttons together to close up the gap(s) as best you can.
-
 Step 11
With the tail of your wire, begin wrapping it around the bangle, going in between every button on the bracelet until the wire is just an inch or two long. Wrap it several times around the bangle in that spot.
-
 Step 12
Trim the wire close to the bangle and secure it against the bangle with your flat-nose piers.
-
 Step 13
Additional Note:
If you begin to run out of wire at any time, just wrap that end of the wire around the bangle several times, cut it, and secure it against the bangle with flat-nose pliers. Begin your new wire several buttons back the same way you began the original one. Weave the new wire between each of the buttons until you get to where you stopped. Wrap the wire several times around the bangle and begin again with attaching the buttons.


 1
Home Accessories »
Diy Jewelry Box
1
Home Accessories »
Diy Jewelry Box
