


About
A quick and easy crochet cozy
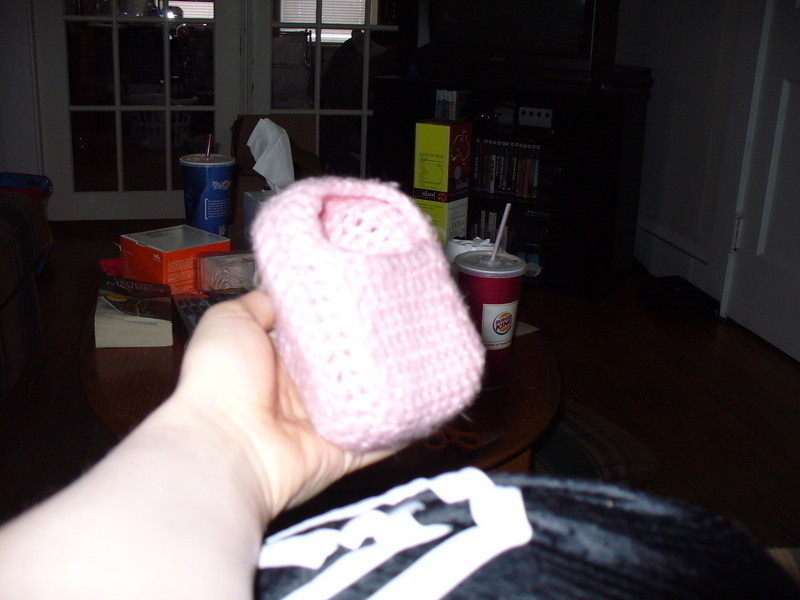
I made this on the bus ride from Boston to NYC, which was by the way, brutal.
I used a 5.5mm/I crochet hook and Caron Simply Soft in a light pink. Basically, and worsted weight yarn will do for this, but make sure it's something you're going to want to touch, have people see and wont scratch your screen.
Also, not trying to brag, but I get a lot of compliments on this...
Here's the "pattern" I'm doing this from looking at the actual item and memory, and it's been about 6 months, so it won't be exact, but it all depends on the size of your camera anyway. Mine isn't big, but it definitely isn't one of the slim ones. It's a Panasonic Lumix DMC-LZ5.
-
 Shiggy G. favorited Bus Ride Camera Cozy
26 Aug 02:33
Shiggy G. favorited Bus Ride Camera Cozy
26 Aug 02:33
-
 arrasi e. added Bus Ride Camera Cozy to diy camera/h.p case
31 Mar 15:44
arrasi e. added Bus Ride Camera Cozy to diy camera/h.p case
31 Mar 15:44
-
arrasi e. added Bus Ride Camera Cozy to Wishlist
31 Mar 15:43
-
arrasi e. favorited Bus Ride Camera Cozy
31 Mar 15:42
-
arrasi e. added Bus Ride Camera Cozy to To-make list
31 Mar 15:42
You Will Need
-
Step 1
ch-chain
sc-single crochet
hdc-half double crochet
dc-double crochetworking in a spiral like with amigurumi, using a stitch marker to mark the FIRST stitch in each round.
CH2
rnd. 1:4 sc into first chain
rnd. 2:2 sc in sc
rnd. 3:*1 sc in sc, 2sc in sc* around
rnd. 4:*1 sc in sc, 1 sc in sc, 2 sc in sc* aroundcontinue like this, adding 1 SC in SC in each repeat each round until your creation covers the front of your camera, on this last round, join with a slip stitch to the first stitch in that round.
Your cozy should almost look like an emptry strawberry with no top.
Now, ch 3 (counts as first dc) and DC in each stitch around, joining with a slip stich at the end of the round. Do this until your cozy covers the fronts and sides of your camera, but not so tightly that it squeezes it.
SC one round. Skip this step if the last DC row comes to just above the height of your camera.
The opening of your cozy should be decidedly rectangle, like in the second picture.
It gets a little weird here, as you go from rounds to rows and you need to make sure it's all connected.
See step 1 for the next direction. Once there, hdc across bottom, slip stitch to other edge.
Slip stitch up to the next stitch then hdc in hdc across.
continue to do this until it you've got something that resembles the image in step two.Once you're here, bind off, and youre finished. I had a closure on mine for about an hour, until I decided it was too annoying to deal with. The camera stays in there pretty well by itself anyway.
The last thing you may want to do is add a strap, but if your camera has a wrist strap like mine does, you don't even need to. Just make sure you put your camera in the cozy so the end with the strap is nearest to the hole and and slip the strap through one of the spaces in the DCs.
I hope this tut actually makes sense and that y'all get some use out of it. If you've got any questions, just send me a message!
-
 Step 2
In case you can't read what it says, slip stitch to the corner marked by the x.
We will now be working in rows.
-
 Step 3
The area in the blue rectangle should be as wide as the widest part of your camera, which is probably from the back of the camera to the tip of the lense.


