About
SEWING A BOLSTER WITH WELT CORD
-
 Pimke added Bolster Cushion to Nähmuster
26 Jan 12:47
Pimke added Bolster Cushion to Nähmuster
26 Jan 12:47
-
 Sylvie S. favorited Bolster Cushion
29 Dec 16:03
Sylvie S. favorited Bolster Cushion
29 Dec 16:03
-
 Sophie A. favorited Bolster Cushion
31 Oct 22:54
Sophie A. favorited Bolster Cushion
31 Oct 22:54
-
 Julie K. favorited Bolster Cushion
26 Oct 12:22
Julie K. favorited Bolster Cushion
26 Oct 12:22
-
Ama R. added Bolster Cushion to Jennifer Aniston's Room
25 Aug 23:09
-
 Monica Handlucci favorited Bolster Cushion
13 Jul 03:39
Monica Handlucci favorited Bolster Cushion
13 Jul 03:39
-
 02jhseaby added Bolster Cushion to Try
07 Jun 22:21
02jhseaby added Bolster Cushion to Try
07 Jun 22:21
-
02jhseaby favorited Bolster Cushion
07 Jun 22:21
-
 Carla B. favorited Bolster Cushion
15 Mar 08:19
Carla B. favorited Bolster Cushion
15 Mar 08:19
-
signe P. added Bolster Cushion to dekoration
03 Mar 19:16
You Will Need
-
 Step 1
With a square and yardstick, draw the pieces for the bolster on the fabric. The bodies of the pillows should be centered over the striped pattern. Cut out the fabric.
-
 Step 2
Cut and stitch welt cord to go around the ends of each bolster, with an extra 2" per piece for connecting the welt cord ends.
-
 Step 3
Make release cuts in the seam allowance of the welt cord to help it bend around the circle. Line up the edge of the welt cord tail with the edge of a circle and stitch all the way around until you get back to where you started. Open up the seams in the ends of the welt cord and cut the ends of the cording so they meet.
-
 Step 4
Wrap a piece of masking tape around the ends of cording to hold them together. Place both ends of fabric around the cording (one end of fabric around the other) and fold under the raw edge of the outer fabric. Stitch across the welt cord ends to secure the cording and fabric in place.
-
Step 5
Repeat steps 18 and 19 for the other bolster ends.
-
 Step 6
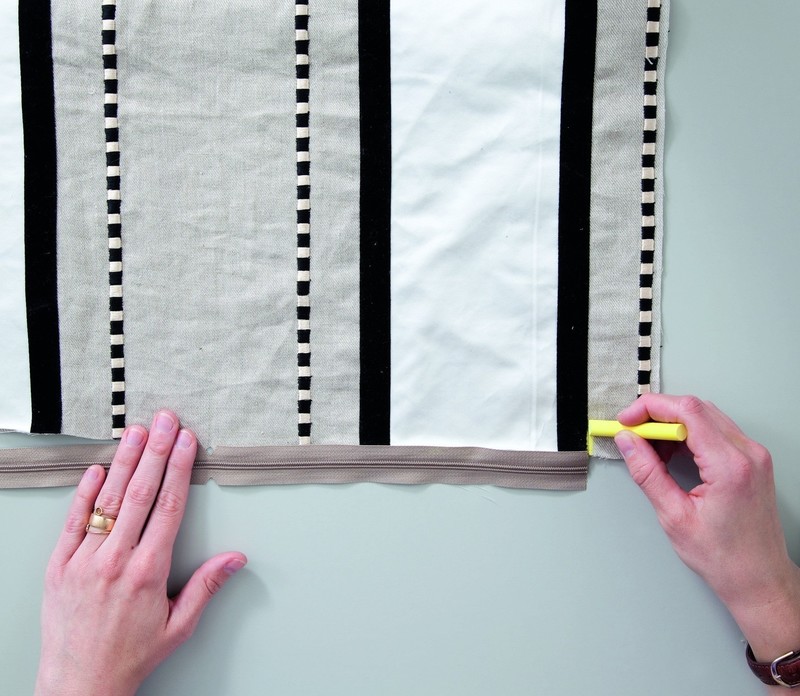
Repeat step 7 to mark the ends of the zipper on the bottom edge of the bolster. Fold the bolster fabric in half lengthwise with the good side facing inward. Use T-pins or the hand-stapling plier to hold the bottom edge together, with the stripes lined up. Begin stitching toward the end of the bolster, 1⁄2" inside the mark made for the end of the zipper. Backstitch the beginning of the seam to lock the threads in place. Stitch until you reach the end, remove the fabric, and repeat for the other end of the bolster.
-
 Step 7
Repeat steps 10–13 to attach the zipper to the bottom edge of the bolster.
For abnormally sized pillows, like these bolsters, I find it’s more time and cost effective to custom order inserts than make them myself. Companies like Ronco can turn around inserts in a week. All you need to do is provide the finished dimensions and choose a fill!
-
 Step 8
Just as we did with the welt cord, make release cuts in the seam allowance at the ends of the bolster so the fabric will bend around the circle. With the bolster inside out, lay the seam allowance of an open end on the seam allowance of a circle, good sides facing. To hide the connection in the welt cord, line it up with the bottom seam of the bolster. Place the welt cord under the foot of the sew- ing machine with the seam allowance to the right, and stitch all the way around the end.
-
 Step 9
Inspect the seams to make sure they’re nice and tight around the welt cord, and tighten if necessary. Turn the fabric right side out and stuff the pillow with your filling of choice.