About
a sweet finishing touch for any latex outfit
After looking at a ton of fabric flower tutorials on this site, I got to wondering what would happen if I tried making one out of latex. (This is nothing new, I pretty much wonder that same thing about everything I come across!)
So, I pulled out some leftover scraps from a skirt I made and sort of... made it up as I went along. Latex is a lot bulkier than regular fabric (and these scraps were .45 mm) so though I started off trying to do the 45-degree folds, that quickly went out the window. I would like to try and re-do this idea with some thinner pink latex I am using for another project at the moment. When I have some scraps to do so, I'm sure I'll post pictures!
In the end, I am very happy with it. It is about 1" tall and about 1 1/2" wide. Because latex is heavy, I don't think it would go well on a choker or barrette. But I do think that it might look nice on another mini top hat, or a wide headband... we shall see =]
[Note: I say that this project costs "almost nothing" under the assumption that if you're going to try it, you already have latex sheeting scraps and latex-making supplies at hand.]
-
 Key West Witch favorited Black Latex Rosebud
10 Sep 08:56
Key West Witch favorited Black Latex Rosebud
10 Sep 08:56
-
 Rachel B. favorited Black Latex Rosebud
12 May 00:45
Rachel B. favorited Black Latex Rosebud
12 May 00:45
-
 MissMarcelline favorited Black Latex Rosebud
15 Sep 17:26
MissMarcelline favorited Black Latex Rosebud
15 Sep 17:26
-
 pandanomz favorited Black Latex Rosebud
08 Sep 19:39
pandanomz favorited Black Latex Rosebud
08 Sep 19:39
-
 Shantelle t. added Black Latex Rosebud to something i'd like to try
02 Oct 03:18
Shantelle t. added Black Latex Rosebud to something i'd like to try
02 Oct 03:18
-
 elarablair favorited Black Latex Rosebud
23 Feb 19:06
elarablair favorited Black Latex Rosebud
23 Feb 19:06
-
 Penny F. added Black Latex Rosebud to TO MAKE!
03 Feb 12:34
Penny F. added Black Latex Rosebud to TO MAKE!
03 Feb 12:34
-
 cristinakilljoyway favorited Black Latex Rosebud
03 Jan 17:39
cristinakilljoyway favorited Black Latex Rosebud
03 Jan 17:39
-
 Tressa F. favorited Black Latex Rosebud
07 Aug 16:51
Tressa F. favorited Black Latex Rosebud
07 Aug 16:51
-
cassie n. favorited Black Latex Rosebud
25 Jul 12:40
You Will Need
-
 Step 1
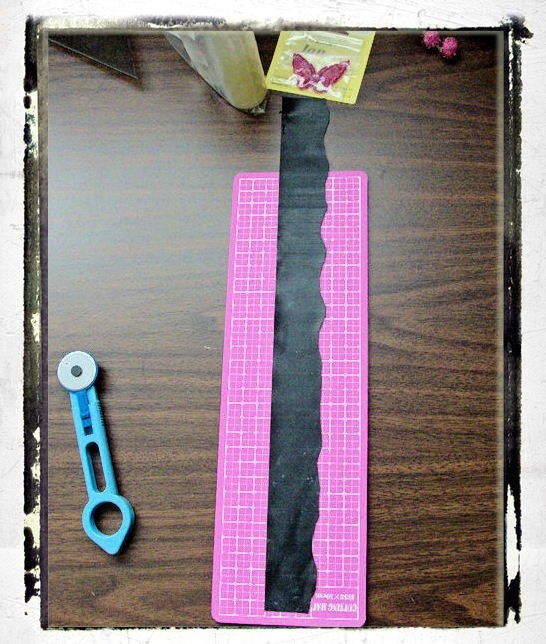
I cut two strips of latex because I didn't have any scraps that were long enough to make one continuous strip. It didn't matter that there was a seam in the middle, however, since it's all wound up.
The first strip is about 1 1/4" wide at one end, and the second is 3/4" wide at the end. I wanted to give it a gradual size change, so the petals wouldn't all be completely uniform.
-
 Step 2
I also cut some irregularities and dips on one side of the latex, to help make the petals look more "realistic".
Then, I wiped down both sides with latex seam prep/cleaner. This makes the latex slightly tacky, so it sticks well to itself.
-
 Step 3
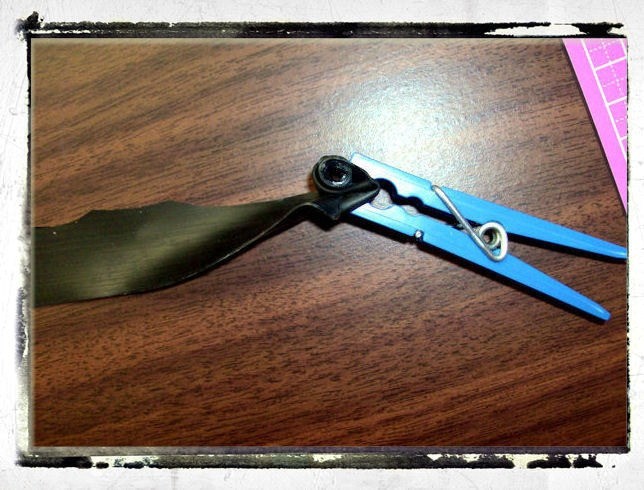
Once the seam between the two strips had had some time to dry, I rolled the small end about 4 or 5 times (tightly) and then began... making it up as I went along.
I left the center clothespinned for a bit to help it stay tightly rolled.
I tried to use the 45 degree folds to form the petals, but that was getting too bulky and all the petals were coming out in the same place... so I unrolled everything back down to the center and tried again.
-
 Step 4
Really, I just goofed around with it until it came together the way I wanted it to. When I was finished, I placed a small amount of latex glue under the end, and used one of those smallish hair clips with the claws to hold it.
-
 Step 5
I let it sit for a few hours, then came back and used a tiny bit more glue to fold down the end that was sticking up, and to "seal" the edges of a couple of the outer petals.
-
Step 6
I decided that it needed a little something extra... so I added a 14SS Swarovski flat back rhinestone in "crystal" using a little dot of Jewel-It. (I'm a firm believer that EVERYTHING needs more rhinestones!)
A little final cleanup, and a tiny bit of latex shiner (I use Pjur Cult Latex Shine)... and there you have it!