


About
Stay beachy year-round with this simple fridge upgrade.
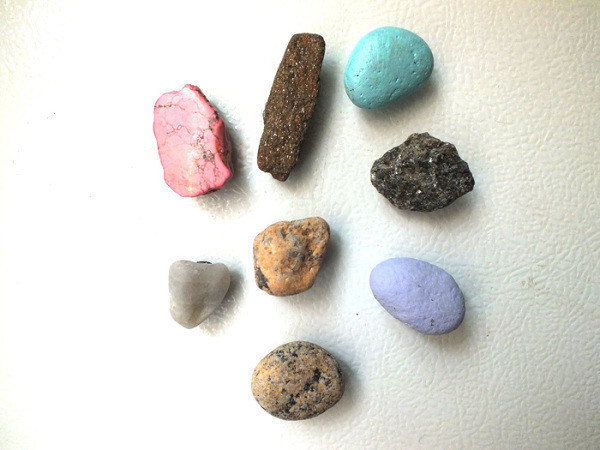
Need a fun summery project? I whipped up some DIY beach rock fridge magnets—a project I’ve been saving rocks for since my vacay last summer.
I used a mix of pink turquoise slabs, quartz, beach glass and assorted salvaged/painted rocks, some $1.99 magnets from Jo-Ann Fabric, and my favorite all-purpose clear tacky glue, Fabri-Tac.
This one is so easy, and the results are so pretty.
See more DIY and style tips at HeyMishka.com! xo
-
 Becky favorited Beach Rock Magnets
16 May 00:14
Becky favorited Beach Rock Magnets
16 May 00:14
-
 Kimberlee thepenartist favorited Beach Rock Magnets
07 May 13:00
Kimberlee thepenartist favorited Beach Rock Magnets
07 May 13:00
-
Jen S. favorited Beach Rock Magnets
02 Mar 20:38
-
Rebecca M. favorited Beach Rock Magnets
12 Jun 00:12
-
 Mia added Beach Rock Magnets to Room Decor
18 Jan 07:59
Mia added Beach Rock Magnets to Room Decor
18 Jan 07:59
-
 Tess favorited Beach Rock Magnets
10 Aug 16:29
Tess favorited Beach Rock Magnets
10 Aug 16:29
-
 Allyne favorited Beach Rock Magnets
28 Jul 16:44
Allyne favorited Beach Rock Magnets
28 Jul 16:44
-
 Mia_Ferry added Beach Rock Magnets to Room Decor
18 Jul 10:13
Mia_Ferry added Beach Rock Magnets to Room Decor
18 Jul 10:13
-
 Emma H. favorited Beach Rock Magnets
04 Jul 11:48
Emma H. favorited Beach Rock Magnets
04 Jul 11:48
-
 Hey Mishka published her project Beach Rock Magnets
30 Jun 06:00
Hey Mishka published her project Beach Rock Magnets
30 Jun 06:00
-
 Step 1
Curate your rocks and gems into a set of mixed colors and textures. You may want to paint some of them to give a more varied appearance. Pastel colors end up looking the most summery.
-
 Step 2
Grab your magnets (in the end, I realized I should have spent a few more bucks and got stronger magnets, as these little guys didn’t hold the heavier stones—but they worked perfectly for the lighter ones).
-
 Step 3
Dab a bit of glue onto the back of each rock with your Fabri-Tac and immediately place the magnet over your glue.
-
 Step 4
Press the magnet down firmly.
-
 Step 5
Let them dry for a few hours — overnight is a safe bet to be sure the rocks don’t ooze off the magnets while they’re on the fridge.
-
 Step 6
Once dry, add them to your fridge!


 1
Home Accessories »
Diy Jewelry Box
1
Home Accessories »
Diy Jewelry Box
