
Automatic Pull Strip
Extract from Pop-Up Design and Paper Mechanics • By Duncan Birmingham • Published by GMC Publications


About
Pop-Up
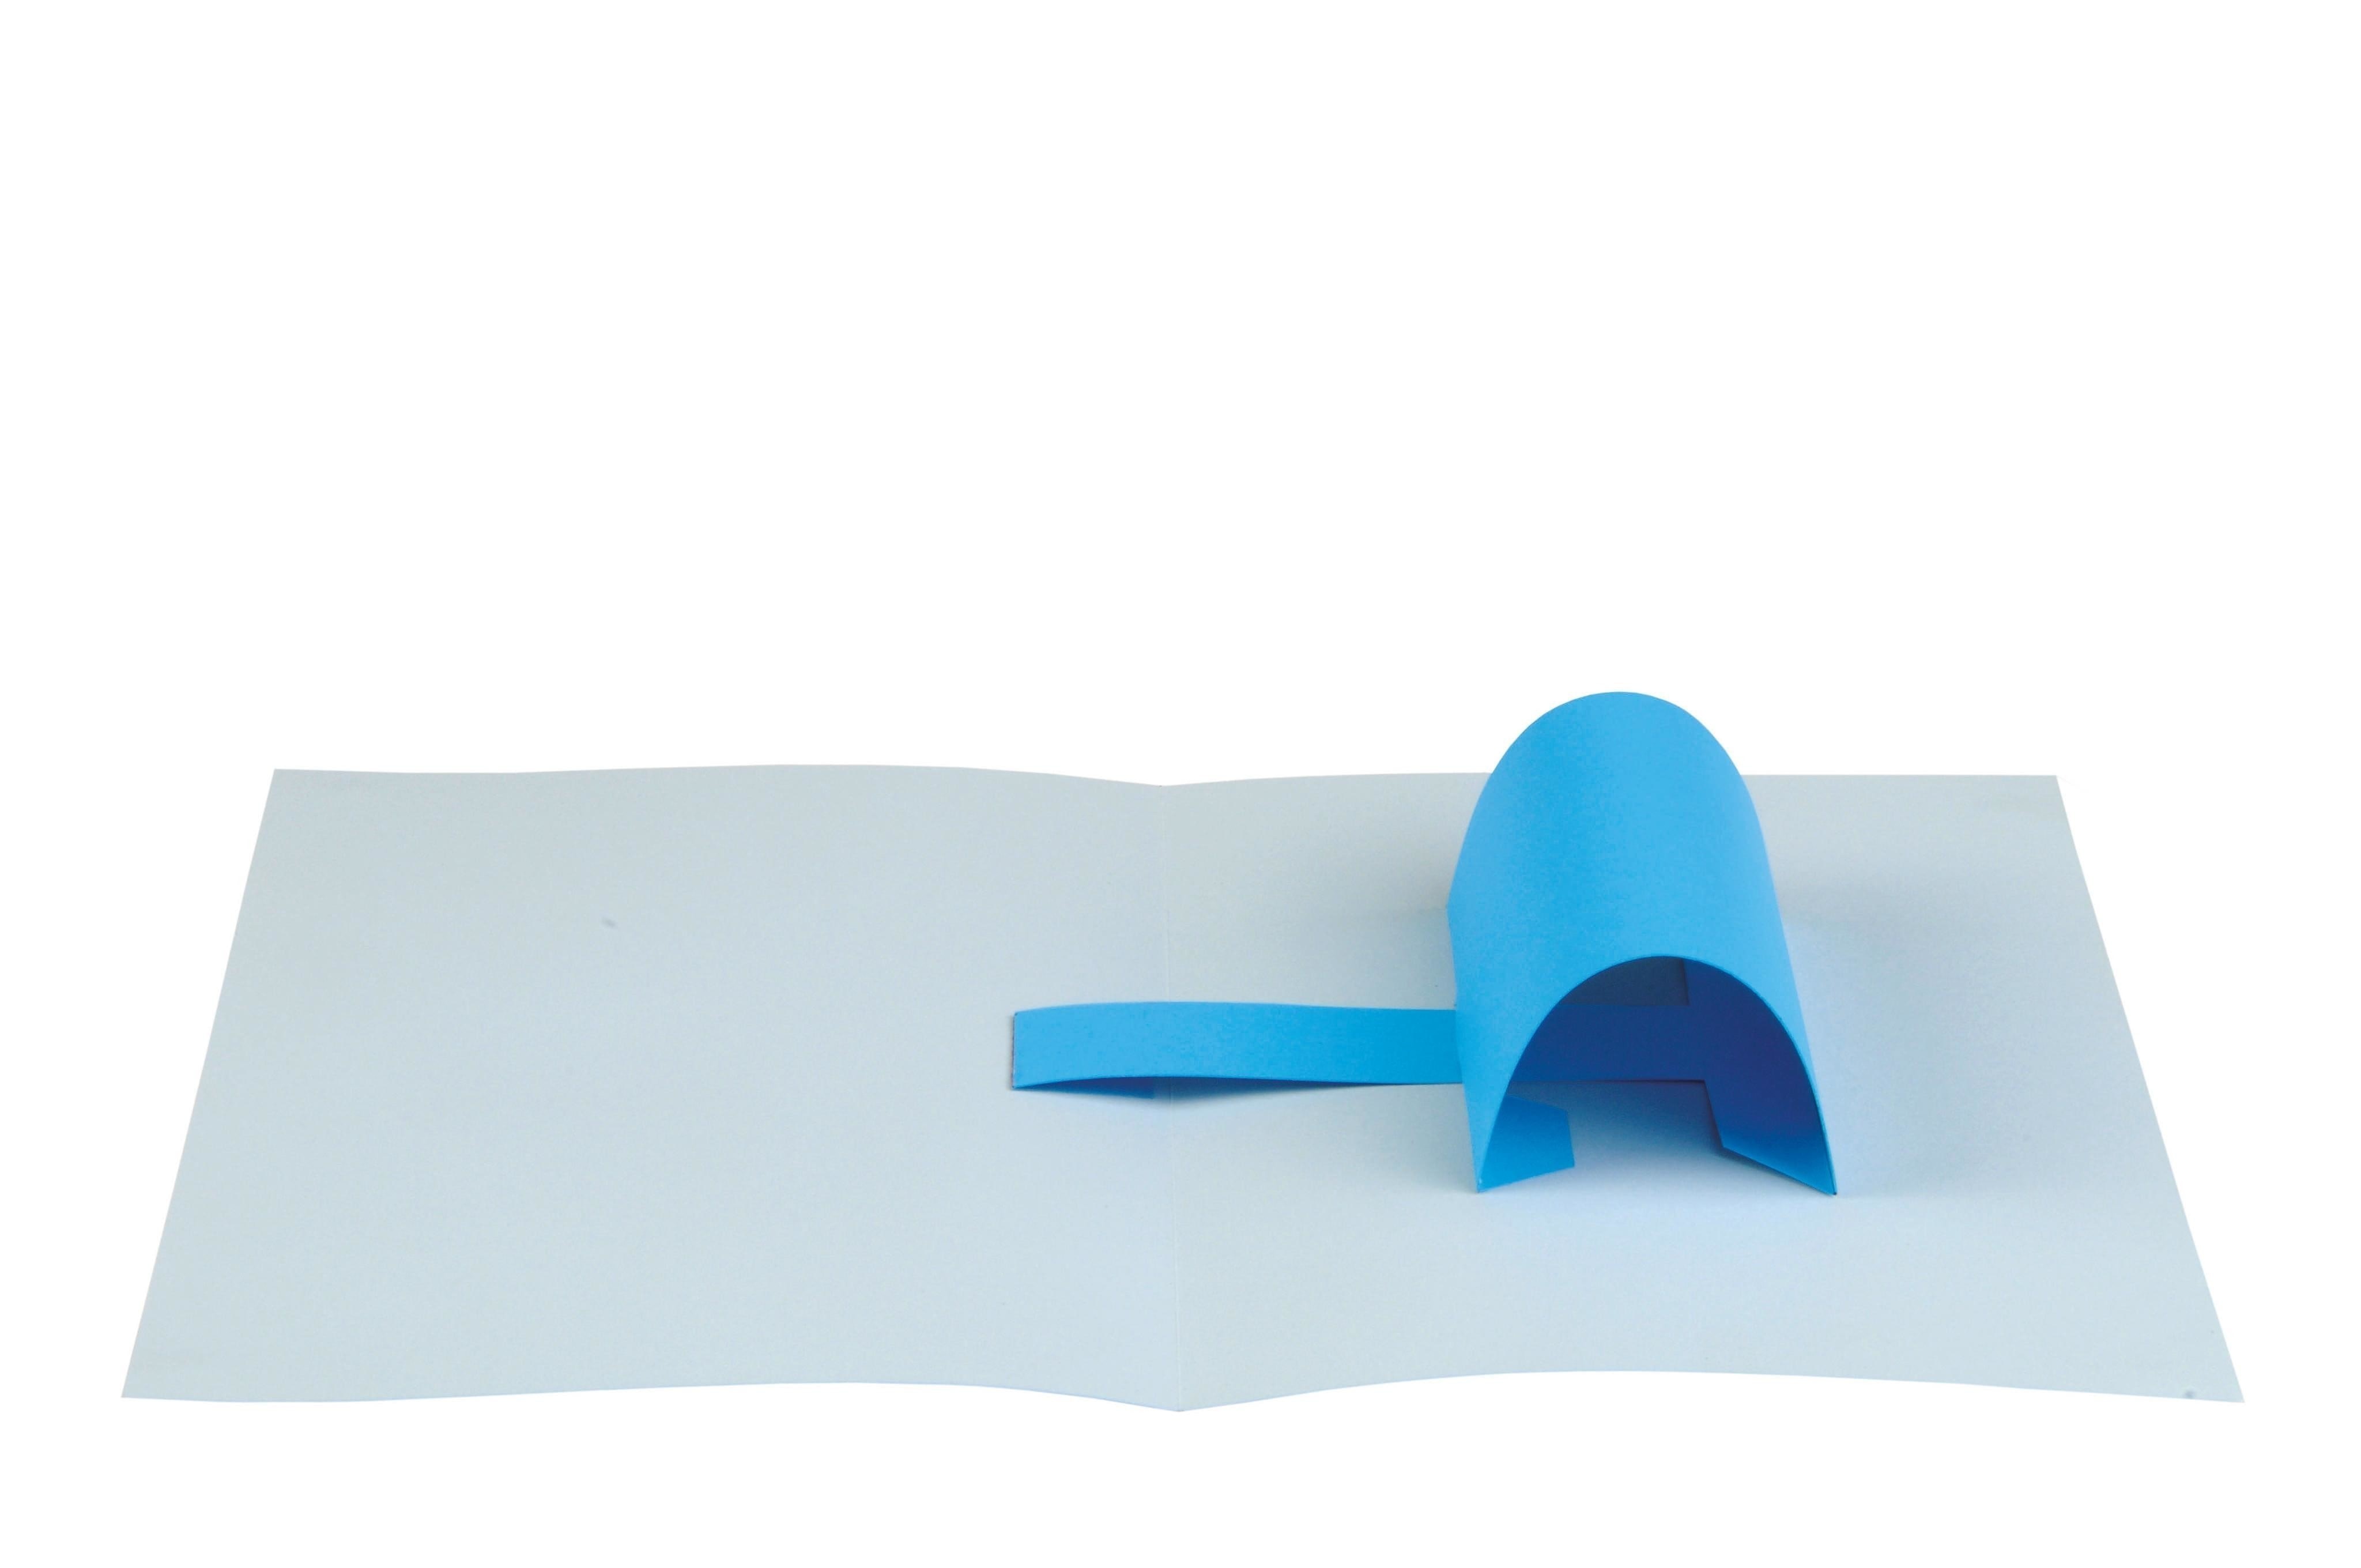
This mechanism uses a strip of card spanning the spine to raise a pop-up on the opposite page. The pop-up can be a Curved shape (as here), a flap, or a Parallelogram. The strip can be concealed beneath the page, which makes the effect even more surprising.
-
 Vivien T. favorited Automatic Pull Strip
13 Sep 22:21
Vivien T. favorited Automatic Pull Strip
13 Sep 22:21
-
 GMC Group published her project Automatic Pull Strip
04 Sep 09:00
GMC Group published her project Automatic Pull Strip
04 Sep 09:00
You Will Need
-
 Step 1
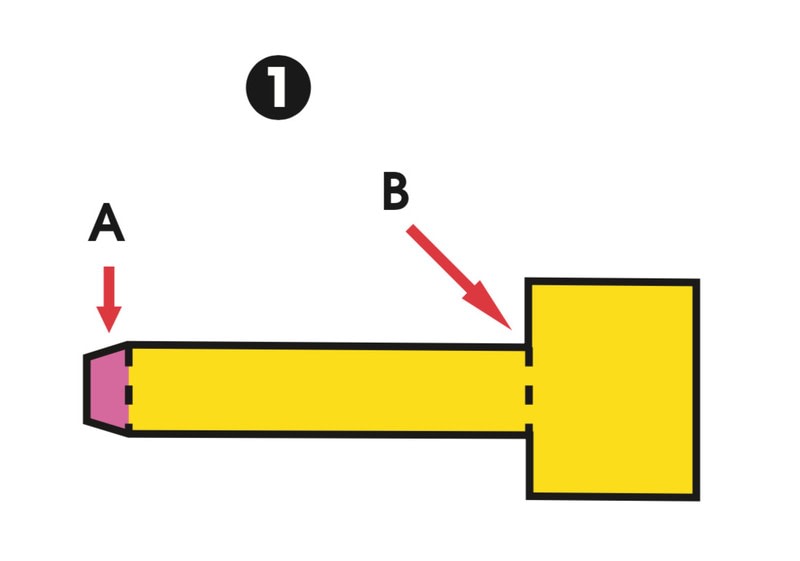
First, take a piece of card approximately 4in (100mm) wide and 10in (254mm) long. Make folds for gluing-tabs at each end, and a third parallel fold about 1in (25mm) off centre. Length A plus one gluing-tab should be slightly less than one side of your card base. Length A should be longer than length B.
-
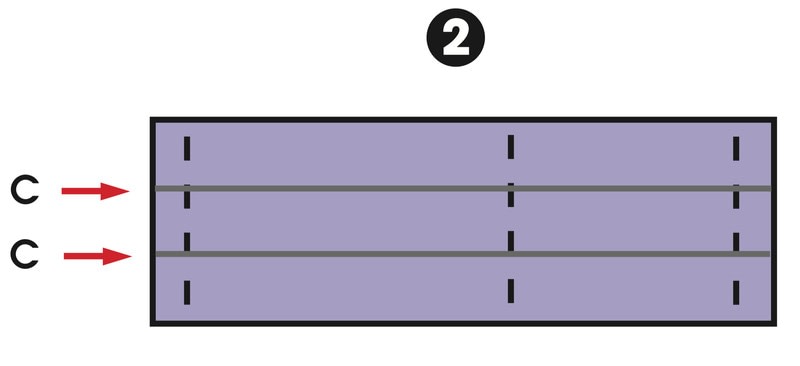
 Step 2
Use the width of a ruler to draw two horizontal, parallel guide lines (C and C).
-
 Step 3
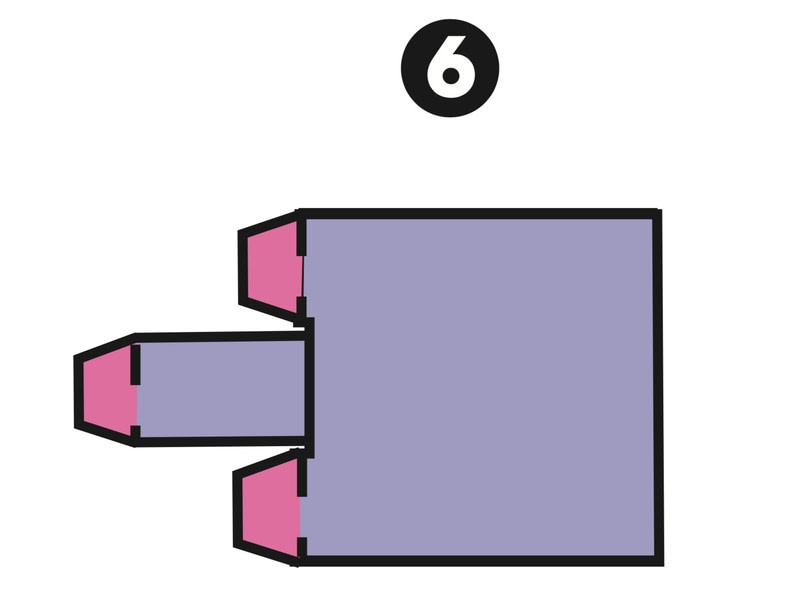
Draw the rest of the shape. The edges of tab D lie just within the guide lines. The edges of tabs E are just outside the guide lines.
-
 Step 4
Cut out the piece. The shape F to the left of the middle fold is an integral part of the strip; it guides the moving edge that slides on the page as the base opens.
-
Step 5
Crease all the folds.
-
 Step 6
Fold the main body of the piece over the strip.
-
 Step 7
Fold tabs E underneath it.
-
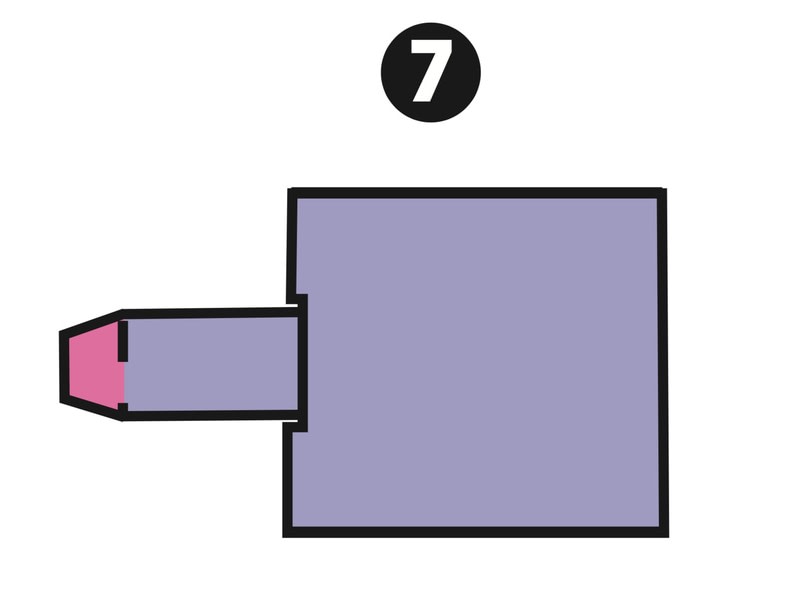
 Step 8
Place the piece on the base with crease G not more than 1in (25mm) away from the spine.
-
Step 9
Before gluing, try pulling tab D, to make sure that the strip can slide freely between tabs E.
-
Step 10
With the whole piece in position, flat on the page, glue tabs E.
-
Step 11
Leave tab D flat on the page (NOT folded). Put glue on top of tab D, then close the base. Allow the glue to set before opening as tab D takes a lot of stress when the base is opened.
Additions
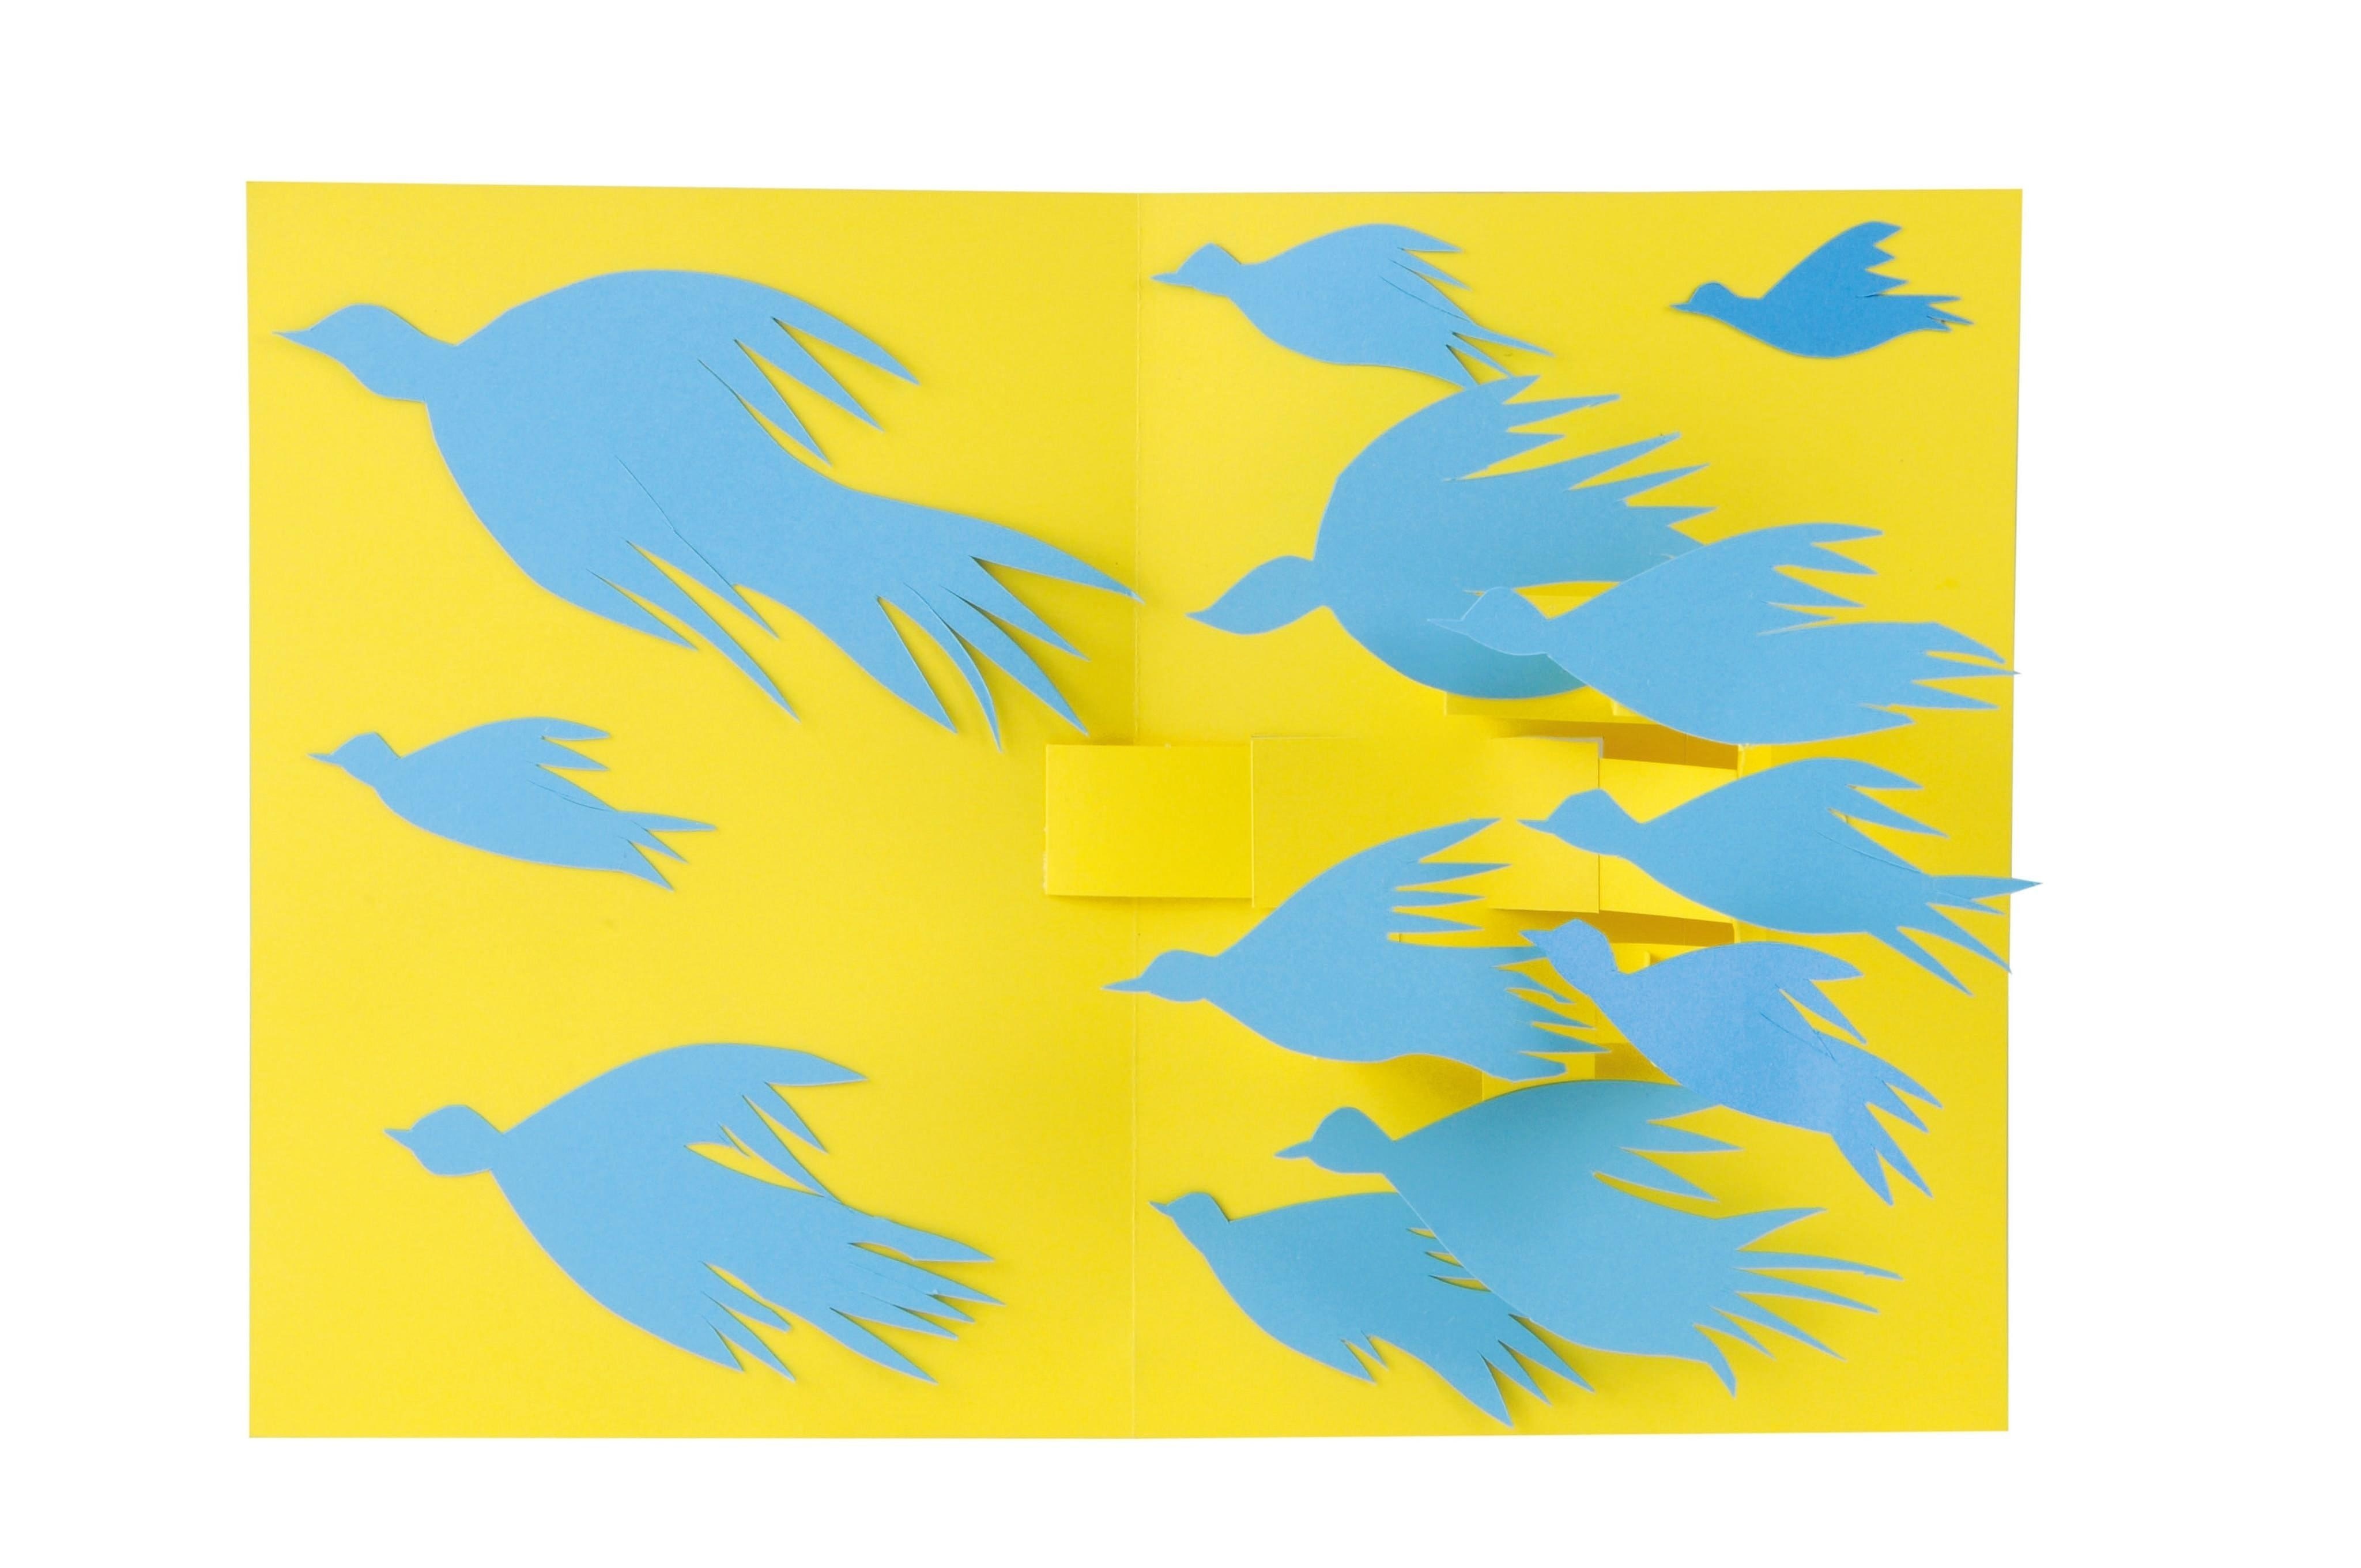
Additional flat strips can be added to this curved shape. Put glue on the end of the strips – they will rise at different angles, depending on where they are attached to the curve.Other pop-ups can also be built into the little gully created where the strip attaches to the base.
-
 Step 12
Running the Automatic pull-strip under the page
The strip can be constructed to run under the base. This holds the sliding part of the mechanism down on the page, it also hides the pull-strip and gets it out of the way of other pop-up constructions.
In this variation the end of the pull-strip near the spine, A, is exactly the same as in the previous example, but the construction at the other end is slightly different – it has one long gluing-tab, B, all the way across the width of the piece.
-
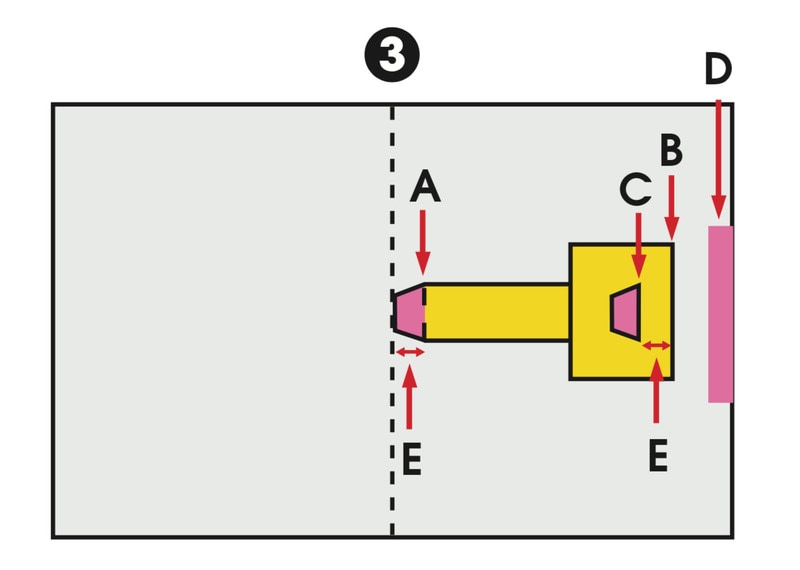
 Step 13
Two slits are cut in the base, C and C. Note the shape of these slits – their ends are extended horizontally by about 1⁄2in (13mm) to allow the page to lift slightly, and so facilitate the movement of the card.
-
 Step 14
Construction: the strip is threaded through the slits until crease A is approximately 1⁄2in (13mm) from the spine; leave the gluing-tab lying flat.
-
 Step 15
Fold the body of the card over towards the spine and fold tab B underneath it.
-
 Step 16
With the piece lying flat, glue tab B to the page between the two slits.
-
Step 17
Put glue on top of tab A, then close the base and press firmly. Give the glue time to set before opening the page.
-
Step 18
Using the Automatic pull-strip to raise a flap in the middle of the page
1 Make the flap – a piece of card with a gluing- tab on one side.
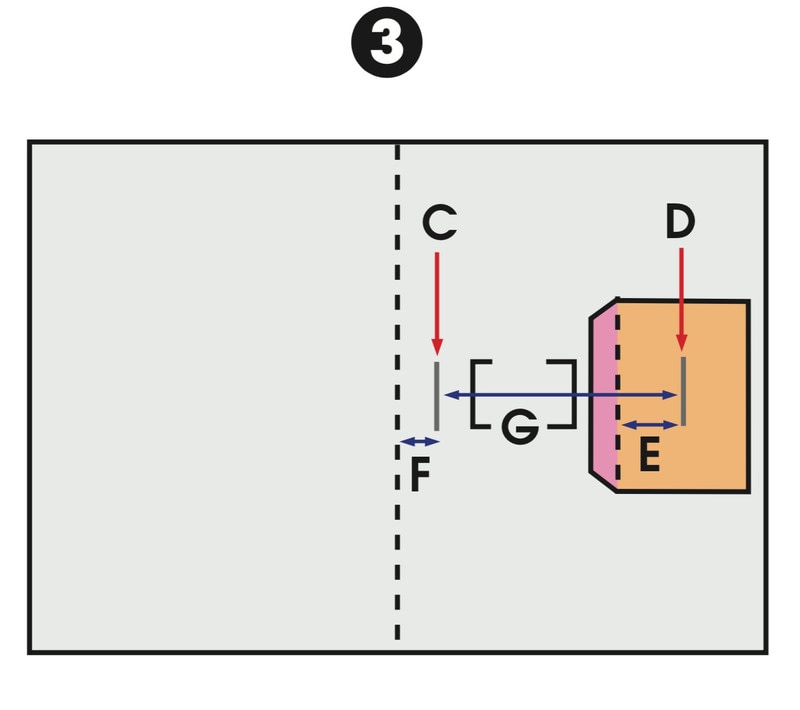
2 Glue the flap to the page. Make two slits in the page – be sure to leave enough of a gap between slit A and the spine, and slit B and the flap for the pull-strip to be able to move comfortably.
3 Draw a line, C, on the page parallel to the spine and about 1⁄2in (13mm) away from it. Draw a line, D, on the flap parallel to the
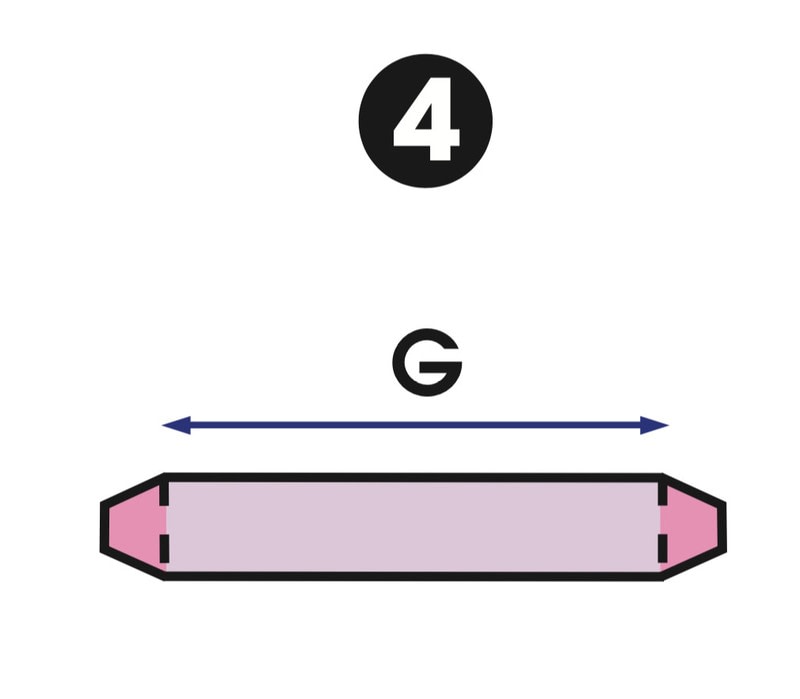
crease where the flap is attached to the page. One end of the pull-strip will be attached here. The position of this line, D, is critical. To make the flap flip right over make length E = length F. To make the flap stand vertical make E = 2 x F. Measure the distance between the two lines, G.4 Make the pull-strip with a gluing-tab at
each end. The distance between the gluing-tabs’ creases is G.5 Thread the pull-strip through the slots in the base.
Glue one end of the pull-strip to the flap with the gluing-tab’s crease exactly on line D.Make sure the crease at the other end of the strip is exactly on line C then, with the gluing- tab flat, put glue on the top of it, shut the base and press firmly.
-
 Step 19
Automatic pull-strip theory
With the base closed this is the position of crease A in relation to the spine.
-
 Step 20
With the base open, crease A moves to position B in relation to the spine. The distance between position A and position B is the amount of movement generated at the other end of the strip, C.
At its most simple, this movement can be used to pull a flat image across the page. It can also be used to flip a flap, or raise a plane which can in turn lift Parallelograms or V-folds.
-
Step 21
A Parallelogram can be built onto the flap rising in the middle of the page
Make a flap rise on the page as explained in 17.2. In this case at step 3, E will be 2 x F.
-
 Step 22
Make a Parallelogram piece – length A will be the same height as the raised flap.
-
 Step 23
Length B on the Parallelogram will be the same as the distance between the place where the flap’s crease is fixed to the page and where the Parallelogram glues down between
the two slits in the base. -
 Step 24
Automatic pull-strip turning a flap on the opposite page
This mechanism is made with two pieces. The first is
a pull-strip with a gluing-tab, A, on one end and a flap on the other. There is a fold, B, between the flap and the strip. -
 Step 25
The second piece is a rectangle of card with a gluing-tab, C, in the middle of one edge. There is a crease between the gluing-tab and the card. Tab C will glue to the back of the flap. The other edge of the card, D, will glue down flat and flush against the edge of the base.
-
 Step 26
Place the strip with A opened out flat and almost touching the spine of the base. Fold the flap over on top of the strip. Distance E between the spine and the crease of flap A must
be the same as E between crease B and the crease of flap C. -
 Step 27
Glue the second piece into position with edge D flush
against the edge of the page A and tab C glued to the back
of the flap. -
Step 28
Put glue on top of flap A. Close the base, press firmly and allow the glue on tab A to set.
-
 Step 29
Open the base. Because the flap is folding towards the
closing page it may need to be
trimmed, as it will snag if it
is too long.


 1
Watercolor Art »
Watercolor Paints Made From Make Up
1
Watercolor Art »
Watercolor Paints Made From Make Up
