About
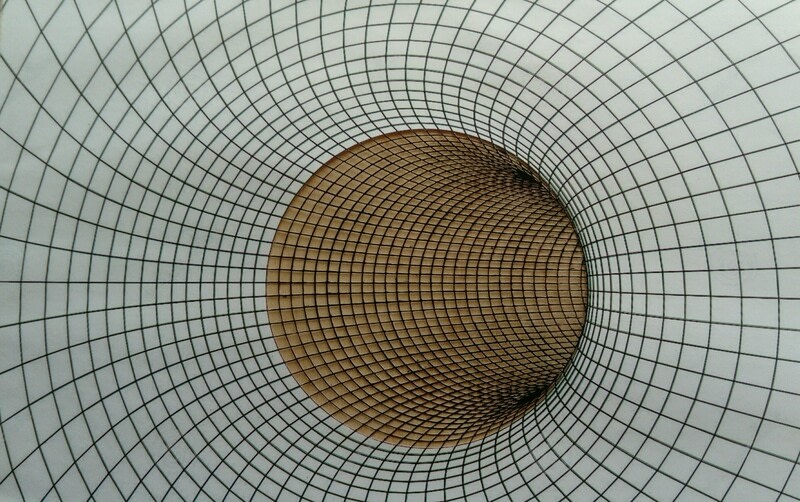
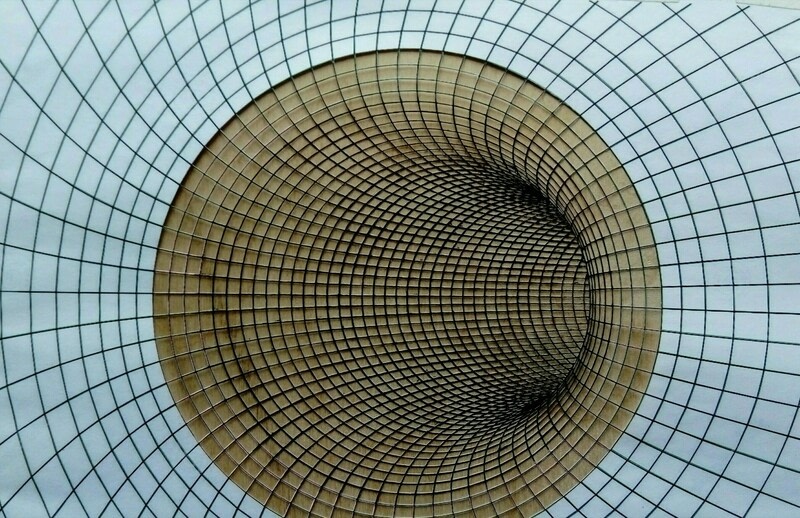
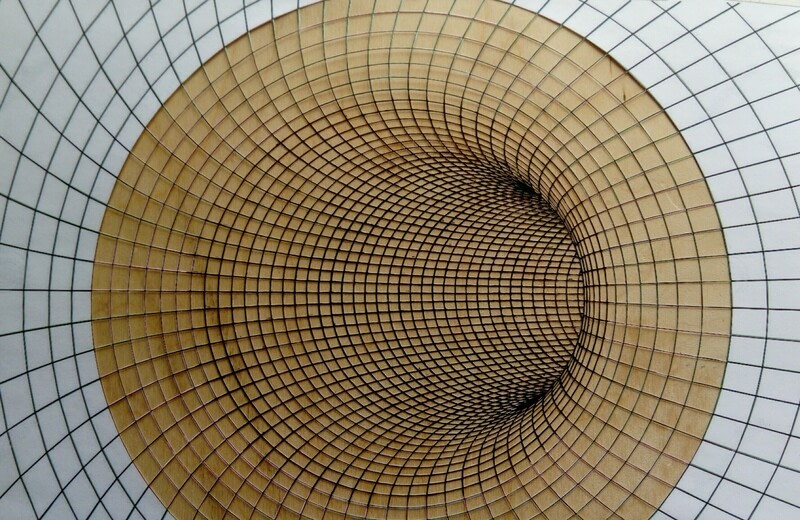
The illusion of an infinite vortex
For this 7th piece, I chose a pattern representing the inside of a wormhole. For this last papercut, it's one of the most difficult techniques of papercut because the precision of the curves and the thickness of the cut lines are essential for a final quality result. The cuts must imperatively follow the drawing for an optimal optical illusion. The imperfect geometric elements are immediately visible to the eye, it's why I recommend you to make your drawing on computer software such as Adobe Illustrator.
-
 Arnaud P. published his project 7. Inside The Wormhole
04 Jul 09:00
Arnaud P. published his project 7. Inside The Wormhole
04 Jul 09:00
-
 Step 1
Print your design or draw it very precisely on a white sheet of paper. Scotch your drawing so that the paper is stretched and does not curl.
-
 Step 2
Start your cuts from the center this time to remove line by line of small rectangle.
-
 Step 3
You must be totally focused on each cut, set reasonable goals for each cutting session.
-
 Step 4
Be careful not to cut one of the lines left previously, the error would then be very difficult to repair because the glue will be seen at the end, which would not be clean.
-
 Step 5
The more you advance in your cuts, the longer it will be because there will be more and more rectangle to be cut on each line.
-
 Step 6
When you start to cut the first full circle, be extremely precise because each element to be cut will be very very fine.
-
 Step 7
On a drawing printed on white paper, you will risk having some places of your cuts that lose their color, I would advise you to go over your lines a little bit of black ink with a fine brush. Be careful to only use alcohol-based ink so as not to distort your papercut.
-
 Step 8
Here too, each circle will take longer and longer to be completely cut.
The diameter of the circle will increase faster than the size of the rectangles to be cut out. -
 Step 9
Once the entire circles cut out, you will only have the last large rectangles left on the sides. This step is the most satisfactory because it is quite fast.
-
 Step 10
Your papercut totally cut, you can now prepare a border cut from a sheet of black paper. Here the whole is placed on a white sheet of paper.
-
 Step 11
You can also fix everything on a colored background, the one of your choice. I chose to make a watercolor pencil background.
-
 Step 12
Protect your papercut in a frame that matches with the dimensions of all your sheets.