About
A little Heron who inspires calm and tranquility
For this 4th piece, I chose a pattern representing a sunset landscape on the edges of a marsh with a White Heron in the center. This pattern is enough delicate and fine when it comes to cutting, the details are quite small, and not to make things easier, wood veneer work will have to be done to finalize and sublimate the background of the landscape.
-
 Crafterella featured 4. The White Heron
07 Jul 23:00
Crafterella featured 4. The White Heron
07 Jul 23:00
-
 KMOM14 favorited 4. The White Heron
03 Jul 05:12
KMOM14 favorited 4. The White Heron
03 Jul 05:12
-
 Arnaud P. published his project 4. The White Heron
01 Jul 09:00
Arnaud P. published his project 4. The White Heron
01 Jul 09:00
-
 Step 1
As usual, draw your pattern right side up on tracing paper, it is important to trace it and cut it upside down. Once your transferred pattern, if the drawing is not visible enough on black paper, feel free to draw it again with your pencil.
-
 Step 2
Start your cut with the clouds and the bottom of the marsh, these
plots are quite similar and you can start "gently". -
 Step 3
Do not cut the large back piece around the Heron at this time, this one should be absolutely cut last. Continue cutting up towards the Heron, respect your lines, sharp parts and curves should not be altered.
-
 Step 4
Now cut out the small pieces inside the Heron's legs, then continue with the elements around.
-
 Step 5
The following will be the cutting of the Heron's feathers, these elements are very delicate and you will have to use your scalpel with precision to respect the drawing.
-
 Step 6
It's very important to keep the background pieces around the Heron to cut out the inside of the feathers and the details of the neck and the head.
-
 Step 7
Finish your cut with the large back pieces, the perimeter of the Heron being the most difficult cut of the pattern. The beak, the feathers on the back of the head and the neck will require a lot of patience and precision for a result faithful to the drawing.
-
 Step 8
Your papercut cut out, you can present it in front of different sheets of wood veneer in order to choose the most suitable for what you want to represent.
-
 Step 9
Once your veneer has been chosen and to be able to put the Heron in the foreground, you will need to choose and cut out several pieces of paper of different colors, in association with colors of your wood to prevent the Heron from mixing with the bottom. They will be glued to the back of the pattern on the areas that allow it, it's important to keep some margin for the glue on the added elements.
-
 Step 10
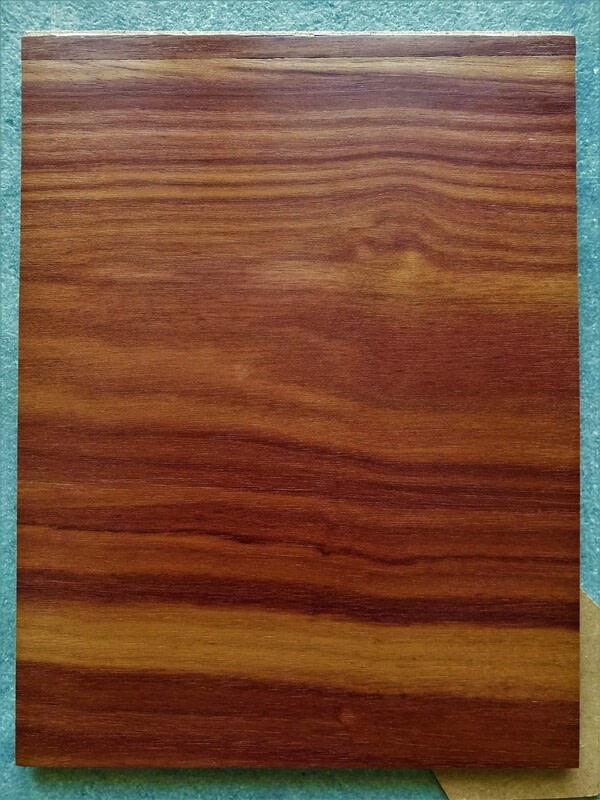
You must now prepare the wood veneer, to do this, cut it to the size of the frame in which you want put it on and paste it on the bottom. The veneer is easily cut with a scalpel, however, you must use a ruler to be precise and to be delicate in your gestures. Once glued you can sand the wood (in the sense of vain), to make it smooth and remove impurities. Use wax for finishing the wood and let it dry well before laying your papercut on it.
-
 Step 11
You can finish by fixing the whole in the frame and your papercut will then take all its effects.