


About
Na na na na na na na na na na na na na na na na... BATMONKEY!
I started my crafting a few years ago when my boyfriend bought me a sock animal book for valentines day (and a pair of man's socks which he got me to open first). Since then there has been no turning back and now I try my hand at as many new crafts as I can find. So in tribute to him and my sock animal beginnings, I created my very own tutorial for BATMONKEY!
Tags
-
 Amber J. added Batmonkey to Cyric
04 Apr 17:05
Amber J. added Batmonkey to Cyric
04 Apr 17:05
-
 Claire Y. favorited Batmonkey
23 Sep 20:49
Claire Y. favorited Batmonkey
23 Sep 20:49
-
 Laura J. favorited Batmonkey
07 Jul 15:34
Laura J. favorited Batmonkey
07 Jul 15:34
-
 Trixzie favorited Batmonkey
25 Nov 03:26
Trixzie favorited Batmonkey
25 Nov 03:26
-
 Crafta La Vista entered her project Batmonkey to Petits Pixels
26 Jul 23:46
Crafta La Vista entered her project Batmonkey to Petits Pixels
26 Jul 23:46
-
Kierra O. favorited Batmonkey
12 Jul 20:52
-
Kierra O. added Batmonkey to Sale?
12 Jul 20:48
-
 miraenna favorited Batmonkey
01 Jul 13:08
miraenna favorited Batmonkey
01 Jul 13:08
-
Brittany D. favorited Batmonkey
16 Jun 08:04
-
 rosie.rivera.7 favorited Batmonkey
04 May 21:56
rosie.rivera.7 favorited Batmonkey
04 May 21:56
-
 Step 1
The colours I chose were based on a traditional batman suit:
Grey/silver - I used shiny tights but grey socks would work as well
black
yellow
brown - for the monkeyYou also need enough stuffing to fill it all. if you don't have a shop near you that sells that, head to your local supermarket and pick up a cheap pillow
-
 Step 2
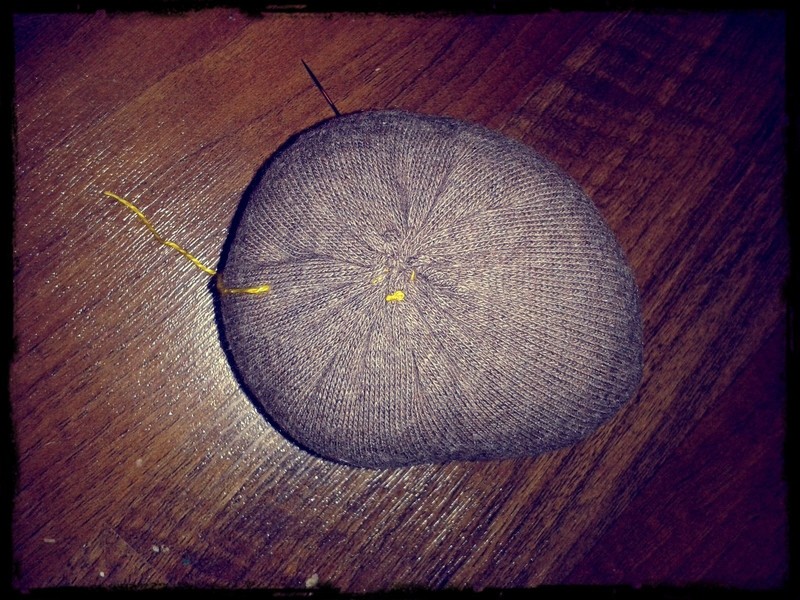
We will start with the head - cut a large square panel out of your brown sock and sew a gathering stitch in a circle shape around the end
-
 Step 3
pull on the stitch and fill with stuffing as you do so
-
 Step 4
pull it as tight as you can and put a few stitches across the opening before tying a knot so it doesn't come undone
-
 Step 5
do the same again but with a smaller more oval shape
-
 Step 6
stitch the two together and pull the thread tight so you can't see it. I used a sort of mattress stitch
-
 Step 7
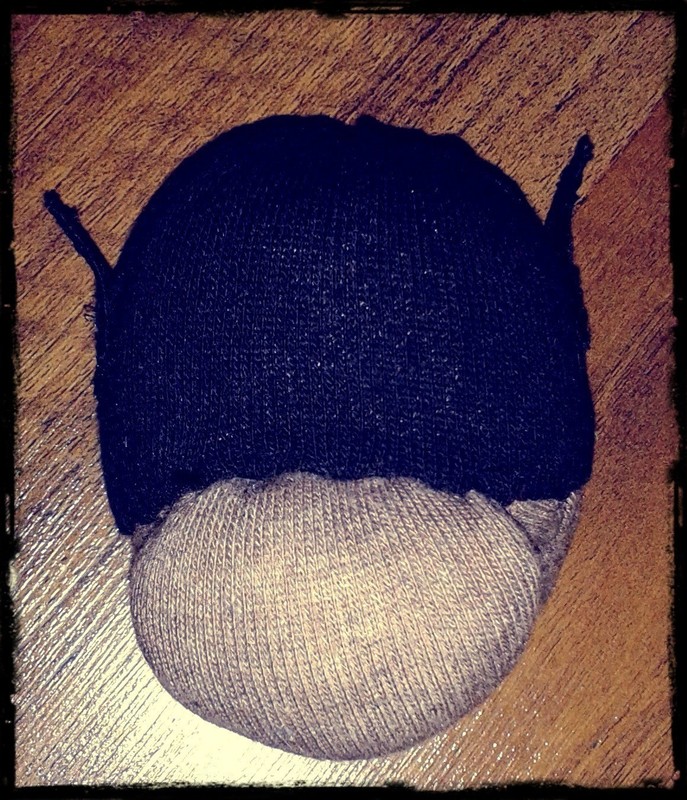
I then cut a tube section from the black sock and gather up one end of the tube and knot it
-
 Step 8
flip that inside out, put it over the top of the head and stitch it round the end to attach it to the head.
Then take small pieces of black material and stitch them to the sides of the head
-
 Step 9
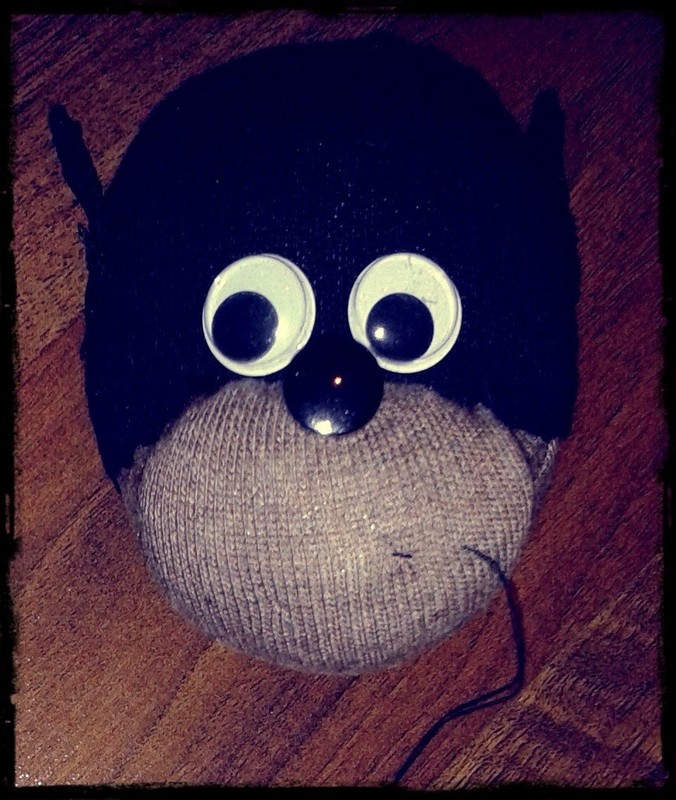
glue some googly eyes to the front on top of the black hat
-
 Step 10
stitch a button between the two eyes for a nose
-
 Step 11
take some red or black thread and stitch a mouth on the face, in whatever shape you would like for it.
I like this cheeky half grin
-
 Step 12
Now to start on the ears - Cut out a small circle of the brown sock and cut it in half. Sew the two halves together on the rounded side, leaving the flat side open.
Knot the end and then flip the ear inside out
-
 Step 13
fill the ear with just a tiny bit of stuffing and then pinch the middle, sewing the open end together as you do so - this creates the ear shape
repeat this again so you have 2 the same
-
 Step 14
Stitch the ears to the side of the head - I lined up with the eyes
-
 Step 15
Take a large section of the grey sock and stuff it, before sewing it at the end to form your body
-
 Step 16
Now lefts get this monkey walking - cut off a long rectangle, and fold it over on itself, before stitching up the side.
Flip it in on itself, stuff with filling and sew the end to the bottom of the body.
Repeat for the other leg
-
 Step 17
take two small pieces of black sock and stitch them round the bottom of the legs
-
 Step 18
cut to small circles and fill them with stitching while sewing, as per the head and then stitch them to the bottom of the legs to form the feet
-
 Step 19
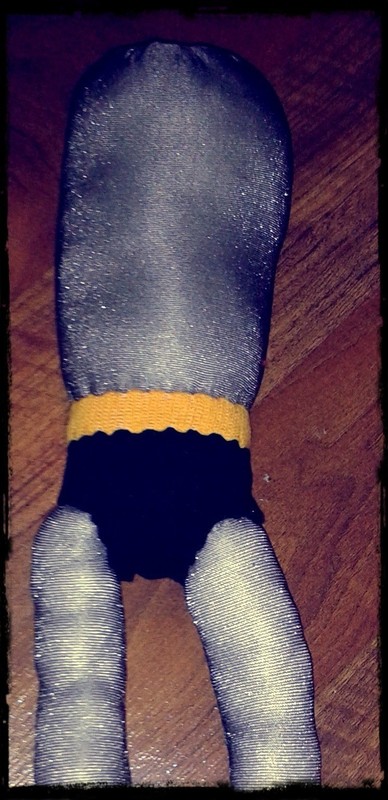
take the toe part of your black
The open end of this piece will be the top of your pants, and you will need to cut two small holes at the sides of the other end
pull the small holes over the legs, up to the stomach and then sew each of the openings to the body and legs
-
 Step 20
cut a ring off the yellow sock and sew it round the top of the pants
-
 Step 21
use a pen to draw the belt buckle on the middle
-
 Step 22
For the arms, repeat the same process as the legs, but make them a bit shorter
Then sew them to the side of top part of the body
-
 Step 23
Take two small pieces of black sock again and sew them onto the end of the arms for gloves
-
 Step 24
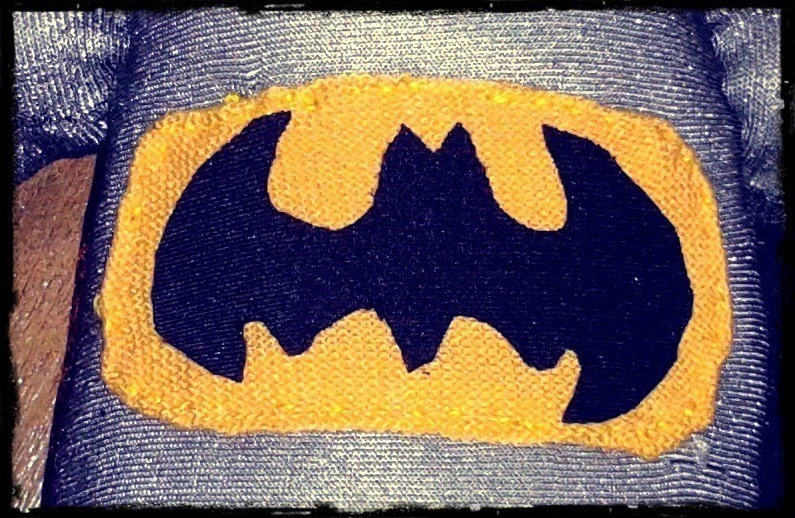
Take an oval shape of the sock and sew it on the top half of the body on the front and then cut out a bat sign from your black material and stitch or glue it on
-
 Step 25
Using a thick piece of black material and cut out a cape shape
-
 Step 26
Sew this onto the top of the body and then sew the head on top of that
-
 Step 27
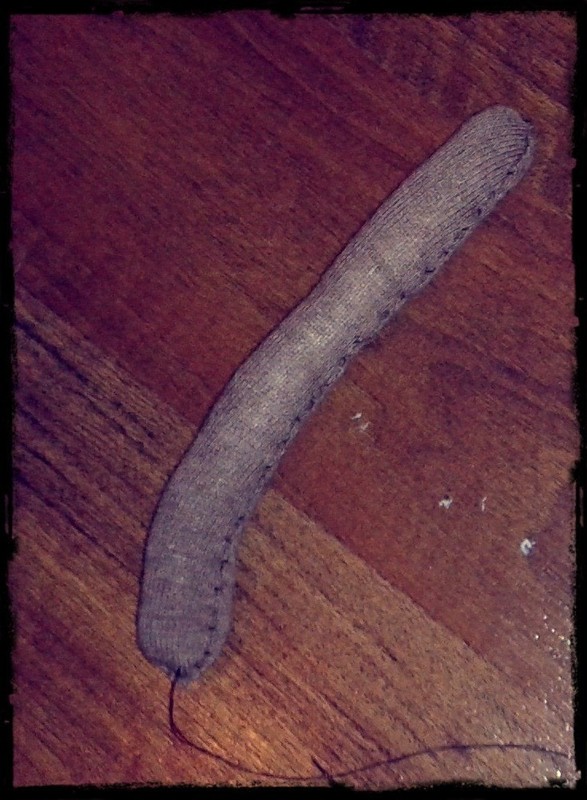
For the tail take a rectangle of the brown material - use a similar style to the leg but make it shorter and thinner
-
 Step 28
Then take your tail and sew it to the back of the pants
-
 Step 29
The final step is to find a building to hang your BATMONKEY from and you are done!
He will be ready and waiting for you turning on that bat signal


Comments


 1
Envelopes »
Green Collage Envelope
1
Envelopes »
Green Collage Envelope
 2
Origami Clothes »
Money Origami Hat
2
Origami Clothes »
Money Origami Hat
 3
Pumpkins »
Pumpkin Plushie
3
Pumpkins »
Pumpkin Plushie
 4
Envelopes »
Blue Collage Envelope
4
Envelopes »
Blue Collage Envelope
 5
Digital Artwork »
How To Turn A Picture Into A Line Drawing In Photoshop
5
Digital Artwork »
How To Turn A Picture Into A Line Drawing In Photoshop


