


About
Because I'm not allowed candles in my room...
Fairy lights are pretty and they make me feel really calm. My best friend has some lights like these in her room - I looked them up and they're pretty expensive (I can kind of see why though, lol) so I thought I'd have a go at making them myself.
Tags
-
 Kaiulani W. favorited Skeleton Leaf Fairy Lights
19 Nov 01:59
Kaiulani W. favorited Skeleton Leaf Fairy Lights
19 Nov 01:59
-
 Vi F. favorited Skeleton Leaf Fairy Lights
23 Oct 01:41
Vi F. favorited Skeleton Leaf Fairy Lights
23 Oct 01:41
-
 VillainousNinja added Skeleton Leaf Fairy Lights to Elf
21 Sep 02:01
VillainousNinja added Skeleton Leaf Fairy Lights to Elf
21 Sep 02:01
-
 Jenee Nicole added Skeleton Leaf Fairy Lights to Home Decor
28 Apr 08:40
Jenee Nicole added Skeleton Leaf Fairy Lights to Home Decor
28 Apr 08:40
-
Maya E. favorited Skeleton Leaf Fairy Lights
14 Mar 22:18
-
 jessica.boulanger.10 favorited Skeleton Leaf Fairy Lights
04 Oct 14:43
jessica.boulanger.10 favorited Skeleton Leaf Fairy Lights
04 Oct 14:43
-
 maja favorited Skeleton Leaf Fairy Lights
22 Sep 20:23
maja favorited Skeleton Leaf Fairy Lights
22 Sep 20:23
-
 gabriela.johnson.94 favorited Skeleton Leaf Fairy Lights
28 Aug 07:19
gabriela.johnson.94 favorited Skeleton Leaf Fairy Lights
28 Aug 07:19
-
 Markee R. added Skeleton Leaf Fairy Lights to Labyrinth Ball
19 Jun 14:10
Markee R. added Skeleton Leaf Fairy Lights to Labyrinth Ball
19 Jun 14:10
-
 Werk.eht.bro favorited Skeleton Leaf Fairy Lights
10 Jun 21:37
Werk.eht.bro favorited Skeleton Leaf Fairy Lights
10 Jun 21:37
You Will Need
-
 Step 1
Put leaves in a pan and cover with water. If making lots of skeletons, boil about 100 at a time. Add the half cup of Persil and stir. Turn the heat on and bring to a boil, then reduce heat so it simmers. Leave simmering for around 2 hours, stirring occasionally - check that the leaves are soft, but not TOO soft or they will just disintegrate.
-
 Step 2
When they've finished boiling they'll look like this - ugly and very smelly. Move them from the pan and into a tub of cold water.
-
 Step 3
The leaves should be very soft - if you pick one up and rub it, the outer 'skin' layer should split and you'll be able to see the skeleton inside (wow this sounds morbid!)
Now take another tub; put the leaf in and fill it with just enough water to cover it. Take the paintbrush and start gently peeling away the skin from the skeleton, discarding the bits of skin as you go. Be careful not to rip the skeleton, but it's not the end of the world if you do.
-
 Step 4
This is what the leaf looks like after the 'skin' has been peeled away; some bits of pulp will remain. Just poke those gently with the paintbrush and they'll dislodge and float away. Think of yourself as some kind of leaf archaeologist. :)
-
 Step 5
Lay the leaf flat on a kitchen towel and poke it with the paintbrush some more, to drain all the excess water.
-
 Step 6
Hooray, now you have a skeleton leaf!
-
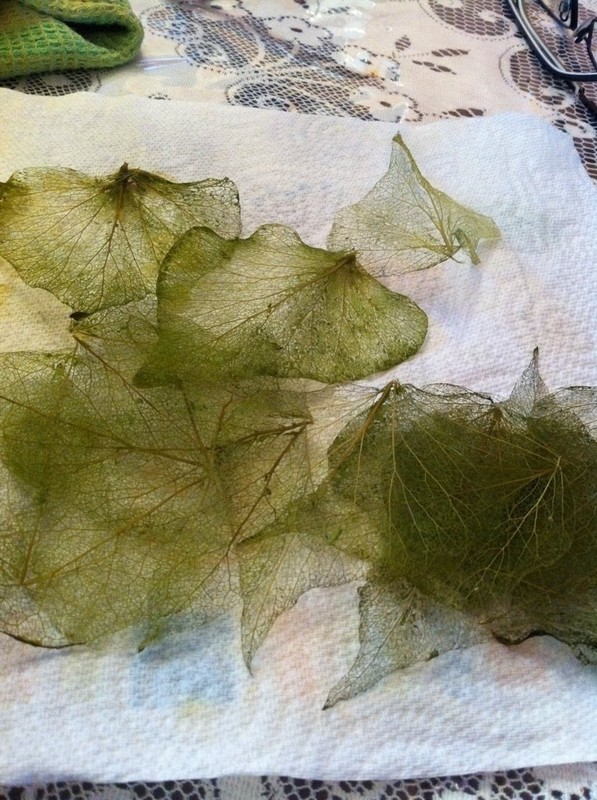
 Step 7
Start building a collection. Leave them to dry for about an hour.
-
 Step 8
Receive your fairy lights in the mail and proceed to decorate your room with them immediately. Then take them down as you realise they're not pretty enough yet.
-
 Step 9
The lights I used were LED lights off eBay, they cost about £8 for 10 metres, which is not bad. They get a little hot, but I'm hoping it's not a cause for concern.
Wrap a piece of double-sided tape around the light. Don't touch the tape with your fingers though, or it'll lose all it's stickiness.
-
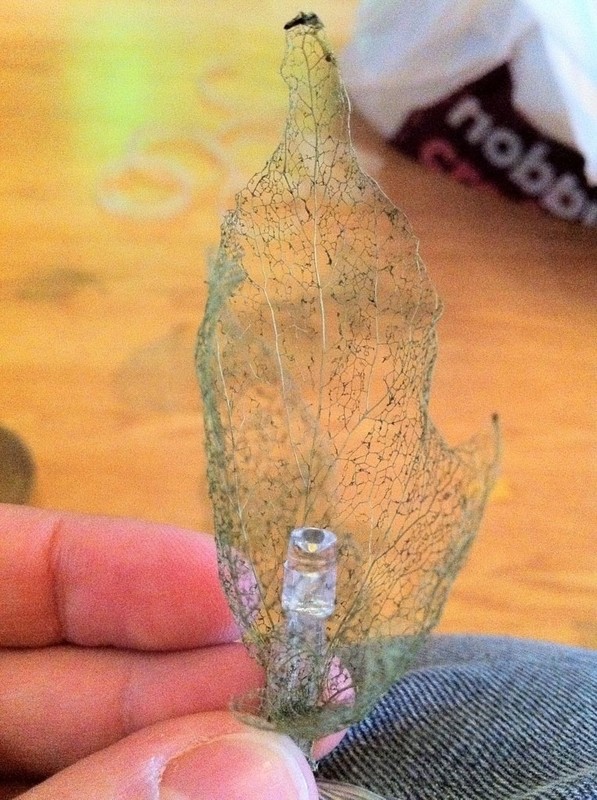
 Step 10
Wrap a leaf around the light.
-
 Step 11
Keep wrapping leaves until it looks like this.
-
 Step 12
Tie a ribbon around the light for pretties and security (but mainly pretties).
-
 Step 13
Voila! Now continue until your lights are done.
-
 Step 14
Plug in and enjoy :)


CO + K User
If you do mind, please let me know. Love the tutorial