


About
Princess Lasertron's low-sew felt jewelry envelope
This project is easy to make in just an hour or so, and makes a great gift for your friends and bridesmaids who are helping you out with your special day. For bonus points, include a little keepsake necklace from your favorite Etsy seller! With a few tweaks, it would also be perfect for the well-accessorized man in your life, and could be used to store watches and cufflinks.
-
 Key West Witch favorited Jewelry Envelope
08 Aug 04:47
Key West Witch favorited Jewelry Envelope
08 Aug 04:47
-
 Rebecca C. favorited Jewelry Envelope
28 Jul 03:32
Rebecca C. favorited Jewelry Envelope
28 Jul 03:32
-
 MidnightCircus favorited Jewelry Envelope
23 Feb 02:01
MidnightCircus favorited Jewelry Envelope
23 Feb 02:01
-
 Xfluffy_unitatoX favorited Jewelry Envelope
17 Nov 17:37
Xfluffy_unitatoX favorited Jewelry Envelope
17 Nov 17:37
-
 02jhseaby added Jewelry Envelope to Try
07 Jun 22:03
02jhseaby added Jewelry Envelope to Try
07 Jun 22:03
-
02jhseaby favorited Jewelry Envelope
07 Jun 22:03
-
 Sarah S. added Jewelry Envelope to Jewelry
19 Jan 07:34
Sarah S. added Jewelry Envelope to Jewelry
19 Jan 07:34
-
 Kathy Gregson added Jewelry Envelope to Weihnachten
07 Dec 02:58
Kathy Gregson added Jewelry Envelope to Weihnachten
07 Dec 02:58
-
 Brianna :) favorited Jewelry Envelope
16 Dec 08:34
Brianna :) favorited Jewelry Envelope
16 Dec 08:34
-
michelle d. favorited Jewelry Envelope
19 Oct 16:08
-
 Step 1
Use a large piece of paper, a flattened paper bag, or wrapping paper to make a pattern. First, draw a 7x9'' rectangle. Three inches from the top, draw a straight line to demarcate the flap that protects the jewelry in the pouch. Draw a dotted line five inches from the left side. And add a scalloped envelope flap to the left that measures about 4'' at its peak. It should look like this. Cut two from your felt pieces.
-
 Step 2
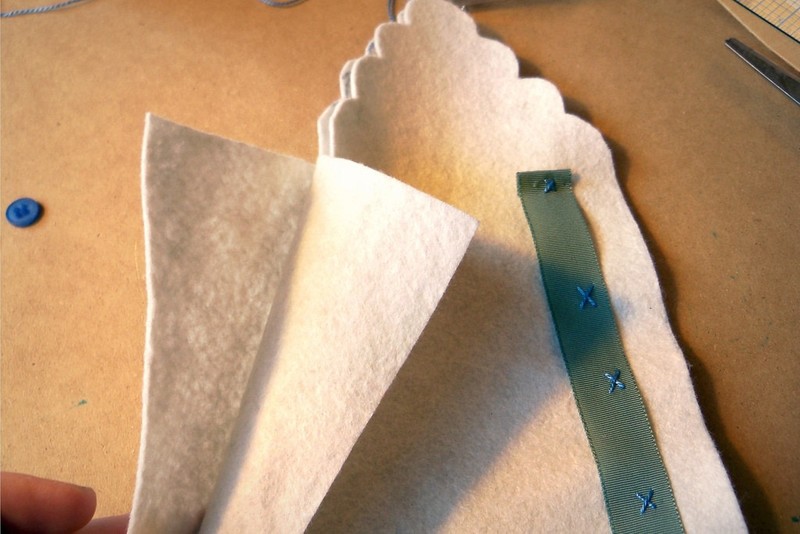
Pin your ribbon to the long side of one of your felt pieces.
-
 Step 3
Secure the ribbon to the felt jewelry roll by stitching little x's with embroidery floss.
-
 Step 4
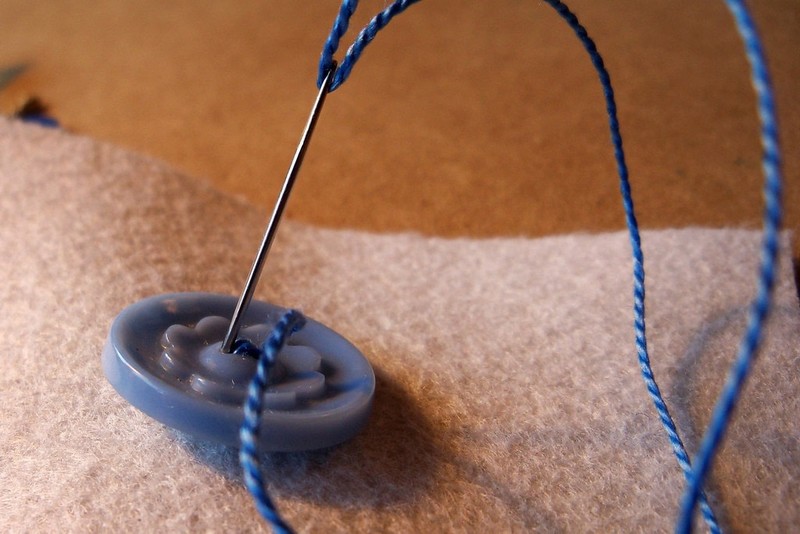
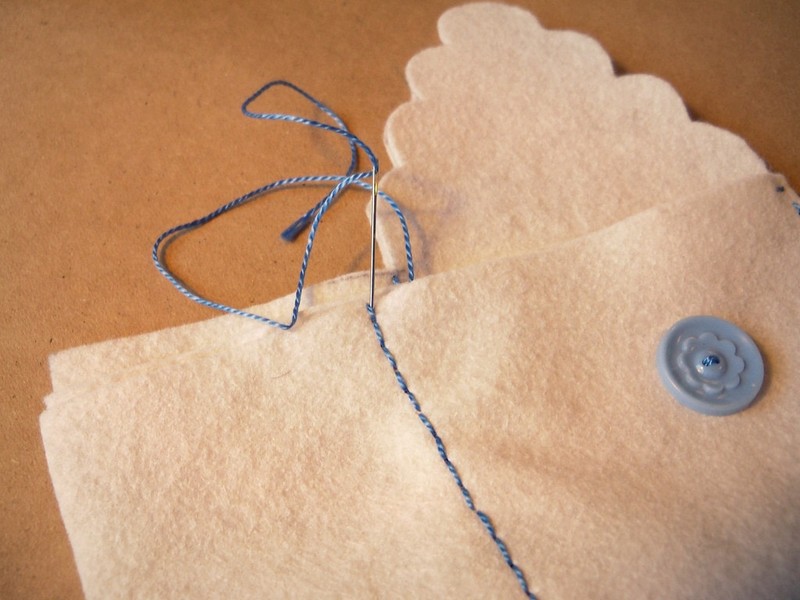
Take your other cut-out piece of felt and sew your button onto the bottom edge, on the opposite side of the envelope flap.
-
 Step 5
The felt with the ribbon goes on the inside of the jewelry envelope, and the piece with the button faces the outside.
-
 Step 6
Stack the two pieces on top of each other and hand-stitch the two pieces together along the inside edges of the envelope pocket, straight down from the edges of the scalloped flap.
-
 Step 7
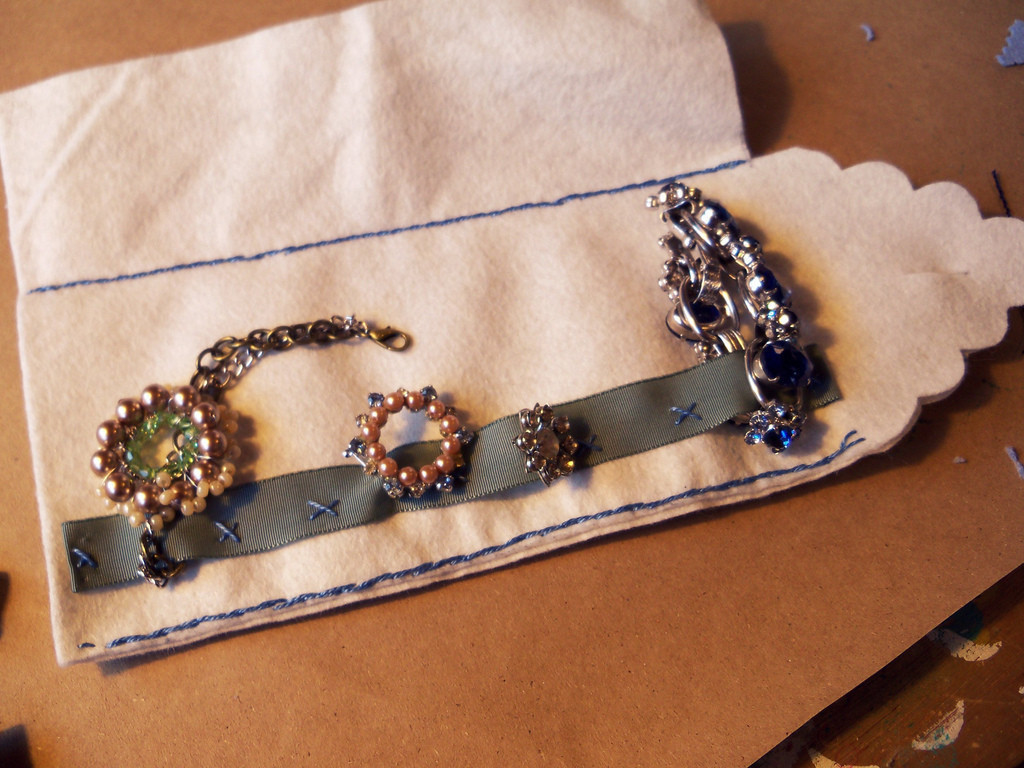
By closing the two sides but not the top and bottom, you form pockets when the pouch is folded that is perfect for rings, brooches, and anything that won’t attach to the inner loops.
-
 Step 8
Technically you are done, but you can always go on to:
-
 Step 9
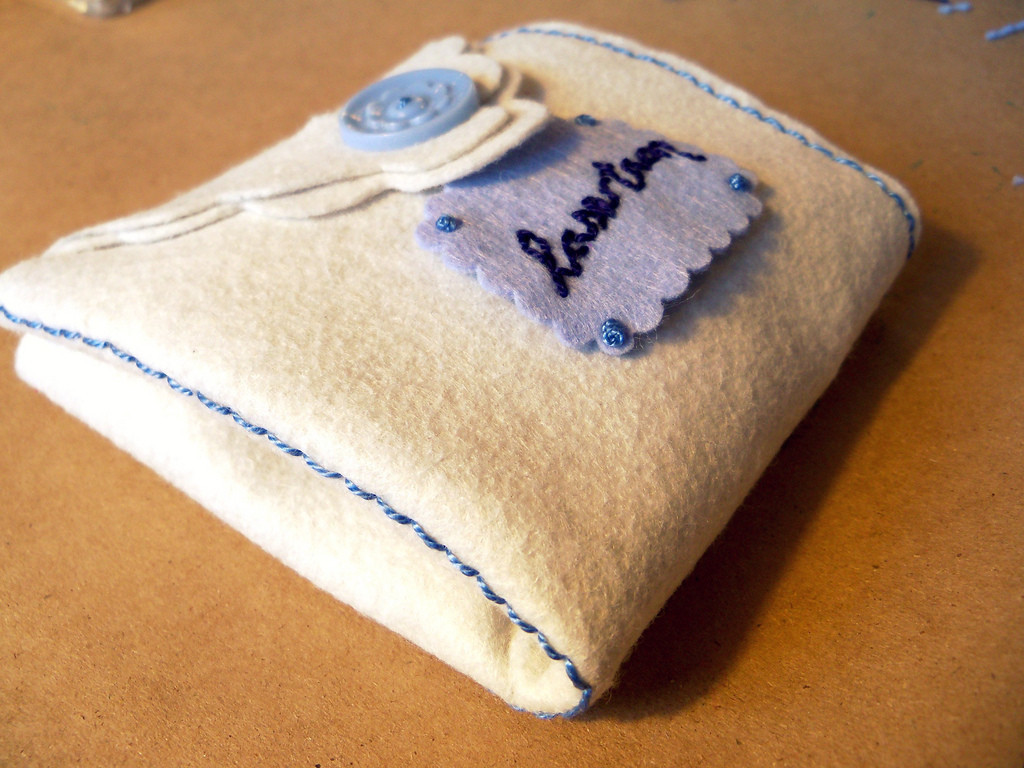
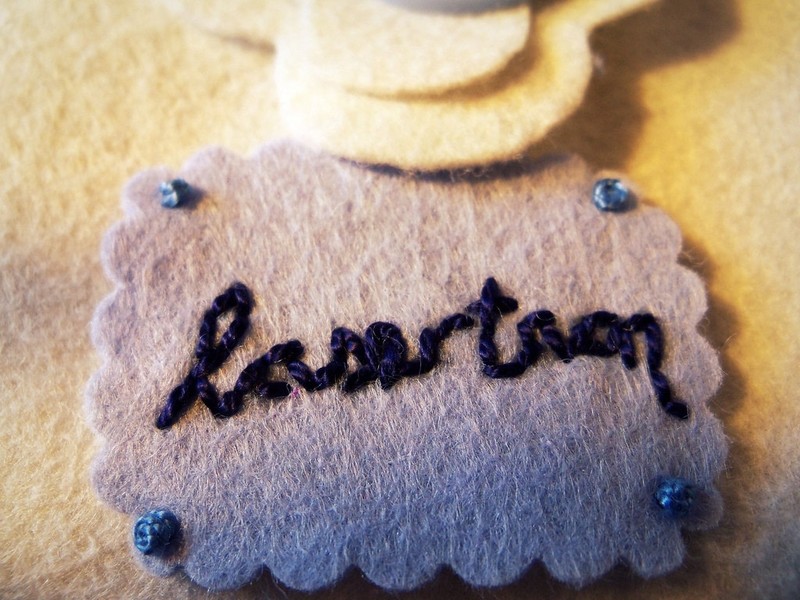
If you want to add a personal touch to your jewelry roll, you can add a little label with your name!
-
 Step 10
If you’re confident in your embroidery skills, you can stitch it out like I did here—but if you’re not as sure, you can always write it in pen, or just use buttons to make it uniquely yours.
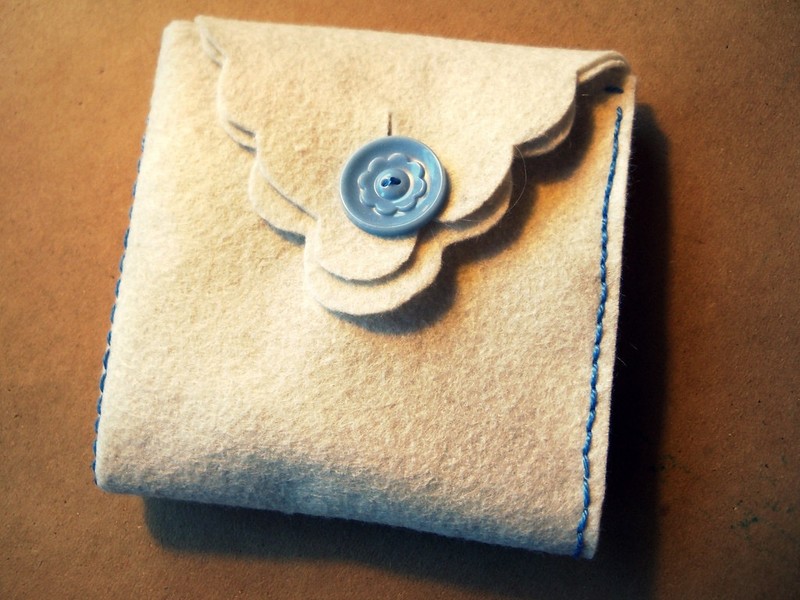
You’re Done! Congratulations!
Once your jewelry is attached to ribbon loops, just fold the side flap over your treasures, fold into an envelope, and secure with the button. Voila! You have an adorable, customized jewelry roll to keep your pretties secure in your purse or in your suitcase when you travel!


Comments

